
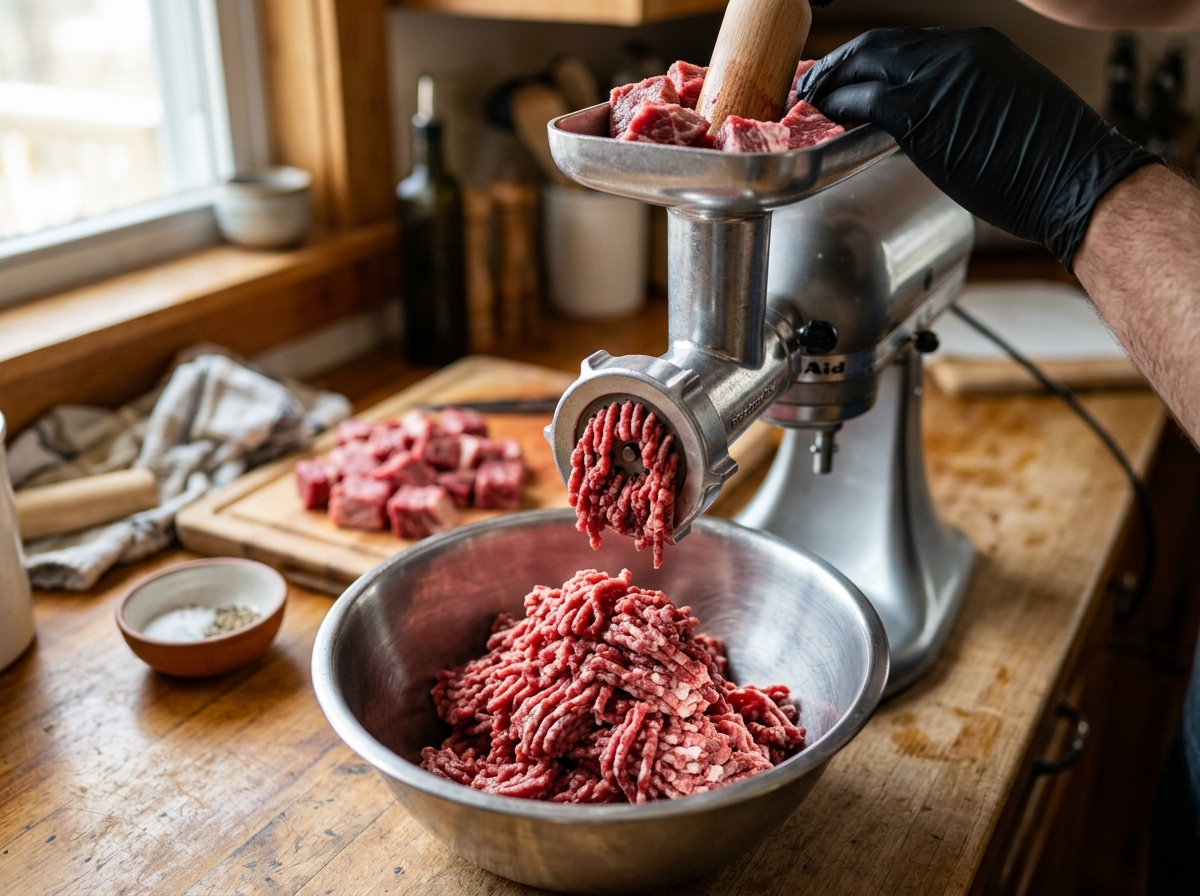
Most grocery store ground beef sits in a case for days. Sometimes longer. It’s a blend of trim from various cuts — often from multiple animals — and you rarely know the actual fat ratio, no matter what the label says. That’s the reality, and most of us just accept it because we don’t think we have another option.
But here’s the thing: grinding your own hamburger meat at home takes about 15 minutes, costs roughly the same per pound (sometimes less if you buy whole cuts on sale), and gives you complete control over flavor, texture, and freshness. Once you’ve bitten into a burger made from meat you ground yourself that same afternoon, store-bought ground beef starts to feel like a compromise you didn’t realize you were making.
Whether you own a dedicated meat grinder or just have a food processor sitting on your counter, you can do this. Let’s walk through exactly how.
Why Grinding Your Own Meat Changes Everything
You might be wondering if this is really worth the effort. After all, pre-ground beef is convenient. It’s right there. Grab a pack, head home, make dinner.
But here’s what you’re giving up with that convenience.
Freshness is the big one. The moment meat gets ground, its surface area increases dramatically. That means more exposure to air, which means faster oxidation and faster bacterial growth. Pre-ground beef from the store was ground hours or even days ago. When you grind at home, you’re cooking with meat that was ground minutes ago. The difference in taste is genuinely noticeable — brighter, cleaner, more “beefy.”
You control the fat ratio. The best fat ratio for burgers is typically around 75/25 or 80/20, depending on your cooking method and personal preference. When you grind your own, you can dial this in precisely by choosing your cuts and adding fat trim as needed. No guesswork, no trusting a label.
Texture is in your hands. Want a coarser grind for a loose, juicy smash burger? Done. Prefer a finer grind for a denser, more structured patty? Also done. You can even do a double grind — coarse first, then fine — for something in between. Try getting that level of customization from a grocery store pack.
Food safety improves too. Store-ground beef often combines trim from many different animals in a single batch. If any piece is contaminated, it spreads through the entire mix. When you grind at home from whole cuts, you’re working with one or two pieces of meat. The exterior of whole cuts (where bacteria live) gets a lot less mixed into the interior compared to commercial grinding operations. That’s part of why freshly ground burgers can be safely enjoyed at medium rare temperatures — something most experts wouldn’t recommend with store-bought ground beef.
Choosing the Right Cuts of Meat
This is where the fun really starts. Picking your cuts is like being a chef building a recipe from scratch, because that’s exactly what you’re doing.
The best meat for burgers isn’t one single cut. It’s often a blend, and creating your own signature blend is one of the biggest rewards of grinding at home.
Chuck is the workhorse of burger blends. It runs around 80/20 (lean to fat) naturally, which is basically the sweet spot for most burgers. It’s flavorful, affordable, and available everywhere. If you’re just starting out and want to keep things simple, a boneless chuck roast is all you need.
Short rib is the luxury addition. It’s rich, deeply beefy, and carries a higher fat content that adds a buttery quality to your burgers. A blend of 60% chuck and 40% boneless short rib is a classic combination that many high-end burger restaurants use.
Brisket brings a unique savory depth. The flat portion is leaner, while the point is fattier. Mix brisket with chuck for a burger that has complexity without being overwhelmingly rich.
Sirloin is your go-to if you want a leaner burger with a clean, straightforward beef flavor. On its own, sirloin can make dry burgers because it’s quite lean. But blended with a fattier cut like chuck or short rib, it adds structure and a slightly different flavor note.
Here’s a simple rule of thumb: pick one “workhorse” cut (chuck) and one “flavor” cut (short rib, brisket, or sirloin), and blend them. Start with a 70/30 or 60/40 split favoring the chuck, then adjust next time based on how you liked it.
A quick note on fat content: You want your final blend to land somewhere between 75/25 and 80/20 for most burger cooking methods. If you’re making smash burgers at home, you can go slightly fattier (closer to 75/25) because the thin patty renders fat quickly and develops a beautiful crust. For thicker patties, 80/20 is usually the right call — you want enough fat for juiciness without the burger falling apart on the grill.
Equipment You’ll Need
You don’t need to drop a ton of money here. There are basically three routes, and each one works.
Dedicated Meat Grinder
This is the gold standard. A standalone meat grinder — whether a manual hand-crank model or an electric one — gives you the most control over texture and handles large batches easily.
Manual grinders clamp onto your counter and cost $30–$50. They work perfectly well, though your arm will get a workout if you’re grinding more than a couple of pounds. Electric grinders range from $60 for basic models to $200+ for heavy-duty machines. If you plan to grind regularly, a mid-range electric grinder is a solid investment.
Most grinders come with at least two grinding plates: a coarse plate (around 3/8-inch holes) and a fine plate (around 3/16-inch holes). The coarse plate is what you’ll use most often for burgers.
Stand Mixer Grinder Attachment
If you already own a KitchenAid or similar stand mixer, the meat grinder attachment is a no-brainer. It costs around $40–$60, takes up almost no storage space, and works surprisingly well. The grinding quality is comparable to a standalone electric grinder for home-use quantities.
Food Processor
No grinder at all? A food processor can get the job done, though the technique is different. You won’t get the same uniform grind, and you need to work in small batches to avoid turning your meat into paste. But for the occasional home-ground burger, it’s a perfectly acceptable option. I’ll cover the specific technique below.
Supplies That Make a Difference
Regardless of which method you use, keep a couple of sheet pans and parchment paper handy. You’ll also want a sharp knife and a large cutting board for cubing the meat. And grab a kitchen scale if you have one — it makes hitting your target fat ratios much easier when you’re blending cuts.
The Critical Step Most People Skip: Keep Everything Cold
This deserves its own section because it’s genuinely the most important part of the entire process, and it’s the step that beginners almost always skip.
Fat needs to stay cold to grind properly. When it warms up, it smears instead of cutting cleanly. Smeared fat coats the lean meat, seals in the protein strands, and creates a dense, sausage-like texture instead of the loose, tender texture you want in a burger. The result is a patty that’s tight, rubbery, and doesn’t release juice when you bite into it.
Here’s exactly what to do. Cut your meat into 1 to 1.5-inch cubes, spread them in a single layer on a parchment-lined sheet pan, and put them in the freezer for 30 to 45 minutes. You want the cubes to be very firm on the outside but not frozen solid. They should give slightly when you press them with your finger.
While the meat chills, put your grinder parts in the freezer too — the blade, the grinding plates, even the feeding tube if it fits. Cold metal against cold meat is the recipe for a clean, well-textured grind.
If your kitchen is warm (especially during summer grilling season), work quickly once everything comes out of the freezer. If you’re grinding a large batch, grind half while the other half stays cold, then swap.
Pro Tip: If you’re using a food processor, the chill step is even more critical. A food processor generates more friction than a grinder, which means faster heat buildup. Keep those cubes as cold as possible without being rock-hard.
How to Grind with a Meat Grinder (Step by Step)
Alright, your meat is cubed and chilled, your grinder is assembled with the cold plates and blade. Let’s go.
Set up your grinder (or attach it to your stand mixer) and place a bowl underneath to catch the ground meat. If you want to be extra careful about temperature, set that bowl inside a larger bowl filled with ice.
Start feeding your cubes into the grinder’s hopper. Use the pusher — that’s the plunger tool that came with your grinder — to push the meat down. Don’t use your fingers, and don’t force the meat through too aggressively. A steady, moderate pace lets the blade do its work without straining the motor (if electric) or creating heat from friction.
For burgers, a single pass through the coarse plate is usually all you need. This gives you a loose, open-textured grind that makes juicy, tender patties. If you prefer a slightly more uniform texture — something closer to what you’d find at a restaurant — run the meat through the coarse plate first, spread it back on the sheet pan, return it to the freezer for 10 minutes, then run it through the fine plate.
As the ground meat collects in your bowl, resist the urge to mash it together or knead it. Just let it fall naturally. Overhandling ground meat activates the proteins (myosin, specifically), which makes your burgers tough and dense. Think of it like biscuit dough — the less you work it, the more tender the result.
Once everything is ground, you’re ready to form patties. Or if you’ve ground a large batch, portion it out, wrap tightly in plastic wrap, and freeze what you won’t use today. Freshly ground meat freezes beautifully and will still taste significantly better than store-bought when you thaw it later.
How to Grind Meat in a Food Processor
No grinder? No problem. The food processor method requires a bit more attention, but it can produce great results.
Start with the same prep: cubed, partially frozen meat. The cubes should be firm enough that they feel like cold butter — stiff but not rock solid.
Place about half a pound of cubes in the food processor at a time. Don’t overload it. A too-full bowl means uneven processing, with some pieces turning to mush while others stay in chunks.
Use the pulse function — short, quick bursts of about 1 second each. After every 4 or 5 pulses, stop and check the texture. Open the lid, look at the meat, and redistribute anything that’s sitting against the sides. You’re looking for pieces roughly the size of small pebbles. Not a smooth paste. Not big chunks. Somewhere in between.
The whole process for each batch should take about 8 to 12 pulses. The moment it looks right, stop. It’s very easy to over-process, and there’s no going back from a meat paste.
Transfer each batch to a cold bowl and repeat until all your meat is ground. Then gently toss the batches together with your hands — not kneading, just lightly combining — and you’re done.
Quick warning: the food processor method creates slightly more texture variation than a grinder. Some pieces will be a bit bigger, some a bit smaller. For a traditional grilled burger, that’s totally fine. For smash burgers, a grinder’s uniform output works better because you want an even, flat patty.
Forming Your Patties the Right Way
You’ve got a pile of beautifully ground meat sitting in a cold bowl. Here’s how to turn it into patties without ruining all the work you just did.
First, decide on your size. For a standard grilled burger, about 6 ounces of meat makes a patty that cooks well and fits a regular bun. For smash burgers, go with 2 to 3 ounce balls. Knowing how thick your burgers should be matters here — thicker patties work better for grilling, while thin patties are the heart and soul of smash-style cooking on a flat top.
Scoop your portion and gently — very gently — shape it into a ball, then press it into a patty. You want just enough pressure to hold it together. If the patty cracks a little at the edges, that’s actually fine. It means you haven’t overworked the meat.
For thicker patties (3/4 inch and up), press a shallow dimple into the center with your thumb. Burgers swell in the middle as they cook, and the dimple counteracts that, giving you a flat, even patty instead of a meatball shape.
Season the outside of each patty generously with salt and pepper right before cooking. Some people mix seasoning into the meat before grinding, but salt mixed into raw ground meat draws out moisture and tightens the proteins. Keeping the seasoning on the surface means maximum flavor with minimum toughness.
Cooking Your Fresh-Ground Burgers
Now for the payoff. You’ve picked your cuts, ground your meat, and formed your patties. Here’s where everything comes together.
Fresh-ground burgers cook a lot like any other burger, but there are a couple of things to keep in mind.
Because you ground the meat yourself from whole cuts, it’s significantly fresher and safer than pre-ground. Many home grinders feel comfortable cooking their burgers to medium or even medium-rare. The burger doneness chart is your friend here — a good thermometer takes all the guesswork out. For medium-rare, pull at 130–135°F internal. Medium is 140–145°F. The USDA recommends 160°F for all ground beef, so use your own judgment based on how fresh your meat is and how comfortable you feel.
If you’re grilling, get your grates hot and clean before the patties go on. Knowing the best temp for burgers on the grill — generally 400 to 450°F — helps you get a good sear without drying out the center. Place the patties, close the lid, and don’t touch them for about 3 to 4 minutes. You want that crust to form before you flip. And speaking of flipping — only flip once. Every time you flip, you lose juice.
On a flat top or cast iron skillet, smash burgers are the move. Press that 2-ounce ball hard onto the screaming-hot surface with a sturdy spatula, let it cook for about 2 minutes until the edges are deeply browned, then scrape it up, flip, add cheese, and give it another 30 to 60 seconds.
One more thing: home-ground burgers tend to be juicier than store-bought, which means understanding why burgers dry out and how to keep burgers juicy still matters. Don’t press the patties with your spatula while they cook (unless you’re making smash burgers). Let them rest for a minute or two after cooking. These small habits protect all the juiciness you worked to build.
Popular Blend Recipes to Try
Part of the joy of grinding at home is experimenting. Here are a few blends worth trying once you’ve got the basics down.
The Classic Steakhouse Blend: 50% chuck, 30% short rib, 20% brisket. Rich, beefy, with a melt-in-your-mouth quality. This is the blend you’ll find at many high-end burger joints.
The Everyday Backyard Blend: 100% chuck roast. Simple, affordable, reliably good. If you’re new to grinding, start here. It’s hard to mess up, and it produces a burger that’ll still blow away anything from a grocery store tube.
The Lean-ish Blend: 60% sirloin, 40% chuck. For people who want a beefy burger without feeling weighed down. Works especially well as a thinner patty on a flat top where the fat renders fast.
The “Everything” Blend: 40% chuck, 25% short rib, 20% brisket, 15% sirloin. Complex flavor, balanced fat content, and the kind of burger that makes people ask what your secret is. If you’re curious about what types of ground meat can make burgers, experimenting with different proteins beyond beef — like pork, lamb, or even venison — can open up entirely new flavor possibilities.
Cleaning Up and Storing Your Meat
Nobody’s favorite part, but it’s worth doing right.
Disassemble your grinder immediately after use. Meat left in the grinding plate or around the blade dries out fast and becomes very difficult to remove later. Run a piece of bread through the grinder after your last batch of meat — it pushes out any remaining bits stuck in the mechanism.
Wash all parts in warm, soapy water. If your grinder parts are stainless steel, they can usually go in the dishwasher. If they’re carbon steel or cast iron, hand-wash and dry them immediately to prevent rust. A light coating of food-safe mineral oil on the blade and plates helps keep them in good shape between uses.
For storing ground meat, wrap individual portions tightly in plastic wrap, press out all the air, and place them in a freezer bag. They’ll keep in the freezer for 3 to 4 months without losing much quality. In the fridge, use fresh-ground meat within 1 to 2 days — it’s no different from store-bought in that regard.
FAQ
Is grinding your own burger meat actually cheaper?
It depends on the cuts you choose and whether you buy them on sale. Chuck roast, for example, often costs the same per pound (or less) as the pre-ground “80/20” in the meat case — and you get a far better product. Premium blends with short rib or brisket will cost more per pound than budget ground beef, but you’re also getting a dramatically better burger. Think of it less as a cost-saving move and more as a quality upgrade at roughly the same price point.
Can I grind meat ahead of time and freeze it?
Absolutely. Wrap portions tightly, label them with the date and blend type, and freeze. Thaw in the fridge overnight when you’re ready to use them. Frozen home-ground meat still tastes noticeably better than store-bought fresh ground beef. That said, grinding and cooking on the same day gives you the peak experience.
Do I need to add anything to the meat besides salt and pepper?
Not for the grinding stage. Keep the grind pure — just meat. Seasonings go on the outside of the patty right before cooking. If you want to get creative with flavor profiles, check out some ideas for making your hamburgers more interesting. But the actual grind? Keep it clean and simple.
What if my ground meat looks smeared or pasty?
That means the fat got too warm during grinding. The meat isn’t ruined — it’ll still be safe to eat and it’ll taste fine — but the texture of the cooked burger won’t be as good. Next time, freeze the cubes a little longer and make sure your grinder parts are cold. Working in smaller batches also helps.
Can I mix different animal proteins together?
You can. A blend of beef and pork (70/30) makes a rich, almost sausage-like burger that’s surprisingly good. Beef and lamb (80/20) gives you a more complex, slightly earthy flavor. Just make sure to cook blended-protein burgers to the recommended internal temperature for the most temperature-sensitive protein in the mix.
Once you grind your own hamburger meat, you start seeing burgers differently. It stops being a weeknight shortcut and starts feeling like something you crafted. You picked the cuts. You chose the ratio. You controlled the texture. And when you bite into that first patty — juicy, deeply flavorful, with a texture that’s loose and tender instead of dense and rubbery — you’ll understand why so many home cooks never go back. Grab a chuck roast this weekend and give it a try. Your next burger is about to be the best one you’ve ever made.