
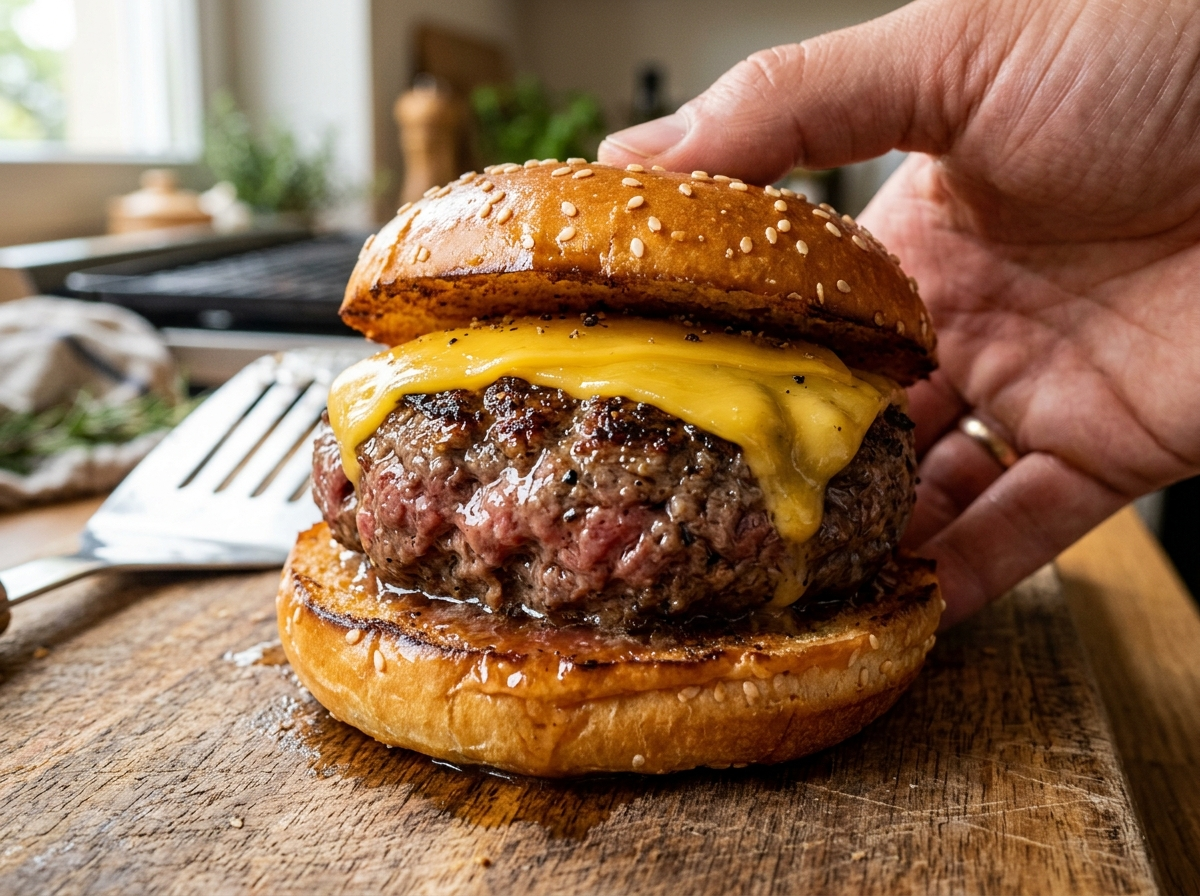
You’ve done everything right — seasoned the meat, heated the grill, timed the flip. But when you bite into that burger, it’s dry, crumbly, and tastes like a hockey puck wrapped in a bun. Sound familiar? You’re not alone. Dry burgers are probably the single most common backyard cooking frustration, and the worst part is that most people don’t realize they’re causing the problem themselves.
The good news? Keeping burgers juicy isn’t complicated. It doesn’t require fancy equipment or some secret ingredient you can only buy online. It’s really about understanding a few basic principles — the right meat, the right fat, the right temperature, and knowing what NOT to do while cooking.
Let’s break it all down.
Why Do Burgers Dry Out in the First Place?
Before you can fix the problem, you need to understand what’s actually happening inside that patty.
A burger is basically ground meat held together by fat and proteins. When you apply heat, two things happen at the same time. The proteins tighten up and squeeze moisture out, while the fat starts to render (melt) and either stays in the patty or drips away. If the proteins tighten too much — because you’ve overcooked it or pressed it flat on the grill — most of that moisture and fat escapes. What you’re left with is a dense, dry disc.
Think of it like wringing out a sponge. The harder you squeeze (or the longer you cook), the less water stays inside. Your burger works the same way. Every bit of excessive handling, pressing, or overcooking literally pushes juiciness out of the meat.
If you want to understand this process in more detail, there’s a solid breakdown over at why burgers dry out that covers the science behind moisture loss.
Start With the Right Meat and Fat Ratio
This is where juicy burgers are won or lost — before you even turn on the grill.
Lean meat is your enemy here. A lot of people grab 90/10 or even 93/7 ground beef because they think it’s “healthier.” And sure, it’s lower in fat. But that fat is exactly what makes a burger taste good and stay moist. When you cook a very lean patty, there’s almost nothing inside to keep things juicy once the heat starts doing its work.
The sweet spot for most burger lovers is 80/20 ground beef — that’s 80% lean meat and 20% fat. This ratio gives you enough fat to keep the burger moist through cooking without making it greasy or falling apart on the grill. Some pitmasters even go 75/25 for an extra-juicy result, especially for thicker patties that spend more time over heat.
Ground chuck is your best friend for burgers. It comes from the shoulder area of the cow, and it naturally sits right around that 80/20 ratio. It also has a beefy, rich flavor that ground sirloin (too lean) or ground round (decent but drier) can’t match.
Want to go a step further? Grinding your own hamburger meat gives you total control over the fat ratio and meat freshness. It’s easier than you think, and the difference in taste and juiciness is noticeable from the very first bite.
For a deeper look at which cuts work best, check out this guide on the best meat for burgers and this one specifically about finding the best fat ratio for burgers.
Don’t Overwork the Meat
Here’s a mistake that almost everyone makes, especially people who are trying hard to make a “perfect” patty.
You take the ground beef out of the package, dump it in a bowl, add your seasonings, and then knead it all together like bread dough. You squeeze, press, fold, and shape until the patty is perfectly smooth and uniform. It looks great. And it’s going to cook up dry and tough.
Why? Because all that kneading and squeezing develops the proteins in the meat — specifically myosin. Myosin acts like a glue. In sausage-making, that’s exactly what you want. In a burger? It creates a dense, tight texture that squeezes out moisture during cooking. The result is a patty that feels more like a meatloaf puck than a juicy burger.
The fix is simple: handle the meat as little as possible. Take your ground beef, gently portion it, and loosely shape it into a patty. Don’t press hard. Don’t smooth out every crack and edge. A slightly rough, imperfect-looking patty will cook up far juicier than a perfectly molded one.
If you’re mixing in seasonings, do it lightly with your fingertips — don’t grab and squeeze the meat over and over. Better yet, season the outside of the patty after you’ve shaped it rather than mixing everything into the meat. This keeps your handling to the absolute minimum.
Pro Tip: Wet your hands slightly before shaping patties. The meat won’t stick to your palms, which means less handling and less temptation to keep pressing and smoothing.
Get Your Patty Thickness Right
Thickness matters more than most people realize, and it directly affects juiciness.
A patty that’s too thin will overcook in seconds. You basically have no margin for error — by the time you get a nice sear on the outside, the inside is already well-done and dry. On the flip side, a patty that’s absurdly thick can end up charred on the outside while the center is still cold and raw, which means you’ll keep cooking it longer and dry out the outer layers trying to get the middle done.
For standard grilled burgers, aim for ¾ inch to 1 inch thick. This gives you enough mass to develop a good crust while keeping the interior juicy and cooked to your preferred doneness.
There’s one more trick that experienced grill cooks know: make a small dimple in the center of each patty with your thumb before cooking. Burgers tend to puff up in the middle as they cook (the edges contract and push the center upward). That dome shape means uneven cooking — the edges get overdone while the center stays underdone. A gentle thumbprint indentation — about ¼ inch deep — counteracts this and helps the patty cook flat and even.
If you want specific guidance on sizing, how thick burgers should be covers the ideal dimensions for different cooking methods.
Temperature Control Is Non-Negotiable
You can pick the perfect meat, shape the patty gently, and still end up with a dry burger if your cooking temperature is off.
Too hot and the outside burns before the inside is done, forcing you to move the burger to a cooler zone and extend cooking time — which dries it out. Too low and the burger just slowly steams and leaks fat the entire time without ever getting a proper sear, which also leads to a dry, gray, sad patty.
For grilling, you want your grates preheated to medium-high heat — around 375°F to 450°F at the grate level. This is hot enough to get a good Maillard reaction (that’s the browning and crust formation that creates amazing flavor) while still giving you time to cook the interior to the right doneness without burning.
If you’re using a flat top or cast iron skillet, the same temperature range applies. And honestly, flat tops have some real advantages for juicy burgers because the burger cooks in its own rendered fat rather than losing that fat through grill grates.
And please — use a meat thermometer. This is the single biggest upgrade you can make. Guessing doneness by pressing the patty with your finger or cutting it open is unreliable and actually costs you juice. Every time you cut into a burger to “check,” you’re creating an exit for all that moisture.
Here are the USDA-recommended and commonly used internal temperature targets:
- Medium-rare: 130–135°F (note: the USDA recommends 160°F for ground beef safety)
- Medium: 140–145°F
- Medium-well: 150–155°F
- Well-done: 160°F+
An instant-read thermometer takes three seconds and removes all the guesswork. If you don’t own one yet, grab one. There’s a helpful breakdown of the best thermometers for burgers that’ll point you in the right direction.
For a full rundown of target temps and what each doneness level looks and tastes like, the burger internal temperature guide covers it all.
Stop Pressing Your Burgers on the Grill
This one deserves its own section because it might be the most common juiciness-killer out there.
You know the move. The burger is sizzling on the grill, and someone grabs the spatula and presses down on the patty. There’s a dramatic sizzle, flames shoot up, and it looks like you’re really “cooking.” What you’re actually doing is squeezing every drop of juice and rendered fat out of the meat and directly into the fire.
That satisfying sizzle? That’s the sound of your burger’s juiciness evaporating.
Don’t press. Don’t squish. Don’t flatten — unless you’re intentionally making smash burgers, which is a completely different technique with its own rules (and if you’re curious, here’s how to make smash burgers at home).
For traditional patties, put them on the grill, leave them alone, flip once, and take them off when they hit temperature. That’s it. The less you mess with the burger while it’s cooking, the juicier it stays.
Flip Once, and Know When to Do It
There’s an old-school rule that says you should only flip a burger once. That advice is mostly solid, though the reasoning people give isn’t always accurate.
The real issue isn’t how many times you flip — it’s how much you’re disturbing the patty. Every time you pick it up and move it around, there’s a chance you’re squeezing it, breaking the crust, or letting heat escape. One flip keeps things simple and minimizes handling.
How do you know when to flip? Look at the side of the patty. You’ll see the color changing from the bottom up as the meat cooks. When the color change has crept about halfway up the side of the burger, it’s time to flip. On a properly preheated grill, this usually takes about 4 to 5 minutes for a ¾-inch patty.
After flipping, resist the urge to move it around. Let it sit, cook for another 3 to 5 minutes (depending on thickness and desired doneness), check the internal temperature, and pull it off.
Let Your Burgers Rest Before Serving
This step takes about 3 to 5 minutes and makes a massive difference, yet almost nobody does it.
When a burger comes off the grill, the interior is extremely hot and all the juices inside are moving around rapidly under pressure. If you bite into it immediately — or worse, cut it in half to see the color — those juices flood out onto the plate instead of staying in the meat.
Resting lets the temperature inside the patty equalize and allows those juices to redistribute and reabsorb into the meat fibers. It’s the same principle behind resting a steak, and it works just as well with burgers.
Just set the cooked patties on a clean plate or cutting board, loosely tent them with foil if you want, and give them 3 to 5 minutes. You won’t lose any heat you’d actually notice — the burger will still be plenty hot when you serve it. But the juiciness difference between a rested burger and one served straight off the grill is dramatic.
Did You Know? During resting, a burger’s internal temperature can rise another 3 to 5 degrees from carryover cooking. That means you should actually pull your burgers off the heat a few degrees before your target temperature. If you want medium at 145°F, pull at 140°F and let the rest do the work.
The Smash Burger Exception
You might be thinking — wait, smash burgers get pressed flat, and they’re incredibly juicy. What gives?
Smash burgers are a different animal entirely. The technique involves taking a ball of ground beef and pressing it very hard onto a screaming-hot flat surface within the first 30 seconds of cooking. At that point, the fat hasn’t rendered yet, so you’re not squeezing out juice — you’re maximizing surface contact with the cooking surface to create an incredible crust.
The key differences: smash burgers are thin (very thin), they cook in under 2 minutes per side, and they rely on that intense crust for flavor rather than a juicy thick interior. It’s a completely different approach to burger-making, and the “don’t press” rule genuinely doesn’t apply here.
If you want to try this method, the guide on smash burgers vs regular burgers explains the differences and helps you figure out which style you’ll prefer.
Seasoning Smart Without Drying Things Out
Salt is essential for flavor, but it can work against you if you use it wrong.
If you mix salt into the ground meat before shaping your patties and then let them sit for a while, the salt starts extracting moisture from the meat and dissolving proteins. This is literally the process used to make sausage — it creates a springy, dense texture. Great for bratwurst. Terrible for burgers.
Season the outside of your patties with salt and pepper right before they hit the grill. Not 30 minutes before. Not while you’re mixing the meat. Right before cooking. This gives you great seasoning on the crust without affecting the interior texture.
If you want to add other flavors — garlic powder, onion powder, paprika, whatever you like — the same rule applies. Sprinkle them on the surface rather than kneading them into the meat. You’ll get plenty of flavor without compromising juiciness.
For specific seasoning ideas and combinations, how to season burgers properly has some excellent options that work for any cooking method.
Add-Ins That Boost Juiciness
Sometimes you want a little extra insurance, especially if you’re working with leaner meat or cooking for people who prefer well-done burgers (which are inherently harder to keep moist).
A few things you can mix into the meat — gently, without overworking — that genuinely help retain moisture:
Grated butter. Freeze a stick of butter, then grate it on a cheese grater and gently fold the shreds into your ground beef before shaping patties. As the burger cooks, those little pockets of butter melt and essentially baste the burger from the inside. This is one of the most effective tricks for keeping well-done burgers from drying out.
Ice chips. Yes, seriously. Some competitive barbecue cooks press a small ice chip into the center of each patty before grilling. As the burger cooks, the ice melts and creates steam inside the patty, keeping things moist. Does it sound weird? Absolutely. Does it work? It really does.
Grated onion. Not diced — grated. A tablespoon or two of finely grated onion mixed into a pound of ground beef adds moisture and a subtle sweetness without changing the burger’s texture. The onion essentially dissolves during cooking and helps keep the interior juicy.
Wagyu tallow. If you’ve never tried cooking burgers with wagyu tallow, you’re missing out. Brushing or melting a little on the flat top or skillet before cooking adds an incredibly rich, beefy flavor and extra fat to keep things moist.
These add-ins aren’t mandatory. If you start with 80/20 meat, handle it gently, and cook it to the right temperature, you probably don’t need any of them. But they’re excellent tools to have in your back pocket for tricky situations.
Charcoal vs. Gas — Does It Affect Juiciness?
People argue about this endlessly, and the truth is that both can produce perfectly juicy burgers if you control the heat properly.
Charcoal burns hotter and can give you a more intense sear, which is great for locking in that flavorful crust quickly. The trade-off is that temperature control requires more skill — you need to manage your coals, create heat zones, and pay close attention to flare-ups.
Gas grills offer easier, more consistent temperature control. You turn a knob and you know roughly what heat you’re getting. That predictability makes it easier for beginners to avoid overcooking.
The biggest juiciness factor isn’t the fuel source — it’s heat management and cooking time. Whether you use charcoal, gas, or a cast iron skillet on your stovetop, the principles are the same: get a good sear, don’t overcook, and don’t press.
If you’re weighing your options, charcoal vs gas for burgers digs into the practical differences beyond just juiciness.
Quick Checklist for Juicy Burgers
If you take nothing else from this article, remember these core principles:
- Use 80/20 ground chuck
- Handle the meat gently — shape loosely, don’t knead
- Season the outside of the patty, right before cooking
- Preheat your grill or skillet to medium-high
- Make a thumbprint dimple in the center
- Flip once
- Never press the patty while cooking (unless making smash burgers)
- Use an instant-read thermometer
- Pull burgers off the heat 3–5 degrees below target
- Let them rest for 3 to 5 minutes before serving
That’s it. No complicated techniques, no expensive gadgets. Just solid fundamentals.
FAQ
Can I make a juicy burger with lean ground beef like 90/10?
You can, but you’ll need to work harder at it. Lean meat has much less fat to keep things moist, so you’ll want to add something like grated frozen butter, a splash of Worcestershire sauce, or grated onion to the meat for extra moisture. You’ll also need to be very careful not to overcook — with lean beef, the margin between “done” and “dry” is razor thin. An instant-read thermometer becomes even more essential.
How long should I let burgers rest after cooking?
Three to five minutes is plenty for a standard burger patty. You don’t need to rest burgers as long as you’d rest a thick steak. Just set them aside on a plate, maybe add your cheese on top so it melts during the rest, and give the juices a few minutes to settle back into the meat.
Is it safe to eat a burger that’s pink in the middle?
The USDA recommends cooking ground beef to an internal temperature of 160°F, which is well-done with no pink. This recommendation exists because grinding meat can introduce bacteria throughout the patty, unlike a whole steak where bacteria stay on the surface. Many restaurants and home cooks serve burgers at lower temperatures (medium, medium-rare), but you should understand the food safety risk involved. Using fresh, high-quality meat — especially if you grind it yourself — reduces that risk, though it doesn’t eliminate it entirely.
Does the type of bun affect burger juiciness?
Indirectly, yes. A dry, thin bun can actually absorb juices from the patty and make the whole experience feel drier. Lightly toasting your buns creates a barrier that prevents them from getting soggy while also keeping the burger’s juices where they belong — in the meat. Brioche buns and potato buns tend to hold up well against a juicy burger without falling apart.
Do egg or breadcrumbs help keep burgers juicy?
Adding egg and breadcrumbs turns your burger into more of a meatloaf patty. The breadcrumbs can absorb and retain some moisture, so technically it can help. But it also changes the texture significantly — you lose that pure, beefy, loose-ground-meat quality that makes a great burger a great burger. If juiciness is your goal, you’re better off fixing your fat ratio and cooking technique rather than adding binders.
Your Next Burger Should Be Your Best One
Keeping a burger juicy really comes down to respecting the meat. Pick the right blend, touch it as little as possible, cook it to the right temperature, and leave it alone while it cooks. That’s the whole secret. No gimmicks, no fancy hacks — just paying attention to a few details that make an enormous difference.
Next time you fire up the grill, try just one of these changes and see what happens. Start with the easiest one — stop pressing your burgers — and you’ll notice the difference immediately. Once you taste what a properly cooked, properly rested burger can be, you’ll never go back to the old way.
Now go make some burgers.