
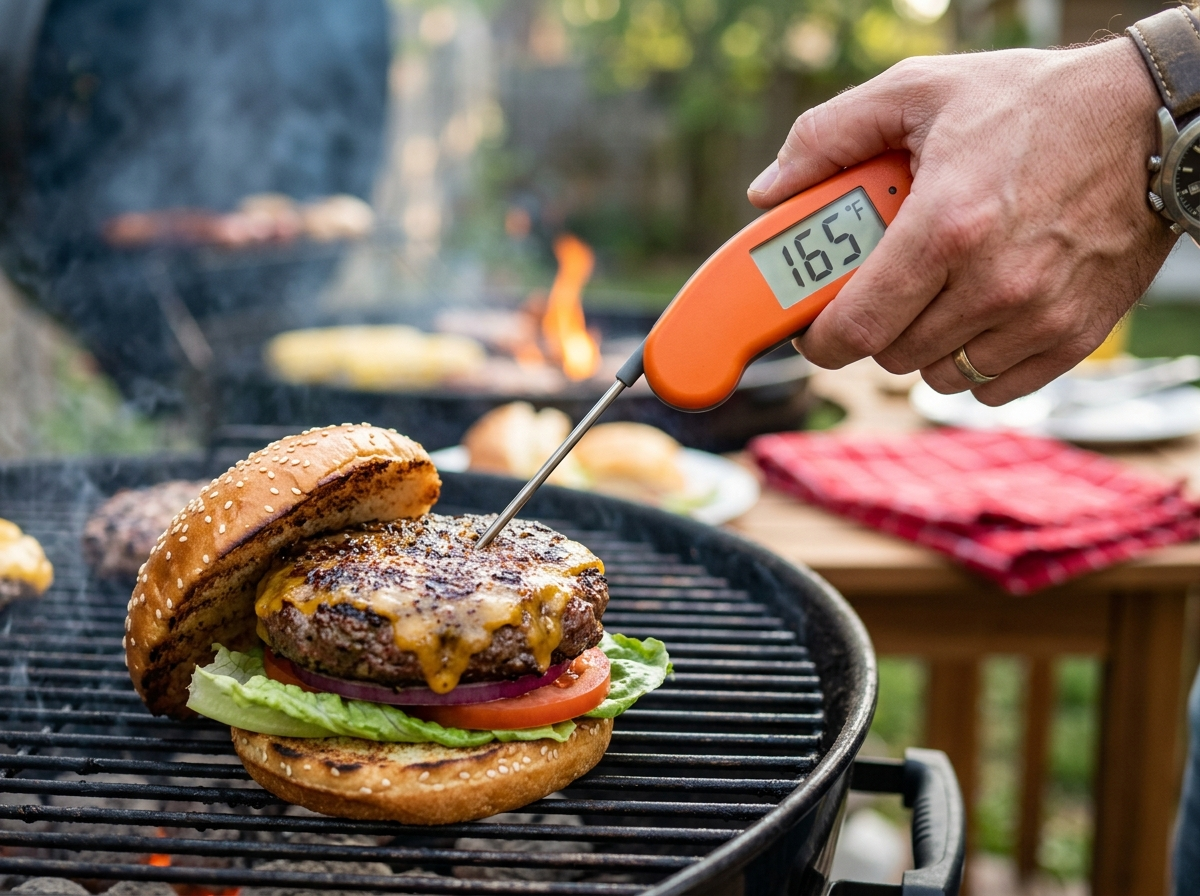
A burger that’s pink in the middle might be perfect or it might send you to the ER. The difference between those two outcomes? About $12 worth of thermometer. The USDA reports that ground beef is responsible for roughly 10 million foodborne illness cases every year in the United States, and most of those could be prevented with one simple tool — a meat thermometer. Yet a surprising number of home cooks still rely on the “poke it and see if the juices run clear” method, which is about as scientific as reading tea leaves.
If you’ve ever sliced into a burger only to find it raw in the center, or you’ve overcooked a beautiful patty into a dry hockey puck because you were scared of undercooking it, you already know the frustration. The best thermometers for burgers take all the guesswork out. They give you a number, and that number tells you exactly where your burger stands.
But here’s the thing — not every thermometer works well for burgers. Burgers are thin. They cook fast. And the margin between a juicy medium and an overdone disaster is maybe 10°F. You need something quick, accurate, and easy to use while you’re standing over a hot grill with smoke in your eyes.
That’s exactly what we’re going to sort out right now.
Why Burgers Specifically Need the Right Thermometer
You might be thinking, “A thermometer is a thermometer, right?” Not exactly. Cooking a whole turkey or a pork roast gives you a large, thick piece of meat where even a slow thermometer has time to catch up. Burgers are different.
A typical burger patty is somewhere between half an inch and three-quarters of an inch thick. That means the probe needs to reach the geometric center of a very thin target — and it needs to read accurately at that shallow depth. If your thermometer probe is thick or if the sensor sits too far from the tip, you might actually be reading the temperature of the air pocket below the patty or the grill grate itself.
Speed matters too. When you’re cooking smash burgers at home, those patties can go from perfectly done to overcooked in under 30 seconds. A thermometer that takes 15 seconds to stabilize is basically useless in that scenario. You need a reading in 2–3 seconds, tops.
And then there’s the accuracy question. The difference between a medium burger (160°F, which is what the USDA recommends for ground beef) and a medium-rare burger is roughly 10–15 degrees. A thermometer that’s off by even 5 degrees can put you in the wrong doneness zone entirely. If you’re curious about what those exact numbers should be, our burger internal temperature guide breaks it all down.
Types of Thermometers That Work for Burgers
There are several categories of meat thermometers on the market, but not all of them are equally suited for burger cooking. Let’s walk through the main types and talk honestly about what works and what doesn’t.
Instant-Read Digital Thermometers
This is the gold standard for burgers. An instant-read thermometer uses a thermocouple or thermistor sensor to give you a temperature reading in 1–3 seconds. You insert the probe into the center of the patty, wait a beat, read the number, and pull it out.
The best instant-read models have thin probes (which is critical for thin patties), backlit displays (because you’re often grilling in the evening), and accuracy within ±1°F. Brands like ThermoWorks, ThermoPro, and MEATER have dominated this space for good reason — they’re fast, reliable, and built to handle the heat and grease of a grill environment.
Pro Tip: When using an instant-read on a burger, insert the probe from the side of the patty, not from the top. Going in from the side lets you position the sensor tip right in the thickest part of the center, which gives you the most accurate reading.
Leave-In Probe Thermometers
These are the thermometers with a probe connected to a wire that runs to a base unit or transmitter. You insert the probe before cooking and monitor the temperature as it rises. They’re fantastic for roasts, briskets, and whole chickens.
For burgers? They’re overkill and actually kind of impractical. The probe is usually too thick for a half-inch patty, and you don’t really need continuous monitoring for something that cooks in 4–6 minutes total. If you already own one, it’ll work in a pinch on thicker patties, but it’s not the ideal tool here.
Infrared (Non-Contact) Thermometers
These measure surface temperature using infrared technology. You point them at your food, pull the trigger, and get a reading. They’re great for checking if your flat top or grill surface is at the right cooking temperature.
But they can’t measure internal temperature. At all. An infrared gun will tell you the surface of your burger is 400°F while the inside is still raw. So while they’re a useful companion tool for checking your cooking surface, they’re not a burger doneness solution.
Dial (Analog) Thermometers
The old-school round-dial thermometers that come bundled with some grill sets. They’re slow (sometimes 20+ seconds to stabilize), the probes are typically thick, and their accuracy can drift over time. For burgers, they’re the worst option in this lineup. If this is all you have, it’s better than nothing — but upgrading to even a basic digital instant-read will change your burger game overnight.
What to Look for in a Burger Thermometer
Not all instant-read thermometers are created equal. Some are genuinely excellent, some are fine, and some are cheap junk that’ll fail after three uses. Here’s what actually matters when you’re picking one out.
Speed and Accuracy
These two go together. You want a thermometer that reads within ±1°F and gives you that reading in under 3 seconds. Anything slower and you’re losing heat every second you hold that grill lid open — and if you’re cooking thin patties, that delay can actually change the cooking outcome.
Thermocouple-based sensors are generally faster than thermistors, but modern thermistors have closed the gap significantly. Both technologies can hit the 2-second mark in quality models.
Probe Design
For burgers, the probe tip matters more than you’d think. Look for a probe that’s thin (around 1.5mm diameter) with the sensor positioned very close to the tip. Some cheaper thermometers have the sensor positioned 5–8mm from the tip, which means you need to insert the probe deeper to get an accurate reading — not ideal for a thin patty.
The length of the probe should be at least 4–5 inches. Any shorter and your hand is uncomfortably close to the heat source. Some compact models have shorter probes that work fine for kitchen use but become impractical on a 500°F grill.
Build Quality and Water Resistance
Your thermometer is going to encounter grease, rain (if you’re a dedicated outdoor griller), and the occasional drop onto a concrete patio. A good burger thermometer should be at least splash-proof (IPX5 or higher) and built to survive a fall from counter height.
The display should be easy to read in bright sunlight if you’re grilling outdoors. Auto-rotating displays are a nice perk — you can read the temperature no matter what angle you’re holding the probe at.
Battery Life and Storage
This sounds boring until your thermometer dies mid-cookout. Models with AAA or coin cell batteries that last 2,000+ hours are standard in the better brands. Some now come with rechargeable batteries via USB-C, which is convenient if you remember to charge them.
A magnetic back or a clip for your apron might seem like a small feature, but when you’re juggling tongs, a spatula, and a cold drink, knowing exactly where your thermometer is matters.
Best Thermometers for Burgers: The Ones Worth Buying
Let’s get into specific recommendations. I’m organizing these by use case and budget because a backyard dad making burgers on weekends has different needs than someone running a food truck business.
Best Overall: ThermoWorks Thermapen ONE
The Thermapen ONE is the thermometer that professional chefs and pitmasters reach for, and for good reason. It reads in about 1 second, is accurate to ±0.5°F, and has a thin probe that’s perfect for burger patties. The auto-rotating backlit display makes it readable from any angle, day or night.
At around $105 (as of early 2025), it’s not cheap. But this is a “buy it once” kind of tool. The build quality is excellent, it’s waterproof (IP67 rated), and ThermoWorks stands behind their products. If you’re serious about getting your burgers — and everything else you cook — dialed in, this is the one to get.
It’s worth mentioning that the Thermapen is what’s used in professional kitchens, USDA testing labs, and by competitive barbecue teams. You’re buying proven performance.
Best Value: ThermoWorks ThermoPop 2
If $105 makes you wince, the ThermoPop 2 is ThermoWorks’ budget option at around $35. It reads in 3–4 seconds (a bit slower than the Thermapen) and is accurate to ±2°F. For burger cooking, that’s plenty fast and plenty accurate.
The rotating display, splash resistance, and overall build quality punch well above the price point. It doesn’t fold like the Thermapen, so the probe is always exposed — just something to be aware of for storage. But in terms of value per dollar, this is hard to beat.
Best Budget Pick: ThermoPro TP03
For around $13–15, the ThermoPro TP03 is the thermometer to grab if you’re on a tight budget or you just want something functional in your kitchen drawer. It reads in about 3–5 seconds, is accurate to ±1°F, and the foldable probe design protects the sensor when not in use.
Is it as refined as the ThermoWorks options? No. The display isn’t backlit, and it’s not waterproof. But at this price point, it does its core job — telling you the internal temperature of your burger — perfectly well. If you’re currently guessing at doneness or cutting burgers open to check, even this $15 upgrade will change your results dramatically.
Best Wireless: MEATER 2 Plus
If you want to monitor your burgers from your phone (say, while you’re inside making game day chili cheese fries to go with them), the MEATER 2 Plus is worth a look. It’s a completely wireless leave-in probe that connects to your phone via Bluetooth, with a range of up to 600 feet with the included charging block as a repeater.
At around $70, it’s a significant investment for burger cooking specifically. The probe is thinner than most leave-in thermometers, but it’s still not as slim as a dedicated instant-read probe. It works better for thicker burger patties — think half-pound pub-style burgers rather than thin smash patties.
Where the MEATER really shines is versatility. If you also smoke briskets, roast chickens, or cook steaks, it earns its keep across multiple applications. For burgers alone, an instant-read gives you more practical value.
Best for the Grill Setup: ThermoWorks Signals + Billows (Advanced)
This is the enthusiast setup. The Signals is a 4-channel WiFi and Bluetooth thermometer that can monitor up to four probes simultaneously. Pair it with the Billows fan controller and you can even regulate your charcoal grill temperature automatically.
For pure burger cooking, this is way more than you need. But if you’re the person who grills burgers while also smoking ribs, has a brisket going, and wants to track your grill temperature for optimal burger results, the Signals system lets you do all of that from one dashboard.
It’ll run you about $230 for the Signals alone, more with the Billows. This is a tool for dedicated outdoor cooking enthusiasts, not a casual weeknight burger flipper.
How to Actually Use a Thermometer on a Burger
Owning a good thermometer is only half the equation. Using it correctly is where a lot of people stumble.
Getting an Accurate Read on a Thin Patty
The number one mistake people make is inserting the probe from the top of the burger and pushing it all the way through. When you do this on a half-inch patty, the probe sensor passes through the center so quickly that it often reads the grill grate temperature below — giving you a wildly inaccurate number.
Instead, insert from the side. Hold the burger with your tongs (gently — you don’t want to squeeze the juices out) and slide the probe horizontally into the thickest part of the patty. Push it in until you estimate the tip is at the center. Hold it there for the thermometer’s specified read time, and that’s your temperature.
For thicker burgers (three-quarters of an inch or more), you can go from the top, but still aim for the geometric center. The coldest point of the patty is what you’re looking for, because if the center is safe, everything else is too.
When to Check
Don’t check your burgers every 30 seconds. That’s a great way to let all the heat escape from your grill and to poke so many holes in the patty that the juices drain out.
Instead, use visual cues first. Wait until you see moisture beading on the top surface of the burger — that’s a sign that heat from below is pushing juices upward, which usually means the bottom half is cooked. Flip the burger, wait another minute or two, and then take your first temperature check. You’re looking for 160°F for the USDA-recommended safe temperature for ground beef, or your preferred doneness level based on our burger doneness chart.
Quick Fact: Ground beef is held to a higher safe temperature standard (160°F) than whole cuts like steaks (145°F) because the grinding process can distribute bacteria throughout the meat, not just on the surface. This is also why the best meat for burgers and how it’s handled matters so much.
Calibrating Your Thermometer
Even good thermometers can drift over time. A quick way to check accuracy is the ice bath method: fill a glass with crushed ice, add cold water, stir, and insert the thermometer. It should read 32°F (0°C). If it’s off by more than 2 degrees, most quality thermometers have a calibration function. Check your manual.
Do this check once every few months, or any time you drop your thermometer. A fall can knock the sensor out of alignment on some models.
Common Mistakes That Lead to Bad Readings
Even with the best thermometer in hand, a few common errors can throw off your results. Here’s what to watch out for.
Touching the grill grate or pan. If the probe tip contacts metal while you’re checking, you’ll get the surface temperature of your cooking surface, not your burger. Metal conducts heat much faster than meat, so you’ll see a number that’s way too high. Make sure the probe is fully inside the meat without touching anything else.
Not going deep enough. On a thick patty, if you only insert the probe a quarter inch, you’re reading the outer layer, which is always hotter than the center. Push it to the middle. On thin patties, this means going in from the side, as we discussed.
Reading too early. If your thermometer says it reads in 2 seconds but you pull it out after 1 second, you’re getting an incomplete reading. Wait for the number to stabilize. On most quality digital thermometers, the display will stop changing when it’s locked onto the final temperature.
Relying on color alone. Ground beef can turn brown well before it reaches 160°F, and it can remain pink even above 160°F (especially if it contains certain additives or was recently frozen). Color is unreliable as a sole indicator of doneness. A study by the USDA’s Food Safety and Inspection Service confirmed that 1 in 4 burgers turns brown before reaching a safe internal temperature. Always trust the thermometer over your eyes.
Thermometer Tips for Different Burger Styles
Not every burger is built the same way, and your thermometer technique should adjust accordingly.
Smash Burgers
These ultra-thin patties (often just a quarter inch thick) cook in about 90 seconds per side. Honestly? You probably don’t need a thermometer for these. At that thinness, by the time both sides have a solid crust, the center is well past 160°F. The smash burger technique relies on high heat and thin patties that cook through almost instantly.
If you do want to check, use the side insertion method with the thinnest probe you have. But for most smash burger cooking, visual and tactile cues (firm texture, deep brown crust) are sufficient.
Thick Pub-Style Burgers
Half-pound patties that are an inch or more thick are where thermometers become absolutely essential. These burgers can look beautifully seared on the outside while still being raw at the center. The thicker the patty, the more important an accurate internal temperature reading becomes.
With these, you can go in from the top, aiming for the center point of the thickest section. If you’re wondering about how thickness affects your cooking approach, the relationship between how thick your burgers should be and proper temperature monitoring is tighter than most people realize.
Stuffed Burgers
Juicy Lucys and other stuffed burgers present a unique challenge. The filling (usually cheese) creates a pocket of extremely hot liquid in the center. Your thermometer might read the molten cheese temperature rather than the meat temperature if the probe lands in the filling.
The trick is to take readings at two or three different points around the edge of the filling, measuring the meat itself rather than the center pocket. If the meat surrounding the filling is at your target temperature, you’re good.
Plant-Based and Meatless Burgers
This one surprises people. Plant-based burgers from brands like Impossible and Beyond Meat also have recommended internal temperatures — usually around 165°F. The texture and color changes in plant-based patties can be even more misleading than in beef, so a thermometer is genuinely useful here. We actually wrote a full piece on why meatless burger temperature matters if you want to dig deeper into this.
Do You Really Need to Spend $100 on a Thermometer?
Let’s be honest about this. The ThermoWorks Thermapen ONE is the best burger thermometer you can buy. But do you need it to cook a great burger? No.
A $15 ThermoPro TP03 will tell you whether your burger is at 160°F. It does so accurately, and it does so quickly enough. The difference between a $15 thermometer and a $105 thermometer is about 2 seconds of read time, a slightly thinner probe, better build quality, and waterproofing.
If you grill burgers a few times a month in the summer, the budget option will serve you perfectly well for years. If you cook outdoors year-round, use your thermometer across multiple applications (burgers, steaks, chicken, deep fried turkey, candy making), and want something that’ll last a decade without question, the premium option justifies itself over time.
The worst thermometer is the one you don’t have. Start somewhere. Even the most basic digital instant-read puts you miles ahead of guessing.
FAQ
What temperature should burgers be cooked to?
The USDA recommends 160°F (71°C) for ground beef to ensure all potential bacteria, including E. coli and Salmonella, are eliminated. Some people prefer lower temperatures for a juicier result, but anything below 160°F with ground beef carries a food safety risk. Our ultimate burger temperature guide covers every doneness level and what to expect at each temperature point.
Can I use an oven thermometer to check my burger?
An oven thermometer measures ambient air temperature inside your oven or grill — it tells you nothing about the internal temperature of your burger. You need a probe-style meat thermometer that actually inserts into the food. They’re different tools for different jobs.
How often should I calibrate my meat thermometer?
For casual home use, checking calibration every 2–3 months is plenty. Use the ice bath method (crushed ice and water should read 32°F) or boiling water (should read 212°F at sea level, adjusted for altitude). If you drop your thermometer or notice readings that seem off compared to visual cues, calibrate immediately.
Is a meat thermometer worth it just for burgers?
Absolutely — but you won’t just use it for burgers. Once you have one, you’ll start checking chicken tenders, pork chops, steaks, and everything else you cook. It’s one of those tools that improves your cooking across the board, not just for one dish. For the price of a fast food meal, you can own a thermometer that prevents both foodborne illness and overcooked, dry meat.
What’s the best thermometer for grilling burgers outdoors?
Any quality instant-read thermometer with a backlit display works well outdoors. The ThermoWorks Thermapen ONE and ThermoPop 2 are both designed with outdoor use in mind — readable in sunlight, splash resistant, and fast enough that you’re not holding the grill open longer than necessary. If you’re choosing between charcoal vs gas for your setup, the thermometer recommendation stays the same regardless of fuel source.
Your Next Burger Deserves a Number, Not a Guess
Cooking burgers without a thermometer is like driving without a speedometer. You might be fine most of the time, but you don’t actually know where you stand until something goes wrong — and with food safety, “something going wrong” can mean a genuinely miserable experience.
Pick a thermometer that fits your budget. Even the most affordable option on this list will dramatically improve your consistency and confidence at the grill. Learn the side-insertion technique for thin patties, trust the number over the color, and calibrate every few months.
The difference between a good burger and a great one often comes down to about 5 degrees. Give yourself the tool to nail those 5 degrees every single time, and you’ll never cut a burger open to “check” it again. That juice stays in the patty where it belongs — and you get to eat the kind of burger that stays juicy from the first bite to the last.