
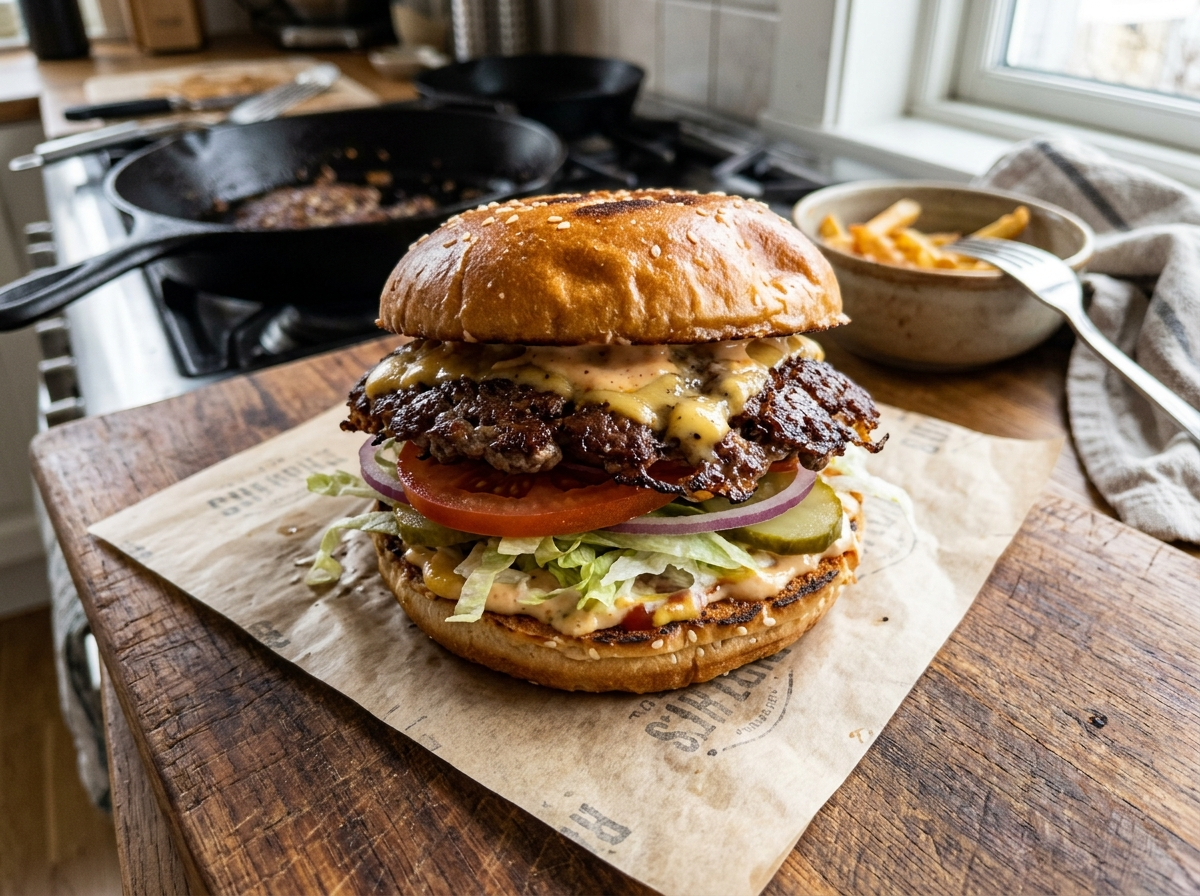
That thin, lacy-edged, deeply caramelized crust you get on a great smash burger? It’s not restaurant magic. It’s science — and it happens at around 300°F when amino acids and sugars in the beef react together on a screaming-hot surface. It’s called the Maillard reaction, and once you understand how to trigger it properly, you can make smash burgers at home that genuinely taste better than what most burger joints put out.
Here’s the thing most people get wrong: they treat a smash burger like a regular burger, just pressed down. That’s not what’s happening here. A smash burger is its own technique, its own philosophy. And the best part? It’s actually easier and faster than traditional burgers once you know the setup. You don’t need fancy equipment. You don’t need culinary school experience. You need good beef, a hot flat surface, and about four minutes of patience.
Let’s get into exactly how to pull this off in your own kitchen.
What Makes a Smash Burger Different
Before you start smashing anything, it helps to understand why this style of burger exists and what separates it from the thick patties you’d throw on a backyard grill.
A traditional burger is usually formed into a thick puck — maybe a third of a pound or more — and cooked over direct heat. You’re aiming for a specific internal temperature, and the outside develops some browning, but the star of the show is the juicy interior.
A smash burger flips that entire idea. You take a loose ball of ground beef, place it on a ripping-hot flat surface, and press it down hard — really hard — into a thin patty. The goal isn’t a juicy, pink center. The goal is maximum surface contact with the cooking surface, which creates a wide, crunchy, deeply flavored crust that covers almost the entire patty.
The flavor profile is completely different. If you’ve ever compared a thick steakhouse burger to a fast-food classic from In-N-Out or Shake Shack, you already know the difference. That fast-food flavor — the one you crave — comes from smashing. If you want a deeper breakdown of how these two styles stack up, check out this comparison of smash burgers vs regular burgers we put together.
The thin patty means the whole thing cooks in about two minutes per side. You get crispy edges, melted cheese that drapes over those edges, and a beefy flavor that punches way above its weight for such a small amount of meat.
Choosing the Right Beef
Your beef choice will make or break your smash burger. And this is where a lot of home cooks go wrong by reaching for the leanest ground beef they can find.
Don’t do that.
Smash burgers need fat. The patty is thin, which means there’s very little insulation to keep things moist during cooking. If you start with lean meat, you’ll end up with a dry, cardboard-like disc that no amount of ketchup can save.
The sweet spot is 80/20 ground beef — that’s 80% lean meat and 20% fat. The fat renders out during the smash and sear, basting the patty from within while the exterior crisps up. Some people go even richer with 73/27 for extra juiciness, and honestly, for smash burgers, that works too. The fat keeps everything tender while feeding the crust development.
If you’re curious about why fat ratio matters so much, there’s a solid deep dive into finding the best fat ratio for burgers that breaks it all down with specific recommendations.
Pro Tip: If you can get your hands on freshly ground beef from a butcher — or even grind your own at home — you’ll notice a big difference. Pre-packaged ground beef gets compressed during processing, which can make the texture denser. Freshly ground meat stays loose and smashes into a more textured, irregular patty with better crust formation.
What about the cut of beef? Chuck is the classic choice, and for good reason. It’s flavorful, naturally hits that 80/20 ratio, and grinds beautifully. Short rib and brisket blends add richness if you’re grinding your own, but straight chuck works perfectly for everyday smash burgers. For a broader look at which cuts work best, take a look at our breakdown of the best meat for burgers.
The Equipment You Actually Need
You don’t need to spend hundreds of dollars on specialty gear. But you do need a few specific things, and skipping any of them will hold you back.
A flat cooking surface is non-negotiable. Smash burgers need flat, direct contact — not grill grates. A cast iron skillet works great for one or two burgers at a time. If you’re feeding a crowd, a cast iron griddle or a flat top attachment for your grill is ideal. The Blackstone griddle has basically become the go-to for home smash burger enthusiasts, and for good reason — big flat surface, even heat, easy cleanup. We’ve actually done a full flat top vs grill comparison for burgers if you’re weighing your options.
A sturdy spatula — and by sturdy, I mean something that won’t flex when you press down hard. A stiff, flat metal spatula is what you want. Some people use a dedicated burger smasher or press, but a heavy-duty spatula works just as well. If you’re using a spatula, make sure it has a flat, squared-off edge so you can scrape cleanly under the patty.
Parchment paper is a small detail that makes a big difference. When you press the ball of beef down, it can stick to your spatula or press. Placing a small square of parchment between the meat and the pressing tool gives you a clean release and lets you apply maximum pressure without tearing the patty.
A bench scraper is optional but helpful. Once that patty develops its crust, it bonds to the cooking surface. A bench scraper lets you get underneath and release it cleanly, preserving all that beautiful Maillard crust instead of leaving it stuck to the pan.
How to Make Smash Burgers at Home: Step by Step
Alright, here’s the actual process. It’s fast — we’re talking about two to three minutes of total cook time per burger — so read through this first and get everything prepped before you turn on the heat.
Portioning the Meat
Take your ground beef and portion it into 2-ounce balls. That’s about the size of a golf ball. Don’t pack them tight — just loosely roll them into a round shape. You want them to hold together enough to place on the cooking surface, but loose enough that they smash easily and create those irregular, lacy edges.
Most smash burger setups are doubles, meaning two patties per burger. So for each finished burger, you’ll need two balls. This is how places like Shake Shack and Smashburger build their sandwiches, and it’s the ratio that gives you the best crust-to-meat balance with melted cheese in between.
Getting the Surface Hot Enough
This is where most home attempts fail. Your cooking surface needs to be screaming hot. Not medium-high. Not “pretty warm.” We’re talking about 450–500°F on the surface.
If you’re using a cast iron skillet, preheat it over high heat for a solid five minutes. You should see the faintest wisp of smoke coming off the surface. If you’re on a flat top griddle, crank it to high and give it time to fully heat — at least 10 minutes for most models.
Here’s a trick: flick a tiny drop of water onto the surface. If it instantly sizzles and evaporates within a second, you’re ready. If it sits there and slowly bubbles, you need more time.
A light coating of a high-smoke-point oil — avocado oil, vegetable oil, or even beef tallow — goes on right before cooking. You don’t want a pool of oil, just a thin film. Tallow, if you can get it, adds another layer of beefy flavor. Some folks use wagyu tallow specifically for this, and it does make a noticeable difference. If you’re interested, here’s a look at how to use wagyu tallow for burgers.
The Smash
Place your loosely formed beef ball on the hot surface. Immediately place a small piece of parchment paper on top of it, then press down firmly with your spatula, press, or the bottom of a heavy pan. You want to flatten it to about ¼ inch thick or even thinner.
Press hard. Harder than you think you need to. You’re not gently nudging it — you’re compressing it into the surface to maximize contact area. This is the entire point of a smash burger. That contact is what creates the crust.
Here’s the critical rule: you only press once. The initial smash is it. After that, you don’t touch it, you don’t press it again, you don’t fidget with it. Pressing a second time squeezes out moisture and fat that you’ve already rendered, and you end up with a dry patty instead of a crusty one.
The Cook
Once the patty is smashed, season the top with salt and pepper. That’s it. Nothing else needs to go into the meat. The beauty of a smash burger is the simplicity — beef, salt, pepper, heat.
Let it cook undisturbed for about 90 seconds to 2 minutes. You’ll see the edges start to turn brown and get crispy. The top surface will begin to change color as the heat works its way up through the thin patty. Juices and fat will pool slightly on the top — that’s normal and good.
Now, use your spatula (or bench scraper) to get under the patty and scrape it off the surface in one confident motion. Don’t be timid. You want to bring all that crust with it. If you go too gently, you’ll leave the best part stuck to the griddle.
Flip it. If you’re adding cheese — and you should be — drop it on now. American cheese is the classic choice because it melts into a creamy blanket almost instantly. Other good options include cheddar, pepper jack, or a smoked gouda if you’re feeling fancy.
Cook for another 30 to 60 seconds on the second side. The total cook time should be about two and a half to three minutes. That’s it. The patty is thin enough that it’s fully cooked through without needing a thermometer, but if you want to be precise about doneness, our burger temperature guide covers every level.
Building the Burger
Stack two patties per bun with cheese between and on top. The classic smash burger build goes like this from bottom to top: bottom bun (toasted and buttered), special sauce or mustard, patty with cheese, patty with cheese, pickles, diced onion, top bun.
A few notes on the bun — don’t overthink it. A soft, squishy potato bun is perfect. Martin’s potato rolls are the gold standard in the smash burger world, and they’re available at most grocery stores. You want the bun to compress slightly when you bite, not fight back with a chewy crust. Toast the cut sides in a little butter on the same griddle you cooked the burgers on. Takes about 30 seconds and adds a whole layer of texture.
Seasoning: Keep It Simple but Do It Right
One of the most common questions about smash burgers is what seasonings to use. The honest answer? Salt and pepper are enough. The crust development and the beef quality do the heavy lifting on flavor.
But “enough” and “optimal” aren’t always the same thing.
A small amount of garlic powder added to your salt and pepper blend gives a subtle savory depth that’s noticeable without being obvious. Onion powder works the same way. Some people add a pinch of smoked paprika for a gentle smokiness, especially when cooking indoors where you don’t get any smoke flavor from charcoal.
The key rule: season the outside of the patty, not the meat itself. You’re not making meatloaf. Don’t mix seasonings into the ground beef. This keeps the texture loose and tender while concentrating the seasoning on the surface where it caramelizes into the crust.
If you want to experiment with more adventurous flavor profiles, we have a full guide on the best seasonings for burgers that goes beyond the basics without overcomplicating things.
Common Mistakes That Kill Your Smash Burger
Even with good ingredients and the right equipment, a few specific errors can turn your smash burger from restaurant-quality to disappointing. Watch out for these.
Not getting the surface hot enough. If your griddle or skillet is at medium heat, the patty will steam instead of sear. You’ll get a gray, soggy disc instead of a brown, crispy one. This is the number one reason home smash burgers don’t taste like the ones you get at your favorite burger spot. High heat, always.
Using meat that’s too lean. We covered this already, but it’s worth repeating because it’s such a common mistake. Lean beef and thin patties are a bad combination. You need that fat to keep the patty moist during the quick, intense cook.
Pressing more than once. The smash is a one-time event. Pressing again after the patty has started cooking pushes out rendered fat and juices. Your crust won’t get crispier from a second press — it’ll just dry out.
Overhandling the meat. If you pack your beef balls too tightly, the patties will be dense and won’t develop those beautiful irregular, crispy edges. Loose ball, firm smash, hands off after that.
Overcrowding the surface. If you drop five balls onto a 10-inch skillet at the same time, the temperature crashes and everything steams. Work in batches. Two patties at a time in a standard skillet, or space them out properly on a flat top.
The Sauce Situation
A smash burger without sauce is fine. A smash burger with the right sauce is transcendent.
The “smash sauce” or “special sauce” you see at most burger spots is usually some variation of a few base ingredients mixed together: mayonnaise, ketchup, yellow mustard, finely minced pickles (or pickle relish), a tiny bit of pickle juice, and sometimes a pinch of garlic powder or paprika.
The ratios vary by personal taste, but a solid starting point is roughly three parts mayo, one part ketchup, half part mustard, and a tablespoon of relish. Mix it up, taste it, adjust. That’s all there is to it. Some people add a few drops of hot sauce or a dash of Worcestershire — both work.
Did You Know? The “special sauce” concept traces back to classic American drive-in culture of the 1950s and ’60s, when burger stands like Big Boy and early McDonald’s locations started mixing their own signature sauces to differentiate themselves. The idea was always about complementing the burger, not overpowering it.
Yellow mustard applied directly to the raw side of the patty before flipping — a technique called “mustard frying” — is another popular approach. The mustard caramelizes into the crust and adds a tangy, slightly sharp note that balances the richness of the beef and cheese. It doesn’t taste like mustard on the finished burger. It tastes like something you can’t quite identify but definitely want more of.
What to Serve Alongside
A smash burger is fast, intense food. Your sides should match that energy.
Homemade fries are the obvious choice, and honestly, they’re worth the effort. If you want the full breakdown on getting them crispy at home, start with picking the right oil — our guide on choosing the best oil for homemade fries covers all the options — and then follow the technique in our golden crisp French fries walkthrough for that perfect crunch.
If you’re making smash burgers for a game day crowd or a casual get-together, you can round things out with some crinkle-cut fries tossed in seasoning, onion rings, or even a batch of homemade potato chips for something a little different.
Scaling Up for a Crowd
One of the best things about smash burgers is how well they scale. Because each patty cooks in under three minutes, you can feed a lot of people in a short time — especially on a large flat top.
Here’s how to set yourself up for success when you’re cooking for six, eight, or twelve people:
Portion all your beef balls ahead of time and lay them out on a sheet pan in the fridge. Get your toppings prepped and laid out in bowls — sliced pickles, diced raw onion, shredded lettuce, sliced tomato, cheese slices. Toast all your buns in advance and keep them warm wrapped in a clean kitchen towel.
Then work the griddle in a steady rhythm. Two to three smashes at a time, cheese on, flip, build, next round. You’ll find a groove quickly, and before you know it, you’ve got a stack of hot, freshly made smash burgers ready to go. If you’re planning a party around this, our best finger foods for football parties list has more ideas that pair well.
Indoor vs. Outdoor: Where Should You Cook?
You can absolutely make great smash burgers indoors on a cast iron skillet or griddle. But let’s be real — smashing beef on a 500°F surface creates smoke. A lot of smoke.
If your kitchen has a strong range hood that vents outside, you’ll probably be okay. If it doesn’t, you’ll set off every smoke detector in your house within about 90 seconds. Ask me how I know.
For indoor cooking, crack a window, turn on any ventilation you have, and accept that your kitchen will smell like a burger joint for the rest of the evening. Some people consider that a feature, not a bug.
Outdoor cooking on a flat top griddle is really the ideal scenario for smash burgers. No smoke worries, plenty of space, and you get to stand outside with a cold drink while you cook. A propane-powered flat top like a Blackstone gives you precise temperature control and a huge cooking surface.
FAQ
Do I need a special press to make smash burgers?
No. A sturdy, flat metal spatula works perfectly. Some people use a heavy-duty burger press or even the bottom of a small cast iron pan. The key is applying firm, even pressure in one decisive motion. Whatever tool lets you do that is the right tool. Parchment paper between the meat and the pressing surface prevents sticking.
Can I make smash burgers on a regular grill?
Not really — at least not well. Standard grill grates have gaps, and the whole point of a smash burger is full surface contact. The meat will push down through the grates and you’ll lose the crust. You need a flat surface. If you love your grill, consider getting a flat cast iron griddle insert that sits over the grates. That gives you the best of both worlds.
How do I know when to flip the patty?
Look at the edges. When you see the bottom third of the patty’s edge turning brown and crispy — and you notice juices starting to pool on the top surface — it’s time. This usually takes about 90 seconds to 2 minutes on a properly heated surface. When you slide your spatula under and the patty releases with a slight scraping sound, you’re right on time.
Why do my smash burgers come out gray instead of brown?
Your surface isn’t hot enough. Gray meat means the patty is steaming, not searing. Let your skillet or griddle heat longer before cooking. You need at least five minutes on high for cast iron, and ten minutes or more for a flat top griddle. The surface should be so hot that a drop of water evaporates on contact.
What cheese melts best on a smash burger?
American cheese is the classic choice for a reason — it melts into a smooth, creamy layer almost instantly. Aged cheddar takes a bit longer and doesn’t get as gooey, but it has a sharper flavor. Pepper jack adds heat. If you want the best of both worlds, try a slice of American on the bottom patty and a more flavorful cheese on top.
Your Next Burger Night Just Got Better
Making smash burgers at home isn’t hard. It’s actually one of the simplest, fastest ways to cook a burger. But simple doesn’t mean careless. The details matter — the loosely formed ball, the screaming-hot surface, the single hard press, the patience to let the crust develop before you flip.
Once you’ve got the technique down, you’ll start wondering why you ever stood over a grill for 15 minutes waiting for a thick patty to cook through. Two minutes per side, a slice of American cheese, a soft potato bun, and you’re eating something that rivals your favorite burger spot.
So grab some 80/20 chuck, heat up that cast iron until it’s almost scary hot, and smash your first one tonight. You’ll burn through a pound of beef making “just one more” before you know it — and honestly, that’s exactly the right way to spend an evening.