
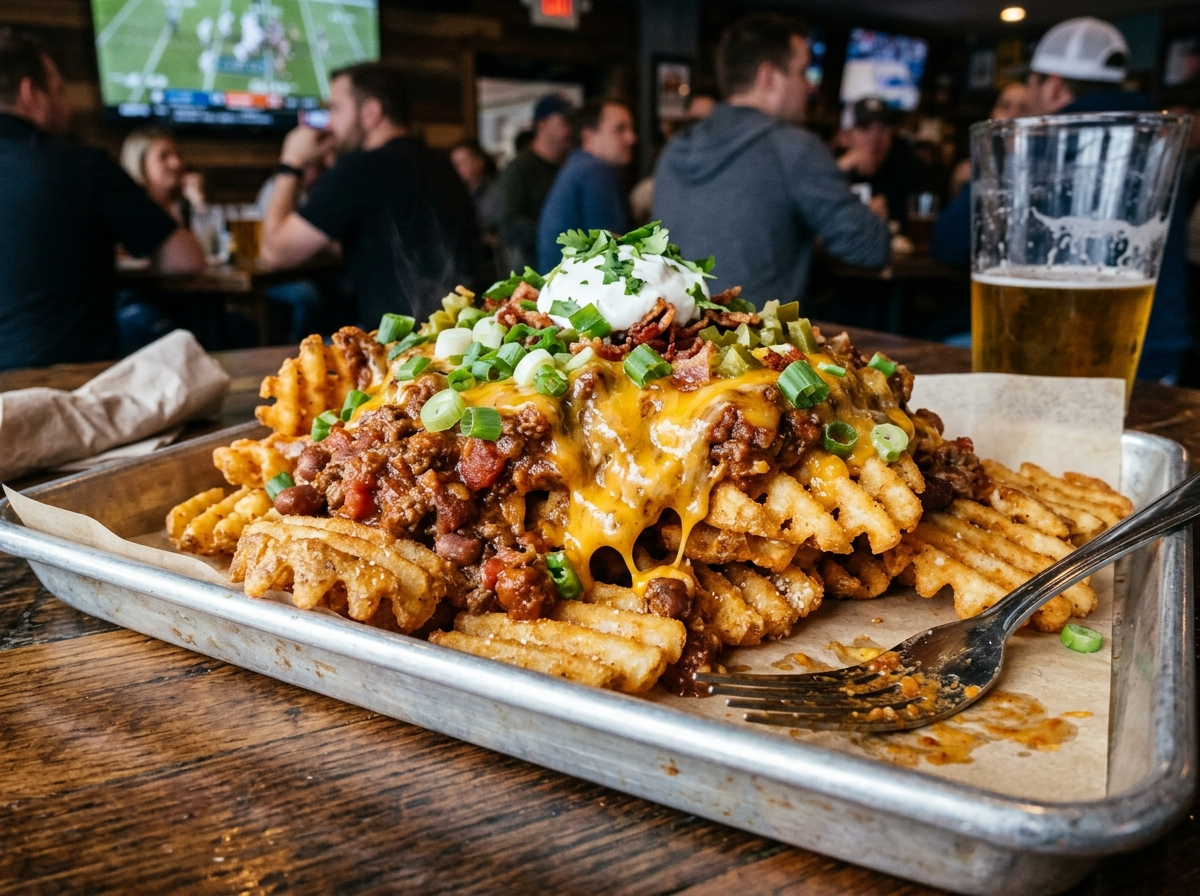
Americans eat roughly 1.25 billion chicken wings during Super Bowl weekend alone. But here’s the thing — while everyone’s fighting over the wing platter, the person who shows up with a massive tray of game day chili cheese fries quietly becomes the real MVP of the party. There’s something about hot, crispy fries buried under thick chili and melted cheese that turns grown adults into wide-eyed kids at a county fair.
The problem? Most homemade versions turn into a soggy, lukewarm disaster within ten minutes. The fries go limp. The chili’s either too thin or straight from a can. The cheese congeals into a rubbery layer that peels off in one sad sheet. You’ve been there. I’ve been there. Everyone who has ever tried to throw together a quick batch for a watch party has been there.
That’s exactly what we’re fixing today. This isn’t about dumping canned chili over frozen fries and calling it a day. We’re talking about building game day chili cheese fries from the ground up — fries that stay crispy under pressure, chili that actually tastes like you meant it, and cheese that stays melty and stretchy long enough for your guests to load up their plates. Whether you’re hosting a Super Bowl party, a regular Sunday football hangout, or just a random Tuesday where you want comfort food that hits different, this one’s for you.
Why Chili Cheese Fries Are the Ultimate Game Day Food
Think about your typical game day spread for a second. You’ve got wings that need napkins and wet wipes. You’ve got sliders that fall apart. You’ve got seven-layer dip where everyone double-dips (you know who you are). Chili cheese fries solve a bunch of problems that other party foods create.
They’re a one-hand food. You grab a plate, you grab a fork (or just your hands, no judgment), and you’re set. You don’t need to assemble anything. You don’t need condiments on the side. Everything you need is already right there in one glorious pile.
They also scale beautifully. Making chili cheese fries for four people or forty people requires the same technique — you just use bigger trays. That’s a massive advantage when you’re not sure how many friends are actually going to show up. And unlike foods that need to be served at exact temperatures, chili cheese fries are forgiving. They’re great piping hot, and they’re still pretty solid at room temperature. The chili holds heat well, and the cheese keeps everything warm underneath.
If you’re already planning a football watch party menu with Southern comfort foods, chili cheese fries fit right in alongside everything else on the table.
The Fries: Your Foundation Makes or Breaks Everything
Let’s start where it matters most — the fries. You can have the best chili in the world, but if your fries can’t hold up under it, you’ve just made a bowl of chili with soggy potato strings floating in it.
Picking the Right Potato
Not all potatoes are created equal for frying. Russet potatoes (also called Idaho potatoes) are your best friend here. They’re high in starch and low in moisture, which means they crisp up beautifully and hold their structure even when something heavy sits on top of them. Waxy potatoes like red or Yukon Gold will hold their shape during cooking, but they don’t get that same shatteringly crispy exterior you need.
If you’re cutting your own fries, aim for a thick steak-fry cut — roughly 3/8 to 1/2 inch thick. Thin shoestring fries taste great on their own, but they’ll surrender to the chili in about ninety seconds. You need thickness and surface area to survive the toppings.
Fresh-Cut vs. Frozen: An Honest Conversation
Here’s where I might surprise you. For game day? Good quality frozen fries are completely acceptable, and in some cases, they’re actually better for loaded fry applications. Why? Because commercial frozen fries have usually been par-cooked and flash-frozen, which gives them a more consistent texture. They’ve also often been coated in a thin layer of starch that helps them stay crispier longer.
If you want to go the fresh-cut route, you absolutely can, and the flavor will be noticeably better. But you’ll need to do a double-fry method (more on that in a moment), and you’ll need to plan for the extra time. On a busy game day, that extra hour of prep might matter.
For tips on choosing the right oil if you’re going fresh, check out this guide on choosing the best oil for homemade french fries.
The Double-Fry Method (For Fresh-Cut Fries)
This is the restaurant secret that transforms home fries from “okay” to “how did you make these?” The technique is simple, and it works because of basic food science.
First fry at around 300°F for 5–6 minutes. You’re not trying to brown them here. You’re cooking the inside of the potato through and starting to dry out the surface. Pull them out and let them rest on a wire rack for at least 15–20 minutes. You can actually do this step hours ahead of time and leave them at room temperature.
Second fry at 375°F for 3–4 minutes until they’re golden and crispy. This high-heat blast creates that crunchy shell on the outside while the inside stays fluffy.
The rest period between fries isn’t optional — it lets moisture migrate to the surface, which then gets blasted off during the second fry. That’s what creates the crunch.
Pro Tip: If you’re nervous about deep frying or don’t want to deal with a huge pot of oil, you can get excellent results by frying at home without a deep fryer. A heavy Dutch oven with a few inches of oil works beautifully.
Want to learn the full science behind what makes fries perfectly golden and non-greasy? There’s a whole breakdown on getting golden, crisp french fries that’s worth reading.
Oven-Baked Fries: The Easier Route
If frying feels like too much for game day (and honestly, managing a pot of hot oil while your team is on a fourth-quarter comeback isn’t ideal), oven-baked fries can work. Here’s how to maximize their crunch:
Spread them on a sheet pan in a single layer — crowding is the number one reason oven fries come out steamed instead of crispy. Use parchment paper or a lightly oiled baking sheet. Bake at 425°F, flipping once halfway through. Total time is usually 25–35 minutes depending on thickness. For extra crispiness, toss the cut fries in a tablespoon of cornstarch before baking. It creates a thin coating that mimics the crunch of fried.
The Chili: This Is Where You Win or Lose
A great chili cheese fry lives and dies by its chili. And game day chili isn’t the same as the chili you’d eat in a bowl with a spoon. It needs to be thicker, meatier, and punchier in flavor because it has to compete with cheese and potatoes for attention.
Building Flavor From the Start
Start with 80/20 ground beef — the fat content matters because it adds richness and body. Leaner beef makes watery, grainy chili. Brown the beef in a heavy pot or Dutch oven over medium-high heat, and don’t rush it. You want actual browning, not gray steaming. Break it into small crumbles as it cooks. Those brown bits on the bottom of the pot? That’s fond, and it’s pure flavor.
Once the beef is browned, add diced onion and a few cloves of minced garlic. Cook them until the onion turns translucent, about 3–4 minutes. Now the spices go in: chili powder (2–3 tablespoons for a standard batch), cumin (1 tablespoon), smoked paprika (1 teaspoon), a pinch of cayenne if you like heat, salt, and black pepper. Cook the spices with the meat for about a minute — this blooms them and wakes up their flavor.
Add a can of tomato sauce (15 oz) and about a half cup of beef broth. You want the chili to be saucy enough to simmer but thick enough that it won’t run off the fries like a waterfall. If you’re using canned tomatoes instead, crush them by hand — you want small pieces, not big chunks that’ll roll off the fries.
Simmering: Low and Slow Wins
Let the chili simmer on low heat for at least 45 minutes, uncovered. Stirring every ten minutes or so prevents sticking. As it cooks, the liquid reduces and the flavors concentrate. You’ll know it’s ready when you can drag a spoon through it and the trail doesn’t immediately fill back in.
Did You Know? Chili actually tastes better the next day. The flavors meld together overnight in the fridge. If you make your chili on Saturday for a Sunday game, you’re not being lazy — you’re being strategic.
A Shortcut That Doesn’t Suck
Look, if it’s 2 PM on game day and you don’t have time to make chili from scratch, here’s a shortcut that actually works. Buy a can of good quality chili (Hormel or Wolf Brand are decent starting points). Brown half a pound of ground beef with onion and garlic, drain it, and stir it into the canned chili along with an extra tablespoon of chili powder and a teaspoon of cumin. Simmer it for 15 minutes. It won’t taste homemade, but it’ll taste a lot better than straight from the can, and nobody at a game day party is going to interrogate you about your chili’s origins.
The Cheese: Getting the Melt Right
Cheese seems like the simple part, right? Just throw some shredded cheddar on top and call it done? You could. But there’s a big difference between cheese that melts into a beautiful, gooey blanket and cheese that breaks into an oily, clumpy mess.
The Cheese Sauce Route
For game day purposes, a quick stovetop cheese sauce is almost always better than shredded cheese on top. Why? Because shredded cheese needs direct heat to melt, which means your fries are sitting under a broiler getting soggy. Cheese sauce, on the other hand, goes on already melted and coats everything evenly.
Here’s a simple one that takes about 10 minutes:
Melt 2 tablespoons of butter in a saucepan over medium heat. Whisk in 2 tablespoons of flour and cook for about a minute — you’re making a roux. Slowly pour in 1½ cups of whole milk, whisking constantly to avoid lumps. Once it starts to thicken (3–4 minutes), pull it off the heat and stir in 2 cups of shredded sharp cheddar and a pinch of salt. The residual heat melts the cheese smoothly.
Adding a half teaspoon of mustard powder and a splash of hot sauce (like Frank’s RedHot) takes this from basic cheese sauce to something people ask you for the recipe for.
Shredded Cheese on Top (If You Prefer It)
If you’d rather go with shredded cheese directly on the fries, use freshly shredded block cheese, not the pre-shredded bags from the store. Those bags contain anti-caking agents (usually cellulose or potato starch) that prevent smooth melting. Block cheese melts better, period.
A mix of sharp cheddar and Monterey Jack gives you great flavor and great melt. After layering the fries, chili, and cheese, pop the tray under the broiler on high for 2–3 minutes. Watch it like a hawk — broilers go from “perfectly melted” to “charcoal” in about thirty seconds.
The Assembly: Layering Matters More Than You Think
Here’s where most people mess up their game day chili cheese fries. They make a great batch of fries, dump all the chili on top, drown it in cheese, and end up with a top layer that’s amazing and a bottom layer that’s a soggy, chili-soaked disappointment.
The fix is layering.
Start with your serving tray or a large oven-safe platter. Put down half your fries. Spoon on half the chili and half the cheese sauce. Now add the second layer of fries on top, followed by the remaining chili and cheese. This way, every bite has some crispy fry, some chili, and some cheese — not just the lucky ones on top.
If you’re using shredded cheese instead of sauce, do both layers and then hit the whole thing under the broiler.
Toppings That Take It Up a Notch
The base of fries, chili, and cheese is already great. But the right toppings push it from “that was good” to “when are you making those again?”
Here are some that work really well: diced white onion for crunch and sharpness, sliced jalapeños (pickled or fresh, your call), a drizzle of sour cream, chopped green onions for color and freshness, or a few dashes of hot sauce on top for people who want extra kick.
Avoid toppings that add a lot of moisture — things like diced tomatoes or heavy salsa can accelerate the sogginess problem you’ve been working so hard to avoid.
Timing It Right for Game Day
This is where the practical reality of hosting matters. You don’t want to be elbow-deep in chili when kickoff happens. Here’s a timing game plan that works:
The day before: Make the chili. Cool it down, store it in the fridge. It’ll actually taste better tomorrow.
2 hours before the game: Take the chili out of the fridge and start slowly reheating it on the stove over low heat. Make your cheese sauce and keep it warm on the lowest burner setting, stirring occasionally.
30 minutes before serving: Cook your fries (whether baking or frying). This is the only step that truly needs to happen close to serving time.
5 minutes before serving: Assemble — layer fries, chili, cheese, toppings. Serve immediately.
If you’re doing this for a crowd and want to round out the spread, finger foods designed specifically for football parties pair perfectly alongside chili cheese fries and give your guests some variety.
Making Chili Cheese Fries for a Big Crowd
Feeding 15–20 people? The math is pretty straightforward. Plan for roughly 5–6 ounces of fries per person (before cooking), about 1/3 cup of chili per person, and 2 tablespoons of cheese sauce per person. For 20 people, that’s roughly 6–7 pounds of fries, about 7 cups of chili (a big batch), and about 2½ cups of cheese sauce.
The easiest approach for a crowd is to set up a build-your-own station. Keep the fries on a big tray, the chili in a slow cooker on warm, and the cheese sauce in a small crockpot or a saucepan on a warming plate. Set out the toppings in small bowls. People serve themselves, and the fries stay crispy because they’re not sitting under chili waiting to be eaten.
This also solves the dietary preference problem. Someone doesn’t want chili? They grab cheesy fries. Someone wants to go light? They take fewer toppings. Everyone’s happy, and you’re not stuck making individual plates.
Variations Worth Trying
Once you’ve nailed the classic version, there’s a whole world of chili cheese fry variations that can keep things interesting across an entire football season.
Pulled Pork Chili Cheese Fries — Swap the ground beef chili for leftover pulled pork mixed with a smoky BBQ sauce. Top with cheddar cheese sauce and pickled red onions. This one is absolutely ridiculous in the best way.
Breakfast Chili Cheese Fries — For those early kickoff games (looking at you, London games), use waffle fries as the base, top with chorizo chili, pepper jack cheese sauce, and a fried egg on top. The runny yolk acts as an extra sauce.
Green Chile Version — If you’re in the Southwest or just love New Mexican food, use a roasted green chile sauce instead of red chili, top with Monterey Jack cheese, and finish with chopped cilantro. Different flavor profile, equally addictive.
Keeping Leftovers (And Reheating Without Regret)
Let’s be realistic — sometimes there are leftovers. And leftover chili cheese fries have a reputation for being terrible the next day. That reputation is… mostly deserved, but there are ways to salvage them.
Store the components separately if at all possible. Leftover chili goes in an airtight container in the fridge for up to 4 days. Cheese sauce stores for 2–3 days. Fries are the hardest to save, but they can be revived.
To reheat fries, skip the microwave entirely. Spread them on a baking sheet and reheat at 400°F for 8–10 minutes. They won’t be as good as fresh, but they’ll crisp back up reasonably well. An air fryer works even better — 375°F for 4–5 minutes brings them back to life surprisingly well.
Reheat the chili on the stove with a splash of water or broth to loosen it up. The cheese sauce can be reheated gently in a saucepan with a splash of milk, whisking until smooth again.
FAQ
Can I use sweet potato fries for chili cheese fries?
You can, and the sweet-savory contrast is actually pretty interesting. Sweet potato fries pair well with a spicier chili because the sweetness balances the heat. Keep in mind that sweet potato fries are softer in texture, so use a thick cut and don’t go overboard with the toppings. They’ll hold up to a light layer of chili and cheese, but they won’t survive the heavy loading that a russet fry can handle.
How do I keep chili cheese fries from getting soggy?
Three things make the biggest difference. First, make sure your fries are extra crispy before assembly — slightly overdone is better than underdone for loaded fries. Second, use thick chili, not watery chili. If your chili looks like soup, it needs more simmering time. Third, layer your assembly instead of dumping everything on top. And always serve immediately after assembling.
What’s the best cheese for chili cheese fries?
Sharp cheddar gives you the best flavor, while Monterey Jack gives you the best melt. A combination of both is ideal. For a cheese sauce, sharp cheddar works great because the sauce-making process handles the melting. If you’re going with shredded cheese on top, adding some Jack to the mix ensures you get that stretchy, gooey pull that looks great and tastes even better. Velveeta or American cheese are also popular choices — they melt incredibly smoothly because they’re processed specifically for that purpose.
Can I make chili cheese fries ahead of time?
You can prep everything ahead of time, but don’t assemble until you’re ready to serve. The chili can be made 1–2 days in advance (it actually improves with time). The cheese sauce can be made several hours ahead and reheated. The fries need to be cooked as close to serving time as possible. Assembly should happen right before people eat.
Your Next Game Day, Sorted
Game day chili cheese fries aren’t hard to make well. They just require a little bit of thinking ahead and caring about the details that most people skip — crispy fries with enough structure, thick chili with real depth, and cheese that actually melts the way it should. Nail those three things, and you’ve got a dish that people will talk about long after the final whistle.
So the next time you’re planning a game day spread, skip the sad veggie tray nobody touches and put your effort where it counts. Make a batch of chili the night before. Shred your own cheese. Get those fries extra crispy. Your future self — the one who’s watching the game with a plate of perfect chili cheese fries and a very impressed group of friends — will thank you for it.