
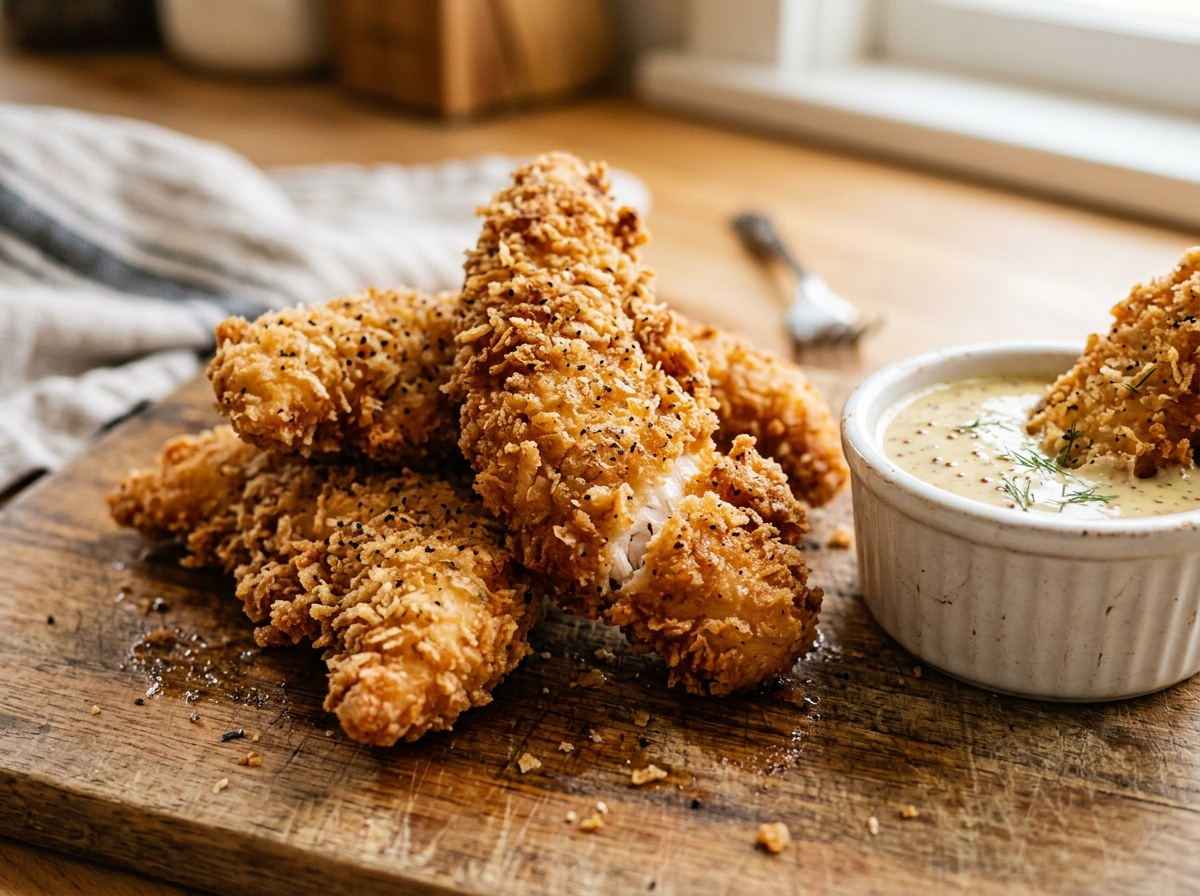
The average American eats roughly 100 pounds of chicken per year, and a big chunk of that comes in the form of chicken tenders — from fast food bags, frozen boxes, and restaurant baskets. But here’s the thing: most of those tenders are made from processed, reformed chicken meat that’s been shaped to look like a tender. They’re not actual tenders. And once you make real homemade chicken tenders from whole chicken breast, with a coating you control and oil at the right temperature, you’ll wonder why you ever settled for the drive-thru version.
Making chicken tenders at home isn’t complicated. You don’t need fancy equipment. You don’t need culinary school training. What you do need is a good understanding of a few basics — how to cut the chicken, how to build a coating that actually sticks, and how to fry (or bake) them so they come out golden and crispy on the outside, juicy and tender on the inside. That’s exactly what we’re going to cover here.
What Exactly Is a Chicken Tender?
Before we get into the recipe side of things, let’s clear something up. A true chicken tender — also called a chicken tenderloin — is a specific cut of meat. It’s the small strip of muscle that runs along the underside of the chicken breast, right next to the bone. Each chicken has two of them, and they’re naturally tender (hence the name) because that muscle doesn’t do a lot of heavy lifting during the bird’s life.
Now, most restaurant and fast food “tenders” aren’t made from this cut. They’re either sliced from the breast or made from processed chicken that’s been pressed into shape. There’s nothing wrong with slicing breast meat into strips — that’s actually what most of us do at home because buying just the tenderloins can be expensive and hard to find in bulk.
The point is, whether you use the actual tenderloin or slice a boneless skinless breast into strips, your homemade version is already a step up. You know what’s in it. You control the seasoning. And you’re working with whole muscle meat, not something that’s been mechanically separated and reformed.
Picking the Right Chicken
Your tenders are only as good as the chicken you start with. This sounds obvious, but it matters more than people think.
Fresh vs. frozen: Fresh chicken breast gives you the best texture. Frozen works fine too, but you need to thaw it completely — and I mean completely — before you start cutting and breading. Partially frozen chicken creates uneven cooking. The outside burns while the inside stays raw. Not what we want.
Bone-in vs. boneless: Go boneless. You can absolutely buy bone-in breasts and remove the bone yourself (it’ll save you money), but for tenders, boneless skinless breasts are the easiest starting point. If you can find the actual chicken tenderloins sold separately, even better.
Sizing matters: Try to buy breasts that are roughly the same size. If one breast is twice as thick as the other, your tenders will cook at different rates. Some will be overcooked and dry while others are still underdone. If your breasts are very thick, you can butterfly them or pound them down to even thickness before slicing into strips.
Pro Tip: If your chicken breasts have that thick, uneven shape that’s common with commercial poultry, place them in a zip-lock bag and use a rolling pin or meat mallet to even them out to about ¾ inch thick before cutting into strips. Your tenders will cook much more evenly.
How to Cut Chicken Breast Into Tender Strips
The way you cut your chicken affects how it cooks and how it feels when you bite into it. You want strips that are roughly the same width and thickness so everything finishes at the same time.
Start with a sharp knife — a dull one will tear the meat instead of slicing it cleanly. Lay the breast flat on your cutting board. Slice lengthwise (with the grain) into strips about 1 inch wide and ½ to ¾ inch thick. You’re aiming for strips roughly the size and shape of what you’d get at a restaurant — long enough to pick up with your fingers, thick enough to stay juicy, thin enough to cook through quickly.
If you find the chicken slippery and hard to control, pop it in the freezer for 15–20 minutes before cutting. This firms up the meat just enough to make slicing much easier without actually freezing it.
One thing to look for: that white tendon that runs through the tenderloin. If you’re using actual tenderloins, you’ll see a tough white strip. Grab the end of it with a paper towel (for grip) and pull it out while scraping along it gently with your knife. It takes 10 seconds and makes a big difference in texture. Nobody wants to bite into a chewy tendon.
The Brining Step Most People Skip
Here’s where homemade tenders separate themselves from the frozen bag. A quick brine — or even just a buttermilk soak — does two things: it seasons the meat all the way through, and it helps the chicken retain moisture during cooking.
Simple salt brine: Dissolve 2 tablespoons of kosher salt in 2 cups of water. Submerge your chicken strips and refrigerate for 30 minutes to 2 hours. Don’t go longer than that, or the texture can get a bit mushy. Rinse briefly and pat dry before breading.
Buttermilk soak: This is the method you’ll find in most Southern cooking traditions, and for good reason. The acidity in buttermilk gently tenderizes the meat while adding flavor. Soak your strips in buttermilk for at least 1 hour, up to overnight. The buttermilk also acts as the “wet” component in your breading process, so you can go straight from the soak into your flour mixture.
If you don’t have buttermilk on hand, add a tablespoon of white vinegar or lemon juice to a cup of regular milk and let it sit for 10 minutes. It won’t be identical, but it works surprisingly well in a pinch.
Did you know? Many fried chicken restaurants, including Chick-fil-A, use a pickle juice brine for their chicken. The salt and vinegar in pickle juice work similarly to buttermilk. If you want to experiment, soaking your chicken strips in dill pickle juice for 30 minutes to an hour adds a subtle tang that pairs really well with a crispy coating.
Building a Coating That Actually Stays On
This is where most homemade chicken tenders fail. You do all the work — season the flour, dredge the chicken, carefully place it in the oil — and then half the breading slides right off. It’s frustrating, and it’s almost always caused by one of a few fixable mistakes.
The Three-Step Dredge
The classic approach uses three stations: flour, egg wash, and a final coating. Each step has a purpose.
Station 1 — Seasoned flour: Mix all-purpose flour with your seasonings. At minimum, you want salt, black pepper, garlic powder, and paprika. This first flour coat gives the egg something to grab onto. Without it, the egg slides right off the raw chicken.
Station 2 — Egg wash: Beat 2–3 eggs with a splash of milk or water. Some people add a teaspoon of hot sauce here for a little background heat — it doesn’t make the tenders spicy, just adds depth. If you’re making Nashville hot chicken tenders, this is where the heat journey starts.
Station 3 — Final coating: This is where you have choices. You can go back into the same seasoned flour (the double-dip method), use panko breadcrumbs for extra crunch, or crush up cornflakes or crackers for a different texture. Each one gives a different result.
Making the Breading Stick
A few tricks that actually work:
Dry your chicken. If the surface is wet and slimy, nothing sticks well. Pat each strip dry with paper towels before hitting that first flour station. If you’re coming out of a buttermilk soak, let the excess drip off for a few seconds but don’t pat dry — the buttermilk replaces the egg wash step.
Press it on. Don’t just dip and lift. When you put the chicken in the flour or breadcrumbs, press it down firmly. Use your other hand (keep one hand dry, one hand wet — this is the golden rule of breading) to press the coating into the meat.
Rest before frying. This is the step almost nobody mentions. After breading, set your tenders on a wire rack and let them sit for 10–15 minutes before they go in the oil. This resting period lets the coating hydrate and bond to the surface. Skip this, and you’re much more likely to lose your breading in the fryer.
Seasoning the Coating
Plain flour and breadcrumbs make plain tenders. Your seasoning blend is what gives them personality. Here’s a solid base to start with and adjust to your taste:
For about 1½ cups of flour, add 1 teaspoon each of salt, garlic powder, onion powder, smoked paprika, and black pepper. Then add ½ teaspoon of cayenne if you like a little kick. Some cooks add a tablespoon of cornstarch to the flour — it creates an extra crispy, almost shattering texture on the outside. Similar principles apply if you’re working on getting the secret to golden, non-greasy fried chicken nailed down.
Frying Your Chicken Tenders
Let’s talk about the actual cooking. You’ve got three main options here: deep frying, shallow frying (pan frying), and baking. Each one works, but they produce different results.
Deep Frying
This gives you the most restaurant-like result — an evenly golden, crunchy exterior all the way around. You’ll need enough oil to fully submerge the tenders, which usually means 2–3 inches of oil in a heavy-bottomed pot or Dutch oven.
Temperature is everything. Heat your oil to 350°F (175°C). This is the sweet spot. Too low, and the chicken absorbs oil and gets greasy. Too high, and the outside burns before the inside cooks through. Use a deep-fry thermometer or a probe thermometer clipped to the side of your pot. Don’t guess — oil temperature is the single biggest factor in whether your tenders turn out great or disappointing.
When you lower chicken into the oil, the temperature drops. That’s normal. But if you overcrowd the pot, the temperature drops too much and your tenders steam instead of fry. Work in batches — 4 to 6 strips at a time depending on the size of your pot. Let the oil come back up to 350°F between batches. If you’re interested in picking the right oil for frying, the same principles you’d use when choosing the best oil for homemade french fries apply here.
Cooking time: Chicken tenders are relatively thin, so they cook fast. Most strips will be done in 3 to 5 minutes. You’re looking for a deep golden brown color on the outside. The internal temperature should hit 165°F (74°C) — check your thickest piece with an instant-read thermometer.
Warning: Chicken is one food where you really don’t want to eyeball doneness. An instant-read thermometer costs less than $15 and takes the guesswork out entirely. Golden on the outside doesn’t always mean done on the inside, especially with thicker cuts.
Pan Frying (Shallow Frying)
If you don’t want to deal with a large amount of oil, pan frying works well. You’ll use about ½ inch of oil in a large cast iron skillet or heavy pan. The difference is you’ll need to flip the tenders halfway through since they aren’t fully submerged.
Heat the oil to 350°F, same as deep frying. Place tenders in without crowding — leave space between each piece. Cook for about 3 minutes on the first side until golden, then flip and cook another 2–3 minutes. This method is covered in more detail in our guide on how to fry at home without deep frying, which walks through the technique step by step.
Pan-fried tenders can be every bit as crispy as deep-fried ones. The only trade-off is that you might get slightly uneven browning on the sides, and you’re limited to smaller batches.
Baking (The Oven Method)
Baking won’t give you the same crunch as frying — let’s be honest about that. But with a couple of adjustments, you can get surprisingly close.
Preheat your oven to 425°F (220°C). Place a wire rack on a sheet pan — this is crucial. If you put the tenders directly on the pan, the bottom gets soggy. The wire rack lets hot air circulate all around.
Before breading, spray or lightly brush each tender with oil. After breading, give them another light spray of oil on top. Bake for 12–15 minutes, flip once, and bake another 8–10 minutes until golden and cooked through.
A trick for crunchier oven-baked tenders: Replace some of the flour in your coating with finely crushed cornflakes, panko, or even crushed pork rinds (for a low-carb option). These add texture that plain flour can’t achieve in the oven.
The Dipping Sauce Situation
A good chicken tender without a good dipping sauce is like fries without ketchup. It’s fine, but it could be so much better.
You probably already have a favorite, but here are a few that pair especially well with homemade tenders:
Honey mustard is the classic. Equal parts honey and yellow mustard, plus a squeeze of lemon juice and a pinch of salt. Done in 30 seconds.
Ranch — and I mean real ranch, not just the bottle. Mix sour cream, mayo, dried dill, garlic powder, onion powder, salt, pepper, and a splash of buttermilk. It tastes nothing like what comes out of a Hidden Valley bottle.
Spicy comeback sauce is a Mississippi specialty that’s basically the perfect all-purpose dipping sauce. Mayo, ketchup, hot sauce, Worcestershire, garlic powder, paprika, and black pepper. It’s tangy, creamy, slightly spicy, and it goes with everything.
BBQ-ranch hybrid — mix your favorite BBQ sauce 50/50 with ranch. Sounds weird. Tastes incredible with crispy chicken.
If you want to go full heat, the same spicy oil drizzle used in Nashville hot chicken can be brushed over your cooked tenders for that signature fiery kick.
Common Mistakes and How to Fix Them
Even experienced home cooks run into issues with chicken tenders. Most of these problems have simple fixes.
The breading falls off. You didn’t dry the chicken before the first flour dredge, you didn’t let the breaded tenders rest before frying, or you moved them too soon in the oil. Place them gently into the hot oil and don’t touch them for at least 90 seconds. The crust needs time to set.
The outside is dark but the inside is raw. Your oil was too hot. This is the most common frying mistake for any breaded food — the same issue people face when their chicken fried steak isn’t crispy. Drop your oil temp to 350°F and use a thermometer. If your strips are very thick, slice them thinner next time or pound them to even thickness.
The tenders are greasy and soggy. Your oil was too cool, or you overcrowded the pan. When too much cold food hits the oil at once, the temperature crashes and the food absorbs oil instead of crisping up. Fry in smaller batches and let the oil recover between rounds.
The chicken is dry. You overcooked it. Chicken tenders are thin and cook fast. Pull them at 165°F internal temperature and let them rest on a wire rack — not a paper towel-lined plate, which traps steam and makes the bottom soggy. Also, try brining next time. That 30-minute salt brine makes a noticeable difference in juiciness.
The flavor is bland. You seasoned the flour but didn’t season the chicken itself. Salt your chicken strips directly before they go into the flour. Seasoning every layer is the secret to food that tastes good all the way through, not just on the surface.
Serving Ideas Beyond the Basket
Chicken tenders don’t just belong in a red plastic basket with fries (though that’s a perfectly valid way to eat them). Here are some other ways to use them.
Slice them up and toss them on top of a salad. The warm, crispy chicken against cold greens and a tangy vinaigrette is a restaurant-quality lunch in about 20 minutes.
Make chicken tender subs — crispy tenders in a hoagie roll with lettuce, tomato, pickles, and your sauce of choice. Pub subs at home.
Chop them and pile them on nachos or loaded fries. If you’ve already got a batch of game day chili cheese fries going, crispy chicken on top takes it to another level.
They’re also one of the best finger foods for football parties. Make a big batch, keep them warm in a 200°F oven on a wire rack, and set out a lineup of dipping sauces. Your guests will keep going back for more.
For a quick weeknight dinner, serve them alongside homemade french fries and coleslaw. It’s a complete meal that takes about 30 minutes from start to plate, and it’ll make any kid (or adult who eats like one) very happy.
Storing and Reheating Leftovers
If you somehow have leftover tenders — and that’s a big if — store them in an airtight container in the fridge for up to 3 days.
Reheating is where most people go wrong. The microwave will make them rubbery and sad. Don’t do it.
Your best option is the oven or toaster oven. Preheat to 375°F, place the tenders on a wire rack set over a sheet pan, and heat for 8–10 minutes. They won’t be quite as good as fresh, but they’ll be crispy and warm.
An air fryer works even better for reheating. Set it to 375°F for 4–5 minutes and they come out almost as good as they were the first time around.
You can also freeze uncooked breaded tenders. Lay them on a parchment-lined sheet pan in a single layer, freeze until solid (about 2 hours), then transfer to a freezer bag. They’ll keep for up to 3 months. When you’re ready to cook them, fry straight from frozen — just add an extra minute or two to the cook time and make sure you check the internal temp.
FAQ
What’s the best oil for frying chicken tenders at home?
Peanut oil is the top choice for flavor and high smoke point (around 450°F). Canola oil and vegetable oil are solid, affordable alternatives. Avoid olive oil for deep frying — its smoke point is too low and it’ll break down at frying temperatures. Whatever you choose, the key is maintaining that 350°F sweet spot throughout cooking.
Can I make chicken tenders without eggs?
Yes. Buttermilk works as a substitute for the egg wash and actually adds more flavor. You can also use plain yogurt thinned with a little milk, or even mayonnaise as the “wet” layer. All of these give the flour or breadcrumbs something to stick to without using eggs.
How do I know when chicken tenders are fully cooked?
Use an instant-read thermometer. You’re looking for an internal temperature of 165°F (74°C) at the thickest part. Color alone isn’t reliable — breading can look perfectly golden while the chicken inside is still pink, especially if your oil was too hot. A thermometer removes all the guesswork.
Are homemade chicken tenders healthier than frozen or fast food?
Generally, yes. You’re using whole chicken breast instead of processed meat, you control the amount of salt and additives, and you can choose higher-quality oil. Baking instead of frying cuts the fat significantly. Even fried homemade tenders typically contain fewer calories and less sodium than most fast food versions because you aren’t using the same preservatives and flavor enhancers.
Can I use chicken thighs instead of breast?
Absolutely. Thigh meat is more forgiving and stays juicier since it has slightly more fat. The texture is a little different — less “clean” and more rich — but many people actually prefer it. Just make sure to trim off any excess fat and cut the thighs into uniform strips.
Your Next Batch Starts Now
Making homemade chicken tenders really comes down to a few fundamentals: good chicken, proper seasoning throughout (not just on the surface), a coating technique that sticks, and oil at the right temperature. Get those four things right, and everything else is just details.
Start simple. Use the basic three-step dredge with seasoned flour, egg wash, and a second flour coat. Fry at 350°F until golden and 165°F inside. Pair with a quick honey mustard or ranch. Once you’ve got that base recipe dialed in, start experimenting — try panko, try a buttermilk brine overnight, try a spicy chicken sandwich build with your tenders on a toasted bun.
The best part? Once you see how easy this is — and how much better it tastes than anything from a box or a bag — you’ll stop buying the frozen ones for good.