
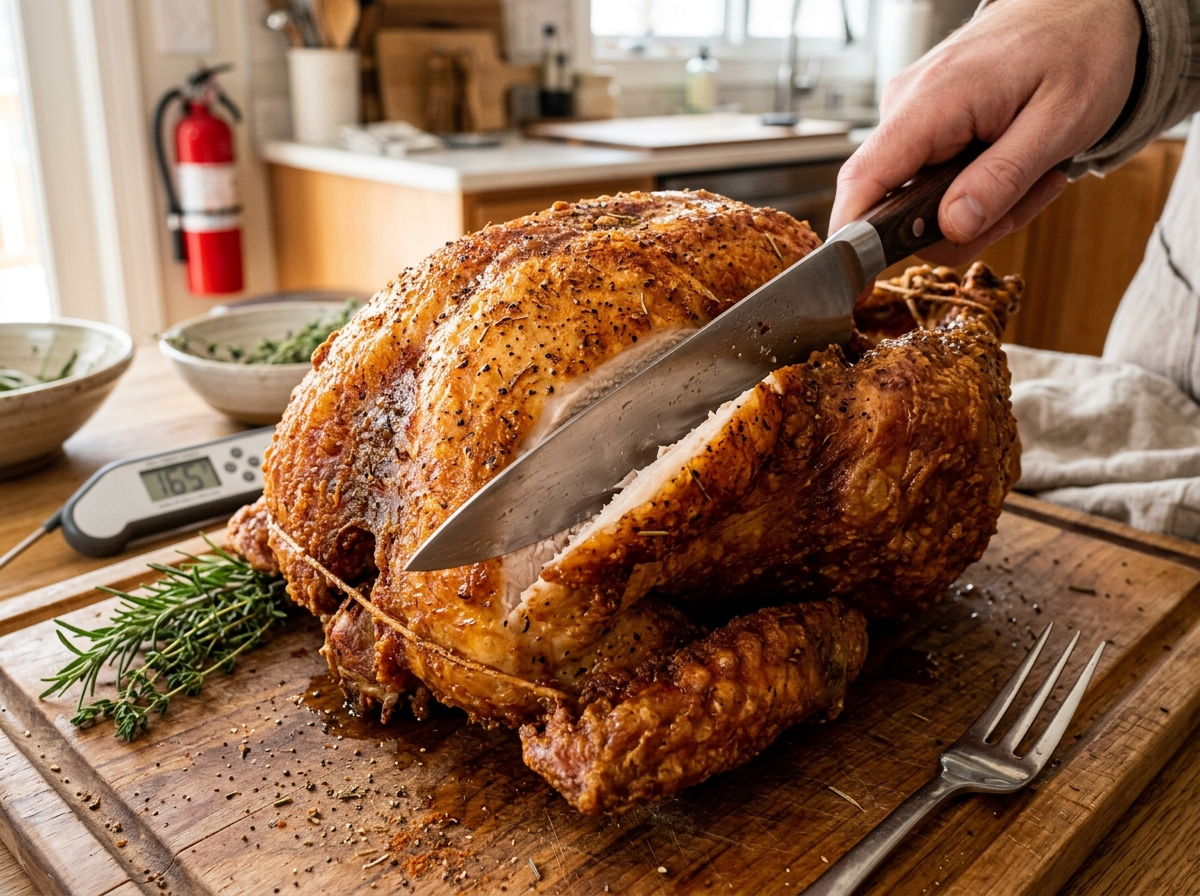
Every year, fire departments across the U.S. respond to over 1,000 cooking fires on Thanksgiving Day alone — and a big chunk of those come from turkey fryers. That stat alone is enough to make most people stick with their oven. But here’s the thing: a deep fried turkey, done correctly, gives you something an oven simply can’t — shatteringly crispy skin with meat so juicy it almost feels unfair.
The problem isn’t the method. It’s how people approach it. They skip the prep, guess the oil temperature, or drop a half-frozen bird into boiling peanut oil and hope for the best. That’s not cooking. That’s gambling.
So let’s walk through this the right way. No shortcuts, no guesswork. You’ll learn exactly how to deep fry a turkey safely, what equipment you actually need, how to prep the bird, manage your oil temperature, and carve out the best turkey you’ve ever put on a table.
Why People Deep Fry Turkey in the First Place
If you’ve only ever had oven-roasted turkey, you might wonder what all the fuss is about. Fair question. Roasting works fine, but it comes with trade-offs. You’re looking at 3 to 4 hours of cook time for a decent-sized bird, and even then, you’re often stuck choosing between dried-out breast meat or undercooked thighs.
Deep frying flips that equation. A 12-pound turkey cooks in roughly 45 minutes — sometimes less. The high heat of the oil (around 350°F) creates an immediate seal on the outside of the skin, locking moisture inside the meat. The result is breast meat that stays tender and thigh meat that practically falls off the bone.
And the skin? Forget about it. It’s golden, paper-thin, and crunchy in a way that oven-roasted turkey can never match. Think of it like the difference between a baked potato and a french fry — same ingredient, completely different experience. If you’ve ever worked on getting the secret to golden, non-greasy fried chicken dialed in, the same basic frying principles apply here, just on a much bigger scale.
The flavor profile is different too. Because cook time is so short, the natural juices don’t have hours to evaporate. You get a turkey that actually tastes like turkey — not like the seasoning you rubbed on it or the broth you basted it with.
The Equipment You Need (And What to Skip)
Before you even think about the bird, let’s talk gear. Getting the right setup is half the battle with deep frying a turkey. You can’t just grab a stock pot and your kitchen stove. That’s how fires start.
Turkey fryer kit: You’ll want a purpose-built outdoor turkey fryer. These typically include a 30-quart (or larger) pot, a burner stand with a propane connection, a poultry rack or basket, and a thermometer. Brands like Bayou Classic and King Kooker have been the go-to for years, and they run between $60 and $150. The pot needs to be tall enough to fully submerge the turkey with several inches of clearance at the top.
Thermometers — yes, plural. You need two. A clip-on deep-fry thermometer attaches to the side of the pot and monitors oil temperature throughout the cook. An instant-read meat thermometer checks the turkey’s internal temperature when you think it’s done. Don’t rely on just one. Oil temperature and meat temperature are two different things, and both matter equally.
A propane tank. Make sure it’s full. Running out of propane mid-cook drops your oil temperature, and the turkey starts absorbing oil instead of crisping. Always have a backup tank on hand.
Fire extinguisher. Not optional. Keep a Class B fire extinguisher (rated for grease and oil fires) within arm’s reach. Never use water on an oil fire — that’s what causes the massive fireballs you see in those viral videos.
What you don’t need: Indoor fryers exist now, and some of them are oil-less air fryers shaped like turkey cookers. They work okay, but they don’t give you the same result. If you want the real deep fried turkey experience — that snap of skin and burst of juice — you’re working outdoors with oil.
Picking the Right Turkey
Size matters here more than you might think. You can’t just grab the biggest bird in the store and drop it in.
Keep it under 15 pounds. Most turkey fryer pots max out around a 14 to 15-pound turkey. Go bigger, and you won’t have enough oil to submerge it properly, or worse, the pot overflows when you lower the bird in. If you’re feeding a big crowd and need more meat, fry two smaller turkeys rather than one massive one. A pair of 12-pounders will cook faster and more evenly than a single 20-pounder ever could.
Fresh vs. frozen: Either works, but the turkey must be completely thawed before it goes anywhere near the oil. This isn’t a suggestion. This is the single most important safety rule in the entire process. Ice and hot oil don’t mix — even small ice crystals inside the cavity can cause dangerous splattering.
If you’re working with a frozen turkey, move it to the fridge at least 4 to 5 days before you plan to fry. The USDA recommends about 24 hours of fridge thawing for every 4 to 5 pounds. A 12-pound bird needs a minimum of three full days.
Skip the pre-brined or self-basting turkeys. Those are injected with a sodium solution, which adds extra moisture under the skin. That extra liquid can cause aggressive popping and spattering when it hits the hot oil. Go with a natural, unflavored bird.
Prepping the Turkey for the Fryer
This is where patience pays off. Good prep is the difference between a safe, successful fry and a stressful, potentially dangerous one.
Dry the turkey thoroughly. After thawing, pull out the giblets and neck from the cavity. Rinse the turkey inside and out with cold water, then pat it dry with paper towels. And I mean really dry. Go through a whole roll if you have to. Let it sit uncovered on a sheet pan in the fridge for a few hours or even overnight after patting it dry. The drier the skin, the less reaction you’ll get when it hits the oil, and the crispier the final result will be.
Season it simply. You don’t need a complicated rub for deep fried turkey. The frying process does most of the heavy lifting in the flavor department. A good coating of kosher salt, black pepper, garlic powder, and a touch of cayenne on the outside is plenty. Some people inject the breast and thigh meat with a Cajun butter marinade using a meat injector — that’s a solid move if you want extra flavor deep in the meat. Just make sure the injection sites are patted dry before frying.
Remove the plastic pop-up timer if your turkey came with one. That thing will melt in hot oil. Also, tuck the wings behind the back and make sure the legs are secured. Most fryer baskets have a hook or rack that holds the turkey in place — test the fit before you fire up the oil.
⚠️ Warning: Never stuff a turkey you’re going to deep fry. The stuffing won’t cook properly at frying temperatures, and it traps moisture inside the bird that can cause dangerous oil eruptions.
The Oil Situation: Type, Amount, and Temperature
Oil choice isn’t just about flavor. It’s about safety and smoke point.
Peanut oil is the standard for deep frying turkey, and there’s good reason. It has a high smoke point (around 450°F), a neutral-to-slightly-nutty flavor that complements poultry, and it doesn’t transfer much taste to the meat. You’ll need about 3 to 5 gallons depending on your pot size and turkey size. Yes, it’s expensive — a 3-gallon jug can run $30 to $40 — but you can strain and reuse peanut oil 2 to 3 times if you store it properly.
If someone in your group has a peanut allergy, canola oil, sunflower oil, or refined safflower oil work as alternatives. All three have smoke points above 400°F. For anyone who’s ever debated which oil works best for frying, the considerations are pretty similar to choosing the best oil for homemade french fries — smoke point, flavor neutrality, and cost all factor in.
How to figure out the right amount of oil: Here’s a trick the pros use. Before fry day, place your turkey in the empty pot. Fill the pot with water until the turkey is submerged with about 2 inches of water above it. Remove the turkey and mark the water line. That’s your oil fill line. Drain the pot completely and dry it out — no water can remain in that pot.
Target oil temperature: 350°F. This is your magic number. Below 325°F, the turkey absorbs oil and turns greasy. Above 375°F, the outside burns before the inside cooks through. Use your clip-on thermometer and adjust the burner to maintain 350°F throughout the cook. The temperature will drop when you lower the turkey in — that’s normal. It should recover within a few minutes.
Setting Up Your Fry Station Safely
Location and setup prevent most turkey frying accidents. This part isn’t glamorous, but it might save your house.
Place your fryer on a flat, stable, non-flammable surface — concrete or bare dirt works best. A patio, driveway, or a cleared spot in the yard is ideal. Never fry on a wooden deck. Never fry in a garage, even with the door open. Never fry under a carport, canopy, or overhang of any kind. You need open air above and around the fryer.
Keep the fryer at least 10 feet away from any structure, including your house, fence, trees, and vehicles. That sounds like overkill until you see how high oil can splatter if something goes sideways.
Make sure kids and pets are nowhere near the fry zone. Set up a clear perimeter. Have your fire extinguisher positioned where you can grab it without reaching over the fryer.
Wear the right clothes. Long sleeves (natural fibers like cotton, not synthetic), closed-toe shoes, and heat-resistant gloves that go past your wrists. Hot oil splashes are no joke — they cause instant, serious burns.
Did you know? The National Fire Protection Association (NFPA) doesn’t recommend home use of turkey fryers at all. They’ve never been listed by any testing lab, including UL (Underwriters Laboratories). That’s exactly why taking every safety step seriously isn’t being paranoid — it’s being smart.
The Frying Process: Step by Step
Alright, everything is prepped, your oil is heating, and your turkey is dry, seasoned, and ready. Here’s how the actual cook goes.
Step 1: Heat the oil slowly. Don’t crank the burner to full blast. Bring the oil up to 350°F gradually over about 20 to 30 minutes. Monitor it constantly with your clip-on thermometer. Oil that overshoots its smoke point can ignite.
Step 2: Turn OFF the burner before lowering the turkey. This is critical. Kill the flame before the bird goes in. If oil splashes onto an active burner, you’ve got a fire. Once the turkey is safely submerged, then reignite the burner.
Step 3: Lower the turkey very slowly. Use the rack or basket that came with your fryer kit. Lower the bird into the oil at a rate of about one inch every few seconds. This gives the oil time to adjust and reduces splashing. You’ll hear aggressive bubbling — that’s moisture escaping from the skin, and it’s normal. If it starts to overflow, stop lowering and wait for the bubbling to calm down.
Step 4: Cook for roughly 3 to 3.5 minutes per pound. A 12-pound turkey needs about 36 to 42 minutes. Keep your oil temperature between 325°F and 350°F for the entire cook. If the temp drops too low, increase the flame slightly. If it creeps above 375°F, reduce it.
Step 5: Check the internal temperature. Pull the turkey up just enough to get an instant-read thermometer into the thickest part of the thigh without touching bone. You’re looking for 165°F minimum. Check the breast too — it should also read at least 165°F. If it’s not there yet, lower it back in for another 5 minutes and check again.
Step 6: Remove and rest. Once your turkey hits temp, carefully lift it out and place it on a sheet pan lined with paper towels or a wire rack. Let it rest for at least 20 to 30 minutes before carving. The internal temperature will continue to rise a few degrees during the rest, and the juices will redistribute throughout the meat.
If you’ve ever worked on perfecting frying temperatures for smaller items — say, getting your corn dogs just right or nailing crispy chicken wings — you already understand how temperature management works. With turkey, the stakes are just higher because of the volume of oil and the size of what you’re cooking.
Flavor Variations That Actually Work
A straight salt-and-pepper deep fried turkey is already fantastic. But if you want to change things up, here are some proven approaches.
Cajun injection: Mix melted butter with Cajun seasoning, garlic powder, onion powder, a squeeze of lemon juice, and a shot of hot sauce. Inject into the breast, thighs, and drumsticks the night before. The frying process heats that butter marinade from inside, basting the meat as it cooks.
Herb butter rub: Combine softened butter with fresh rosemary, thyme, and sage. Carefully loosen the skin over the breast and spread the herb butter directly on the meat under the skin. The oil’s heat renders that butter and infuses the breast meat with flavor.
Dry brine method: Instead of a wet injection, coat the entire turkey with a generous layer of kosher salt, brown sugar, smoked paprika, and black pepper 24 hours before frying. The salt draws moisture out, then pulls it back in along with the seasonings. Pat dry before frying.
Pro Tip: Whatever seasoning you use on the outside, keep it free of sugar-heavy rubs. Sugar burns fast at 350°F and can turn your beautiful golden skin dark and bitter. A little brown sugar in a dry brine is fine because it gets absorbed, but a thick coat of sweet rub on the surface is asking for trouble.
What to Do With the Oil After
You’ve got 3 to 5 gallons of used oil. Don’t pour it down a drain. Don’t dump it in the yard. Here’s how to handle it properly.
Let the oil cool completely — this takes several hours, sometimes overnight. Once cool, strain it through cheesecloth or a fine-mesh sieve into its original container or a clean, sealable container. If the oil still smells clean (not fishy or rancid) and looks relatively clear, you can store it in a cool, dark place and reuse it up to 3 times. It’s great for frying chicken later — and if you’re planning something like fast and crispy fried chicken for a crowd, that seasoned oil actually adds a nice depth of flavor.
Once the oil is spent or smells off, seal it in its container and take it to a local recycling center. Many auto shops and waste collection facilities accept used cooking oil. Some municipalities offer drop-off points specifically for cooking grease, especially around the holidays.
Troubleshooting Common Problems
Even with good prep, things don’t always go perfectly. Here’s what to do when the unexpected happens.
Oil temperature won’t come back up after dropping the turkey in. Your burner might be struggling in cold or windy conditions. Use a wind guard around the base of the fryer, or position the setup to block prevailing wind. Also check that your propane tank isn’t running low.
The skin is getting too dark too fast. Your oil temperature is too high. Turn down the burner immediately. You want steady heat, not blazing heat. If the outside is already dark but the meat isn’t done, you may need to pull the turkey, let the oil cool to 325°F, and lower it back in to finish gently.
The turkey floats and bobs. This happens sometimes, especially with smaller birds. Use your fryer’s rack or hook to keep the turkey submerged. If it’s bobbing aggressively and oil is splashing over the sides, your pot might be too full — you may have used too much oil relative to the turkey’s size.
Oil bubbles over the edge. Kill the burner immediately. Do not attempt to move the pot. Wait for the bubbling to subside. This almost always means the turkey had too much moisture on or inside it. That’s why the drying step is so important — and why you should never fry a turkey that’s even partially frozen.
A Few Things About Timing and Sides
One of the best things about deep frying your turkey is how much oven and stove time it frees up. While your bird fries outside in under an hour, your oven is free for casseroles, rolls, pies, and whatever else your spread includes.
If you’re hosting a big gathering — maybe a Thanksgiving that doubles as a football watch party — the fried turkey becomes the centerpiece while you fill the table with sides. Think about rounding out the menu with southern comfort foods built for a watch party or a solid lineup of finger foods that work for game day crowds. A deep fried turkey pairs especially well with coleslaw, cornbread, and mac and cheese — the crunch of the skin against creamy, rich sides creates exactly the kind of contrast that keeps people going back for more.
FAQ
How long does it take to deep fry a turkey?
Plan for about 3 to 3.5 minutes per pound at 350°F. A 12-pound turkey takes roughly 36 to 42 minutes. Always verify doneness with an instant-read thermometer — the thigh and breast should both read at least 165°F before you pull it out.
Can you deep fry a turkey in the rain?
You technically can, but it’s not recommended. Rain hitting hot oil causes splattering and makes the surface around the fryer slippery. If rain is in the forecast, set up a freestanding canopy well above the fryer (at least 10 feet overhead clearance), but honestly, rescheduling or choosing a different cooking method is the safer call.
What size turkey is best for deep frying?
Stick with turkeys between 10 and 14 pounds. This range fits comfortably in most 30-quart fryer pots and cooks evenly. If you need to feed a large group, fry two smaller birds instead of forcing one large turkey into the pot.
Is deep fried turkey greasy?
Not when you do it right. If the oil stays at 350°F throughout the cook, the high heat prevents the turkey from absorbing oil. The skin comes out crispy, not oily. Greasiness happens when oil temperature drops too low — that’s why monitoring your thermometer the whole time is essential.
Can you reuse the frying oil?
Yes. Strain it through cheesecloth after it cools completely, store it in a sealed container in a cool, dark spot, and you can reuse it 2 to 3 times. If it starts to smell off, look foamy, or has turned dark, it’s time to dispose of it responsibly.
Your Turkey, Your Way — Just Do It Safely
Deep frying a turkey isn’t hard. It’s not reckless either, as long as you respect the process. Thaw completely, dry thoroughly, measure your oil, hold your temperature, and never walk away from a live fryer. Those five things prevent the vast majority of turkey frying disasters.
What you get in return is a turkey that cooks in a fraction of the time, stays impossibly juicy, and has skin that crackles when you bite through it. Once you’ve had one done right, the oven method starts to feel like settling.
So get your gear together, pick a good 12-pounder, clear a safe spot in the yard, and give it a shot. Your Thanksgiving table — and everyone sitting around it — will thank you.