
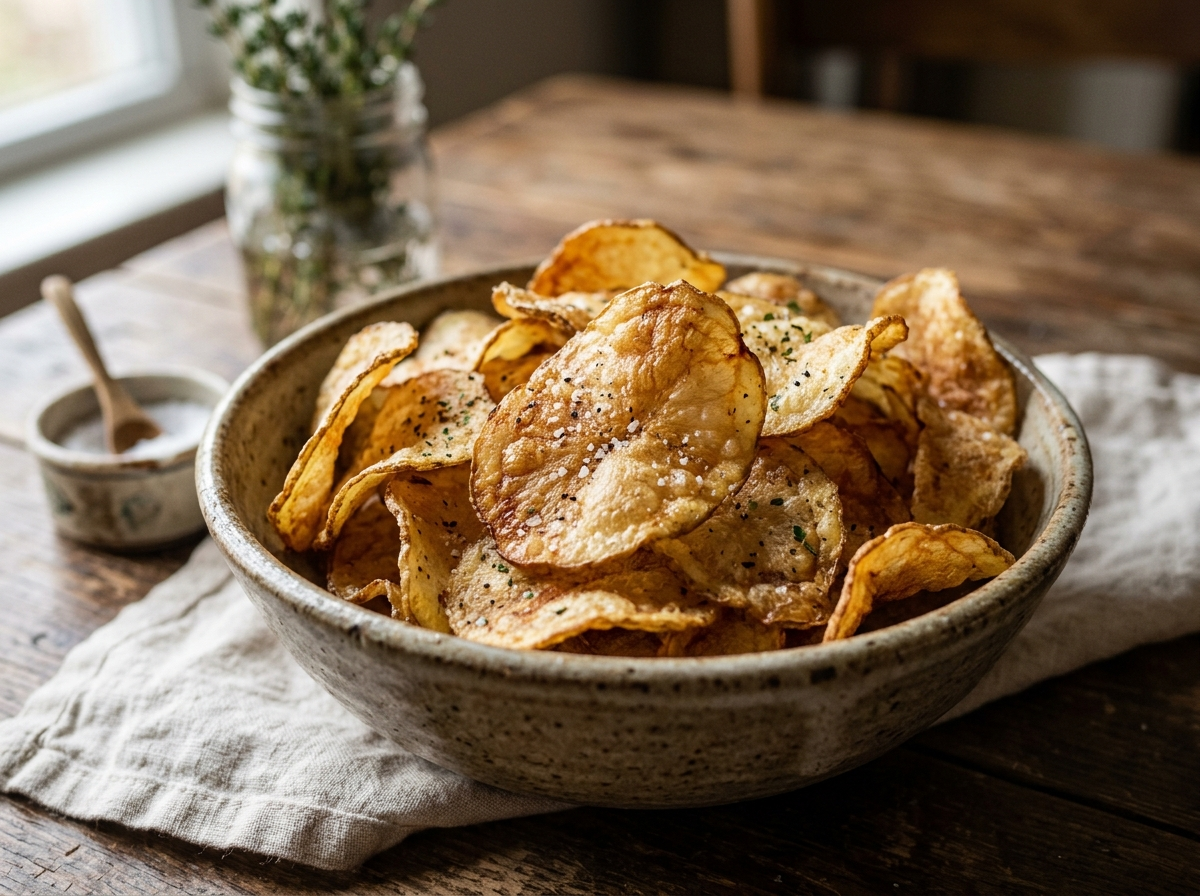
A single potato can give you a full bowl of chips that taste nothing like what comes out of a bag. That’s not an exaggeration. The difference between freshly fried homemade potato chips and their store-bought cousins is the kind of difference you feel on the first bite — and then you can’t stop reaching for more. The crunch is louder, the flavor is cleaner, and you control everything from the thickness to the seasoning.
Yet most people never try making chips at home. The usual reasons? They think it’s too complicated, they’re worried about getting them crispy, or they just don’t know where to start. Fair enough. But here’s the truth — potato chips are one of the simplest fried snacks you can make in your own kitchen. You need a potato, some oil, salt, and about 20 minutes. That’s the whole deal.
This guide walks you through the entire process — picking the right potato, slicing it properly, frying at the correct temperature, and seasoning your chips so they taste like you actually know what you’re doing. Whether you’re prepping snacks for your next football watch party or just craving something crispy on a Tuesday night, this is your go-to resource.
Why Homemade Potato Chips Hit Different
You might wonder why you’d bother making potato chips from scratch when a bag costs two bucks at the store. It’s a reasonable question.
The answer comes down to three things: freshness, control, and flavor.
Store-bought chips are made in massive industrial fryers, then packaged with preservatives and nitrogen gas to keep them shelf-stable for months. They taste fine — we’ve all eaten plenty of them. But they’re designed for consistency and shelf life, not for peak flavor.
Homemade potato chips are eaten within minutes of leaving hot oil. That freshness creates a crunch and a clean potato flavor that no factory can replicate. You also get to decide exactly how thick or thin they are, what oil you fry them in, and what seasonings go on top. Want them dusted with smoked paprika and garlic powder? Done. Prefer just sea salt and cracked black pepper? Easy.
There’s also something satisfying about watching a raw potato slice puff up and turn golden in hot oil. It’s one of those kitchen moments that feels almost like magic — simple ingredients transforming into something genuinely addictive.
Picking the Right Potato (This Matters More Than You Think)
Not all potatoes behave the same way in hot oil, and choosing the wrong one is probably the most common mistake people make with homemade chips.
Russet potatoes are the classic choice for chips, and for good reason. They’re high in starch and low in moisture, which means they crisp up beautifully and don’t turn limp or soggy. If you’ve ever made homemade french fries, you already know that Russets handle frying like a pro.
Yukon Golds are another solid option. They’ve got a slightly creamier texture and a naturally buttery flavor that comes through even after frying. They won’t crisp up quite as aggressively as Russets, but the taste makes up for it.
Red potatoes and fingerlings can work too, especially if you’re going for a thicker, heartier chip. Just know that their higher moisture content means you need to be extra careful with your fry time and temperature.
Pro Tip: Whatever potato you choose, look for ones that are firm and free of green spots. Green patches on potatoes indicate solanine — a natural toxin that tastes bitter and isn’t great for you. Just cut those parts away or pick a different potato altogether.
The Slicing Secret: Thin and Uniform
Here’s where your chips either succeed or fail. If your slices aren’t uniform in thickness, some chips will burn while others stay undercooked. That’s frustrating, and it’s completely avoidable.
The ideal thickness for a homemade potato chip is about 1/16 of an inch — roughly the thickness of a coin. You want them thin enough to turn translucent when you hold them up to light, but not so thin that they disintegrate in the oil.
A mandoline slicer is your best friend here. You can pick up a decent one for under $20, and it’ll give you perfectly even slices every single time. If you don’t have one, a sharp knife works — but it takes practice and patience to keep slices consistent by hand.
One thing people skip that makes a real difference: soaking the slices in cold water after cutting. This rinses off excess surface starch, which helps the chips crisp up instead of sticking together in the oil. A 20 to 30-minute soak in cold water does the trick. Some folks even add a splash of white vinegar to the soaking water — about a tablespoon per quart — which helps the potato hold its structure during frying and produces an even crispier chip.
After soaking, dry your potato slices thoroughly. This step is non-negotiable. Wet potato slices hitting hot oil means dangerous splattering and soggy chips. Spread them out on clean kitchen towels or paper towels and pat them dry. Both sides. Every slice.
Choosing Your Frying Oil
The oil you use affects the flavor, the crunch, and how healthy (or unhealthy) your chips end up being. If you’ve ever looked into choosing the best oil for frying, you know this can get surprisingly nuanced.
For potato chips, you want an oil with a high smoke point and a neutral flavor — something that lets the potato taste shine through without adding its own competing flavors.
Peanut oil is the gold standard for frying chips. It handles high heat beautifully, has a clean taste, and produces consistently crispy results. Many professional kitchens and food trucks use peanut oil for exactly these reasons.
Vegetable oil and canola oil are the budget-friendly workhorses. They get the job done without breaking the bank, and their neutral flavor won’t overpower your seasonings.
Avocado oil is a premium option with one of the highest smoke points available — around 520°F. It’s pricier, but if you’re health-conscious and want clean-tasting chips, it’s worth considering.
Coconut oil adds a subtle sweetness that pairs well with certain seasonings like cinnamon sugar or curry powder. It’s a fun choice for flavored chip experiments, but it’s not ideal if you want a classic, neutral-tasting chip.
One rule that applies across the board: use enough oil. You want at least 2 to 3 inches of oil in your pot or Dutch oven. The chips need room to float freely. Overcrowding the pot drops the oil temperature and gives you greasy, limp chips instead of crispy ones.
Frying Temperature: The Number That Changes Everything
If there’s one piece of information that separates great homemade chips from disappointing ones, it’s frying temperature. Get this wrong, and nothing else you do will save your chips.
The sweet spot for frying potato chips is 350°F to 375°F (175°C to 190°C).
Below 325°F, your chips absorb too much oil before they crisp up. You end up with greasy, heavy chips that feel more oily than crunchy. Above 400°F, the outside burns before the inside cooks through. You get chips that are dark brown on the edges but still chewy in the center.
A clip-on deep fry thermometer is the easiest way to monitor your oil temperature. They’re cheap, accurate, and they clip right to the side of your pot. If you’ve been working on frying at home without a deep fryer, you already know that temperature control is the single most important factor in getting crispy results.
Did you know? Every time you add a batch of potato slices to hot oil, the temperature drops — sometimes by as much as 25°F. That’s why frying in small batches matters so much. Add too many slices at once, and you’re basically boiling your potatoes in lukewarm oil instead of frying them.
Here’s a practical trick: let your oil come back up to temperature between batches. Give it 60 to 90 seconds. Watch your thermometer. Patience here pays off with better chips.
The Frying Process: Step by Step
Let’s walk through the actual frying, from oil to finished chip.
Start by setting up your workstation. You want your dried potato slices within arm’s reach, your pot of oil heated to 360°F, a slotted spoon or spider strainer ready, and a sheet pan lined with paper towels waiting nearby. Having everything set up before you start frying keeps the process smooth and safe.
Drop a small batch of potato slices — maybe 10 to 15 at a time — gently into the hot oil. They’ll immediately start bubbling. That bubbling is moisture escaping from the potato, which is exactly what needs to happen for them to crisp up.
Use your slotted spoon to gently separate any slices that stick together. This is common in the first 30 seconds or so. A quick stir keeps everything frying evenly.
Watch for color. You’re looking for a light golden yellow — not brown, not dark amber. Light golden. Most chip batches take between 2 to 4 minutes depending on thickness and your oil temperature. The chips will also stop bubbling as aggressively when they’re nearly done — that reduction in bubbling tells you most of the moisture has cooked out.
Warning: Chips continue to darken slightly after you pull them from the oil. The residual heat keeps working. So pull them out when they’re just a shade lighter than your ideal color.
Transfer your finished chips to the paper towel-lined sheet pan and season them immediately while they’re still glistening with oil. The oil helps the seasoning stick. Wait too long, and the salt just slides right off.
Seasoning Ideas That Go Beyond Just Salt
Plain salted potato chips are a thing of beauty, and there’s nothing wrong with keeping it simple. Good sea salt or flaky Maldon salt on fresh, hot chips is genuinely perfect.
But if you’re making chips from scratch, why not experiment? Here are a few seasoning combinations worth trying:
BBQ Style — Mix smoked paprika, garlic powder, onion powder, a touch of brown sugar, and a pinch of cayenne. Dust this over hot chips for that smoky, sweet, slightly spicy flavor profile that reminds you of summer cookouts.
Salt and Vinegar — This one takes a little extra work. Add 2 tablespoons of white vinegar to your soaking water, and then hit the finished chips with fine salt and a light spray of malt vinegar. The soaking step infuses tanginess into the potato itself.
Ranch — Combine dried dill, dried parsley, garlic powder, onion powder, and a bit of dried chives with salt. It’s homemade ranch seasoning, and it clings to hot chips beautifully.
Spicy Kick — If you like heat, try cayenne pepper, chili powder, and a touch of lime zest. This combination works especially well if you enjoy dishes like Nashville hot chicken — that same vinegar-meets-heat philosophy translates surprisingly well to potato chips.
Parmesan Herb — Finely grated Parmesan cheese with dried rosemary and black pepper. The cheese melts slightly on contact with the hot chip and creates a savory, umami-rich coating.
The key with any seasoning is to apply it while the chips are still hot and to toss them gently so every chip gets coated. A large bowl works better than the sheet pan for this — you can toss without breaking chips.
Baked Potato Chips: A Lower-Oil Alternative
Not everyone wants to deal with a pot full of hot oil, and that’s perfectly understandable. Baked potato chips won’t taste exactly like fried ones — let’s be honest about that upfront — but they can still be really good in their own right.
Preheat your oven to 400°F. Toss your soaked and dried potato slices with just enough oil to lightly coat them — about a tablespoon of olive oil per potato. Spread them in a single layer on a parchment-lined baking sheet. Don’t overlap them.
Bake for 15 to 20 minutes, flipping once at the halfway mark. Watch them carefully in the last few minutes because they go from golden to burnt fast. Like fried chips, they’ll continue to crisp up slightly as they cool.
Baked chips come out thinner and more delicate than fried ones. They shatter more easily and have a lighter feel. The flavor is a bit more “potato-forward” since there’s less oil involved.
Pro Tip: For extra-crispy baked chips, try placing a wire cooling rack on top of the baking sheet and laying the potato slices on the rack. The air circulation underneath helps both sides crisp up evenly, and you don’t have to flip them.
Troubleshooting Common Problems
Even simple recipes can go sideways. Here are the issues people run into most often with homemade chips, and how to fix them.
Chips are greasy and limp. Your oil temperature was too low. Potatoes absorb oil when the heat isn’t high enough to instantly seal the surface. Check your thermometer and make sure you’re staying above 350°F. Also, don’t overcrowd the pot — too many slices at once drops the temperature quickly.
Chips are burning before they crisp. Your oil is too hot, or your slices are too thin. Dial the temperature back to 350°F and make sure you’re slicing consistently. If only the edges are burning, your slices might have uneven thickness.
Chips aren’t staying crispy after cooling. You probably didn’t remove enough moisture before frying. Soak them longer, dry them more thoroughly, and make sure you’re frying until the bubbling slows way down. Also, don’t pile hot chips on top of each other — the steam softens the ones underneath. Spread them out in a single layer to cool.
Chips are sticking together in the oil. You need to stir gently during the first 30 seconds of frying. Also, adding too many slices at once makes clumping more likely. Smaller batches solve this.
Chips taste bland even with seasoning. Season them the moment they come out of the oil. If you wait even two minutes, the surface dries and seasoning won’t stick. You can also try seasoning your soaking water with a bit of salt — this pre-seasons the potato from the inside.
Storing Your Homemade Chips
Let’s be realistic — a batch of homemade potato chips rarely lasts long enough to need storage. But if you somehow manage to have leftovers, or you’re making a big batch for a party, here’s what you need to know.
Homemade chips are best eaten within a few hours of frying. They’re at peak crunch right after they cool down, and they gradually lose crispness as they sit. That said, you can store them in an airtight container or a zip-top bag (squeeze out the excess air) at room temperature for up to 2 to 3 days.
If they’ve gone a little soft, spread them on a baking sheet and pop them in a 300°F oven for 5 minutes. That burst of heat drives out any absorbed moisture and restores some of the crunch. It won’t be exactly the same as fresh, but it’s close enough.
Don’t refrigerate potato chips. The moisture in the fridge will make them soggy almost immediately.
Pairing Homemade Chips With Dips and Meals
Homemade potato chips aren’t just a standalone snack. They’re versatile enough to work as a side dish, a party appetizer, or even a topping.
Thick-cut homemade chips hold up well under toppings — think along the lines of loaded chili cheese fries, but with chips instead of fries. Layer on chili, shredded cheese, jalapeños, and sour cream for a nacho-style chip plate that disappears fast at any gathering.
They’re also a perfect companion to sandwiches. A crispy homemade chip alongside a fried pork tenderloin sandwich or a spicy chicken sandwich is the kind of lunch that makes you feel like you’ve got your life together.
For dipping, classic options like French onion dip, guacamole, and queso all work great. But also consider something unexpected — a warm pimento cheese dip or a blue cheese and bacon dip. Sturdy homemade chips can handle thicker, chunkier dips that would snap a flimsy store-bought chip in half.
FAQ
How thin should I slice potatoes for homemade chips?
Aim for about 1/16 of an inch thick — roughly the thickness of a coin. A mandoline slicer gives you the most consistent results, but a sharp knife works if you take your time. Uniform thickness is more important than hitting an exact measurement because it ensures all your chips cook at the same rate.
What’s the best oil temperature for frying potato chips?
Keep your oil between 350°F and 375°F. Use a clip-on thermometer to monitor it, because oil temperature drops every time you add a new batch of slices. Let it recover between batches for the crispiest results.
Why do my homemade chips come out soggy?
The most common causes are oil that’s not hot enough, potato slices that weren’t dried properly before frying, and overcrowding the pot. Make sure your slices are patted bone-dry, keep your oil at the right temperature, and fry in small batches.
Can I make potato chips without a deep fryer?
Absolutely. A heavy-bottomed pot or Dutch oven with 2 to 3 inches of oil works perfectly. You can also bake them at 400°F for a lower-oil version. Many home cooks prefer the pot method because it’s easier to control the temperature and you don’t need any special equipment.
How long do homemade potato chips stay fresh?
They’re best within a few hours of making them. Stored in an airtight container at room temperature, they’ll keep for 2 to 3 days. You can re-crisp them in a 300°F oven for about 5 minutes if they’ve softened.
Your Next Batch Is Waiting
Making potato chips at home is one of those things that sounds fancier than it actually is. A potato, some oil, salt, and a little attention to temperature — that’s really all it takes to produce chips that are crunchier, tastier, and fresher than anything you’ll pull off a store shelf.
Start with a basic batch of salted Russet chips. Nail the technique — the soaking, the drying, the temperature control. Once you’re comfortable with the fundamentals, start playing with seasonings, different potato varieties, and cooking methods. You’ll find your favorites fast.
And next time you’re putting together snacks for game day or just want something satisfying on a lazy afternoon, skip the chip aisle. Your kitchen can do better.