
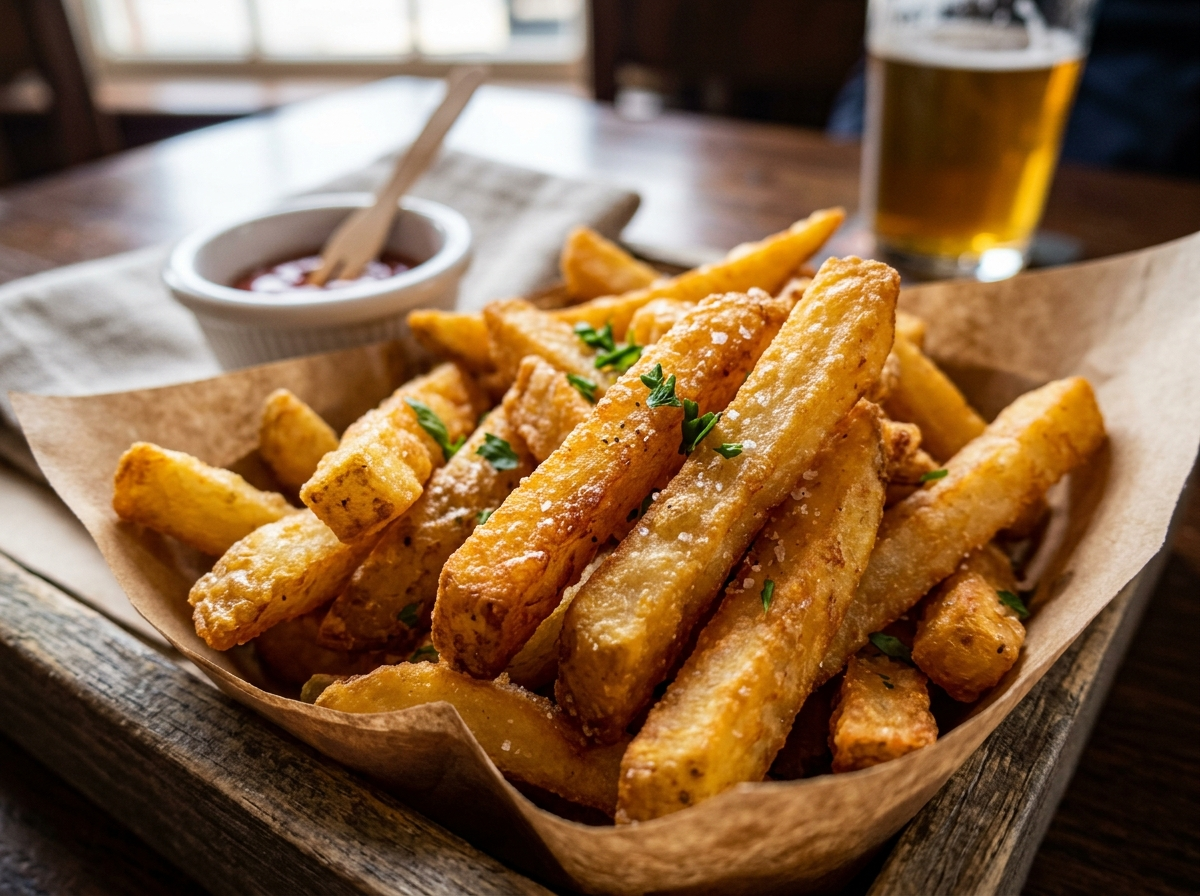
You grab a fry from the plate, expecting that satisfying crunch, and instead you get… a sad, limp, pale stick of potato that bends like rubber. Sound familiar? You’re not alone. Most homemade fries end up disappointing because people skip a few small but critical steps that make the difference between “okay” and “oh wow.”
Here’s the thing — making golden crisp french fries at home isn’t just possible, it’s actually easier than you think once you understand why certain techniques work. You don’t need a commercial kitchen or fancy gadgets. You need the right potato, the right oil, and a bit of patience. That’s it.
Let’s break down exactly how to get there.
Why Most Homemade Fries Fall Flat
Before we talk about what to do, let’s talk about what usually goes wrong. Because knowing the problem is half the solution.
The number one reason homemade fries turn out soggy is excess starch and moisture. Potatoes are full of both, and if you don’t deal with them before frying, that water turns to steam inside the hot oil. The result? Fries that puff up for a second and then collapse into greasy, soft disappointments.
The second biggest mistake? Frying at the wrong temperature. Too low, and the fries absorb oil like a sponge. Too high, and the outside burns while the inside stays raw. There’s a sweet spot, and we’ll get to that.
And the third mistake most people make is skipping the double-fry method. Yes, it takes more time. But if you want that crackling exterior with a fluffy interior — the kind you get at your favorite burger joint — you really can’t skip it.
Choosing the Right Potato
Not all potatoes are created equal, and this is one area where the wrong pick will sink your fries before you even heat up the oil.
Russet potatoes (also called Idaho potatoes) are your best friend here. They’re high in starch and low in moisture, which is exactly what you want. That starch creates the crispy shell on the outside, and the low moisture means less steam, less sogginess.
Yukon Golds can work if that’s what you’ve got on hand. They’ll give you a creamier interior and a slightly different texture — more of a thin, crispy bite than a big fluffy crunch. Some people actually prefer them for thinner fry cuts.
What you want to avoid are waxy potatoes like red potatoes or fingerlings. They hold too much moisture, and you’ll never get that golden crunch no matter what you do.
Quick tip: Look for potatoes that feel firm and heavy for their size. If they’re sprouting or have green spots, pass on them. Green spots indicate solanine, which is mildly toxic and tastes bitter.
The Cut Matters More Than You Think
You might assume that how you cut a potato doesn’t change much. But the size and shape of your fries directly affect cooking time, crispiness, and texture.
For classic golden crisp french fries, aim for a cut about 1/4 inch to 3/8 inch thick. This gives you enough surface area for a good crust while leaving room for that soft, fluffy center. Go too thin and they’ll crisp up fast but won’t have much interior. Go too thick and you’ll struggle to cook them through without burning the outside.
Try to keep your cuts uniform. If half your fries are thick and half are thin, they’ll cook unevenly. The thin ones will burn while the thick ones stay underdone. A sharp chef’s knife helps here — or use a mandoline with a fry-cutting attachment if you want consistent results.
One more thing: cut your fries lengthwise along the potato. You’ll get longer, better-looking fries that hold up well during cooking.
Soaking and Rinsing — The Step You Can’t Skip
Here’s where most recipes lose people. Soaking your cut potatoes in cold water feels unnecessary, right? Like an extra step you can just ignore?
You can’t. Not if you want genuinely crispy fries.
When you soak cut potatoes in cold water for at least 30 minutes (overnight in the fridge is even better), you’re pulling out excess surface starch. That loose starch is what causes fries to stick together and turn gummy. Removing it gives you a cleaner fry with a better crust.
After soaking, rinse them under cold running water until the water runs clear. You’ll notice the soaking water looks cloudy and milky — that’s all the starch coming out. Good. You want it gone.
Now here’s the part that’s equally important: dry them completely. Seriously. Pat them down with paper towels or a clean kitchen towel until there’s no visible moisture on the surface. Water and hot oil don’t mix — you’ll get dangerous splattering and your fries won’t crisp properly. Every drop of water left on the surface is fighting against the crunch you’re trying to build.
Picking Your Frying Oil
The oil you use affects flavor, crispiness, and even how healthy your fries turn out. This decision deserves some thought.
Peanut oil is widely considered the gold standard for french fries. It has a high smoke point (around 450°F), a neutral-to-slightly-nutty flavor, and it produces incredibly crispy results. Many restaurants and food trucks use it for exactly this reason. If you’re setting up a food truck menu, peanut oil is often the go-to choice for fried items.
Vegetable oil and canola oil are solid alternatives. They’re cheaper than peanut oil, have high smoke points, and won’t impart much flavor to your fries. Perfectly good choices for home cooking.
Beef tallow is the old-school option. McDonald’s used it until the early 1990s, and plenty of fry lovers swear nothing beats the flavor. It gives fries a richer, almost savory taste that’s hard to replicate with plant-based oils. The downside? It’s a saturated fat, so it’s not the healthiest pick for everyday cooking.
If you want a deeper breakdown on oil choices, there’s a helpful article on choosing the best oil for homemade french fries that covers the pros and cons in detail.
Whatever oil you choose, make sure you have enough. You need at least 3 to 4 inches of oil in your pot or fryer. Fries should be able to swim freely — crowding them drops the oil temperature and creates steam instead of crispiness.
The Double-Fry Method — Your Secret Weapon
This is what separates restaurant-quality fries from home-kitchen mediocrity. The double-fry technique. It sounds like extra work, but the payoff is enormous.
Here’s how it works:
First fry (the blanch fry): Heat your oil to 300°F to 325°F. Add your dried potato strips in small batches — don’t overcrowd the pot. Fry them for about 5 to 7 minutes. They won’t look golden yet. They’ll look pale, maybe slightly translucent. That’s exactly right. You’re cooking the inside of the potato, building structure, and starting the starch conversion that leads to crispiness. Pull them out and lay them on a wire rack or paper towels.
Now let them rest. At minimum, give them 15 to 20 minutes at room temperature. Some cooks let them cool for up to two hours or even freeze them at this stage for later use. During this rest, the exterior dries out and the interior cools and firms up — setting the stage for a perfect second fry.
Second fry (the crisp fry): Crank your oil up to 375°F to 400°F. Drop the par-cooked fries back in, again in small batches. Fry for 2 to 4 minutes, until they’re deep golden brown and visibly crispy. They’ll float near the surface and the bubbling will slow down — that’s your visual cue that the moisture is gone and the crust has set.
Pull them out, shake off excess oil, and season immediately while they’re hot. Salt sticks best to hot, slightly oily surfaces.
Pro Tip: A thermometer isn’t optional here. Guessing your oil temperature almost guarantees inconsistent results. A simple clip-on deep-fry thermometer costs a few dollars and makes a massive difference. Getting temperature right is just as critical for fries as it is for achieving non-greasy fried chicken.
Can You Get Crispy Fries Without Deep Frying?
Not everyone wants to deal with a big pot of oil. Fair enough. The good news is you can still get genuinely crispy fries using other methods — though you’ll make some trade-offs.
Oven-baked fries can get surprisingly crispy if you do it right. The key is high heat (425°F to 450°F), a well-oiled baking sheet (or parchment paper), and making sure the fries aren’t touching each other. Overcrowding on the sheet means the fries steam instead of roast. Flip them halfway through, and you can get a nice golden exterior. They won’t be identical to deep-fried, but they’ll be good.
Air fryers have become hugely popular, and they do a decent job with fries. Toss your cut and dried potatoes with a tablespoon or two of oil, spread them in a single layer, and cook at 380°F to 400°F for about 15 to 20 minutes, shaking the basket every 5 minutes. The results are crispy enough to satisfy most people, with way less oil.
For more ideas about frying with less oil, check out this guide on how to fry at home without deep frying. It covers pan-frying and shallow-frying techniques that work well for smaller batches.
Seasoning: Keep It Simple or Go Bold
Here’s where you get to have fun. Golden crisp french fries are a blank canvas, and the seasoning options are practically endless.
The classic approach is just fine salt — not coarse salt, which tends to bounce right off. Fine salt clings to the surface and distributes evenly. Season your fries the second they come out of the oil while they’re still glistening.
If you want to step it up, try mixing salt with a little garlic powder, smoked paprika, or onion powder. These dry seasonings stick well and add flavor without making the fries wet or soggy.
Want to go further? Toss your hot fries with grated Parmesan cheese and minced fresh parsley. Or sprinkle on some Old Bay seasoning — it’s phenomenal with fries and not just for seafood. A touch of cayenne pepper or chili powder works great if you like heat.
And if you really want to turn a plate of fries into a full-blown snack situation, pile on chili, cheese sauce, and jalapeños for loaded game day chili cheese fries. Perfect for watch parties or tailgating.
Keeping Fries Crispy After Cooking
There’s nothing sadder than perfectly fried potatoes turning soft five minutes later. It happens because steam gets trapped between the fries as they sit. But you can fight it.
Use a wire rack instead of paper towels. Paper towels absorb oil, yes, but they also trap steam underneath the fries. A wire rack set over a sheet pan lets air circulate around the fries from all sides, keeping them crispier for longer.
Don’t cover them. Putting a lid on your fries or wrapping them in foil creates a steam bath. Keep them uncovered.
Serve fast. French fries are at their absolute best within the first five minutes after cooking. If you’re feeding a crowd, fry in batches and serve each batch as it comes out rather than waiting until everything’s done.
If you’re holding fries for a few minutes while you finish other things, stick them in an oven set to 200°F on a wire rack. It’ll keep them warm without making them rubbery.
What About Frozen Fries?
Let’s be real — not everyone has time to cut, soak, dry, and double-fry potatoes from scratch every time they want fries. Frozen fries exist for a reason, and there’s no shame in using them.
The key to making frozen fries taste great is, again, temperature control. Don’t thaw them before frying — cook them straight from the freezer. The ice crystals on the surface actually help create steam pockets that contribute to crispiness.
For deep-frying frozen fries, heat your oil to 375°F and cook for about 3 to 5 minutes until golden. For the oven or air fryer, follow the package directions but consider bumping the temperature up by 10-15 degrees and adding a light spray of oil.
One thing to watch: many frozen fries already contain salt and coatings. Taste one before you season the whole batch, so you don’t end up with a salt bomb.
Pairing Your Fries With the Right Main Course
Great fries deserve great company. And honestly, the pairing can make or break a meal.
The most obvious match is a burger. A perfectly cooked smash burger with crispy fries on the side is one of life’s simple pleasures. If you’ve never tried making smash burgers at home, it’s easier than you’d expect — and the thin, lacy-edged patties pair incredibly well with thick-cut golden fries.
Fried chicken is another natural partner. Whether it’s classic Southern fried chicken or Nashville hot chicken tenders, the crunch-on-crunch combination with fries is deeply satisfying.
Don’t overlook sandwiches, either. A spicy chicken sandwich with a side of golden crisp fries? That’s a meal that rivals anything at a fast food drive-through, and you made it in your own kitchen.
For a party spread, fries fit right in alongside the best finger foods for football parties. Set up a fry bar with different dipping sauces — ketchup, ranch, chipotle mayo, honey mustard — and let your guests go at it.
The History Behind the Fry
Here’s a fun aside for those who like knowing where their food comes from. French fries probably aren’t even French. Belgium has a strong claim to inventing the fried potato strip, with stories dating back to the late 1600s. The name “French fries” likely came from American soldiers in World War I who encountered fried potatoes in Belgium — but since the locals spoke French, the soldiers called them “French fries.”
Thomas Jefferson is often credited with bringing the concept to America after his time in France in the late 1700s. He served “potatoes fried in the French manner” at White House dinners.
If you find this kind of food history interesting, there’s a whole article on the background and history of homemade french fries worth reading.
A Quick Comparison: Fry Styles and Cuts
Not all fries are the same shape, and each cut gives you a different eating experience.
Standard cut (3/8 inch): The all-purpose classic. Good crunch-to-fluff ratio. Works with everything.
Shoestring (1/8 inch): Ultra-thin, ultra-crispy. These cook fast and are basically all crunch, no fluff. Great as a garnish or snack.
Steak fries (1/2 inch or thicker): Thick wedges with lots of fluffy interior and a moderate crust. They’re hearty and filling, but harder to get fully crispy without the double-fry method.
Waffle fries: Cut using a mandoline with a crinkle blade, rotated 90 degrees between each slice. Lots of surface area means extra crunch, plus the holes hold dipping sauces.
Curly fries: These usually require a spiralizer and a seasoned coating. Fun, but hard to replicate at home without the right tools.
If you enjoy making potato-based snacks and want to try something different, you might also like learning how to make homemade potato chips — thin, crispy, and completely customizable.
FAQ
What’s the best temperature for frying french fries?
Use a two-stage approach. Start with a lower temperature of 300°F to 325°F for the first fry to cook the interior. Then increase to 375°F to 400°F for the second fry to create that golden, crispy shell. Using a thermometer is the best way to stay accurate.
Why do my homemade fries turn out soggy?
Three likely reasons: you didn’t soak and rinse out the excess starch, you didn’t dry the potatoes thoroughly before frying, or you overcrowded the pot. Any of these will introduce too much moisture into the oil, leading to soft, greasy fries instead of crispy ones.
Can I make crispy fries in an air fryer?
Yes. Toss your cut and dried potatoes with a small amount of oil, arrange them in a single layer in the basket, and cook at 380°F to 400°F for 15 to 20 minutes. Shake the basket every 5 minutes for even cooking. They won’t be exactly like deep-fried fries, but they get surprisingly close.
How long should I soak potatoes before frying?
At least 30 minutes in cold water. For even better results, soak them overnight in the refrigerator. This removes more surface starch and gives you a noticeably crispier fry.
Do I need to peel potatoes for french fries?
It’s a personal preference. Peeled potatoes give you a cleaner, more uniform look and texture. Leaving the skin on adds a rustic feel, a bit of extra fiber, and a slightly different taste. Either way works — just make sure you scrub the potatoes well if you’re keeping the skins.
Your Fries, Your Rules
Making golden crisp french fries at home comes down to a handful of decisions: the right potato, a proper soak, thorough drying, the right oil at the right temperature, and the patience to fry twice. None of these steps are complicated. They just require a little intention.
Once you’ve got the basics down, you can experiment endlessly — different cuts, different seasonings, different oils. Try them as a side for your next cookout, as the base for loaded fries, or just as a solo snack with your favorite dipping sauce.
The best batch of fries you’ll ever eat might just be the one you make yourself tonight. Grab some russets and heat up that oil.