
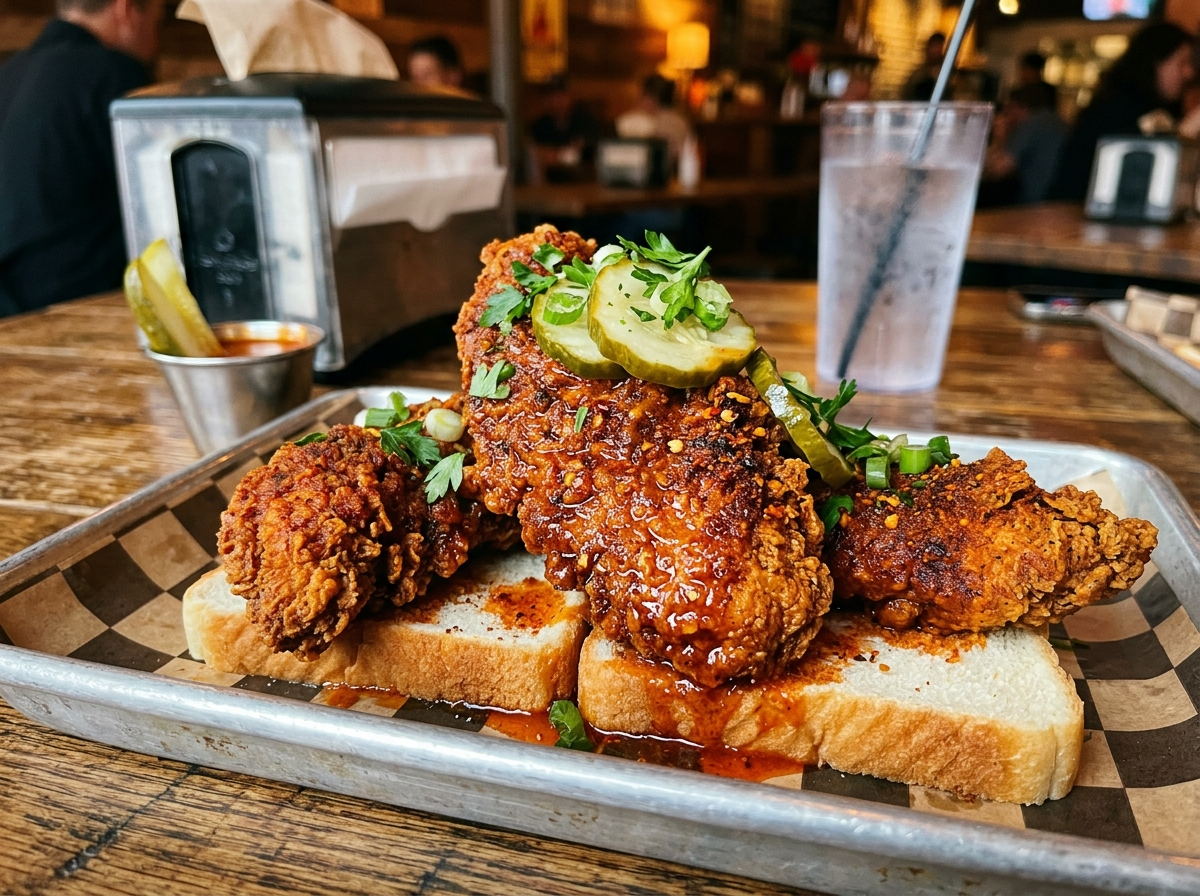
A single bite of a perfectly made Nashville hot chicken tender can honestly ruin regular fried chicken for you forever. That crispy, golden crust hiding a juicy strip of chicken underneath, coated in a fiery cayenne-laced oil that hits your lips before you even taste the meat — it’s a completely different experience from anything you’d grab at a drive-through window.
The thing is, most people think Nashville hot chicken tenders are complicated. They picture smoke-filled kitchens, secret family recipes, and some mystical process that only works in Tennessee. But here’s the truth: you can make absolutely legit Nashville hot chicken tenders at home with ingredients you probably already have. You just need to understand what makes them actually Nashville hot — and that’s exactly what we’re going to cover.
What Makes Nashville Hot Chicken Tenders Different from Regular Fried Chicken Tenders
Let’s clear something up right away. Nashville hot chicken tenders aren’t just regular chicken tenders with hot sauce dumped on top. That’s a completely different thing.
The real difference comes down to one specific technique: the hot oil paste. After the tenders are fried to golden perfection, they get brushed or dipped in a mixture of cayenne pepper, brown sugar, paprika, garlic powder, and — this is the key part — hot frying oil from the same pan you cooked them in. That oil carries all the flavor from the breading and the chicken, and it turns those dry spices into a glossy, fiery coating that sticks to every inch of the crust.
Traditional hot sauce gives you vinegar-based heat. Nashville hot chicken gives you oil-based heat. The fat in the oil actually helps deliver the capsaicin more effectively to your taste buds, which is why Nashville hot chicken has that deep, slow burn that builds with every bite instead of a sharp, immediate sting.
If you’ve ever had Nashville hot chicken in its traditional bone-in form, you already know the flavor profile. Tenders give you that same experience but in a more convenient, snackable format that’s perfect for dipping, sharing, and — let’s be real — eating in your car.
The Origin Story You Should Know
Nashville hot chicken traces back to the 1930s and a man named Thornton Prince. The legend goes that his girlfriend made him an extra-spicy batch of fried chicken as revenge for his wandering ways. Instead of suffering through it, Prince loved it so much he turned it into a business. Prince’s Hot Chicken Shack opened in Nashville and has been serving the original recipe ever since — they’re still open today, run by the family.
For decades, hot chicken stayed almost exclusively in Nashville, mostly in small restaurants and roadside spots. The dish didn’t really explode nationally until the 2010s, when food bloggers, travel shows, and chains like KFC and Hattie B’s started bringing it to a wider audience. By 2016, Nashville even declared an official “Hot Chicken Day” every July 4th.
The tender format became popular as the dish went mainstream. Bone-in chicken is traditional and still considered the “real” Nashville hot chicken by purists, but tenders made the dish more accessible. They cook faster, they’re easier to eat, and they work better for food trucks and quick-service restaurants.
Understanding this history matters because it tells you something important about the dish: Nashville hot chicken was never meant to be fancy. It’s street food. Working-class food. Food that’s supposed to be bold, messy, and unapologetically intense. Keep that energy when you make your tenders at home.
Choosing the Right Chicken for Your Tenders
You’ve got two paths here, and both work well.
Option one: Buy whole chicken breasts and cut them into strips yourself. This gives you control over the size and thickness, and you’ll get more uniform pieces that cook evenly. Look for boneless, skinless breasts that are about ¾ to 1 inch thick. If they’re thicker than that, butterfly them first, then slice into strips about 1 to 1.5 inches wide.
Option two: Use actual chicken tenderloins. These are the small, separate muscles that sit underneath the breast. They’re naturally the right shape and size, and they tend to be more tender (the name isn’t accidental) because the muscle doesn’t work as hard. The downside? They’re usually more expensive per pound, and the sizes can be inconsistent.
Either way, avoid pre-frozen chicken tenders from a bag. They often have added water, sodium solutions, and a rubbery texture that no amount of seasoning can fix.
Pro Tip: Whatever cut you choose, pat the chicken completely dry with paper towels before you start the brining or marinating process. Surface moisture is the enemy of crispy breading — and if you’ve ever struggled with getting fried chicken crispy, excess moisture is probably why.
The Buttermilk Brine: Why It’s Non-Negotiable
Skipping the buttermilk brine is the single biggest mistake people make with Nashville hot chicken tenders. You can nail everything else — the breading, the frying, the hot oil paste — and the tenders will still taste flat if you didn’t brine them.
Here’s what buttermilk does. The lactic acid in buttermilk gently breaks down the protein fibers on the surface of the chicken, making it more tender without turning it mushy. It also creates a slightly tacky surface that the flour coating clings to like glue. And because buttermilk is thicker than regular milk or water, it stays on the chicken instead of dripping off.
For a basic Nashville hot chicken buttermilk brine, you need:
- 2 cups buttermilk
- 1 tablespoon hot sauce (something simple like Crystal or Frank’s)
- 1 teaspoon salt
- 1 teaspoon garlic powder
- 1 teaspoon black pepper
Submerge your chicken strips in this mixture, cover the bowl, and refrigerate for at least 2 hours. Overnight is even better if you can plan ahead — 12 to 24 hours is the sweet spot. Don’t go past 24 hours, though. The acid will start breaking the meat down too much, and you’ll end up with a weird, mealy texture.
One thing people forget: the buttermilk brine isn’t just about the chicken. It’s also adding a subtle tang that balances the intense heat of the cayenne paste later. Every layer of flavor in this dish has a purpose.
Building the Perfect Breading
The breading for Nashville hot chicken tenders needs to do two things really well: get extremely crispy, and create lots of nooks and crannies for the hot oil paste to settle into. A smooth, uniform coating won’t work here. You want texture. You want craggy bits and rough edges.
The way to achieve that is the shaggy dredge technique. Here’s the process:
Start with a bowl of seasoned flour. For about 1.5 pounds of chicken, use 2 cups all-purpose flour mixed with 1 teaspoon salt, 1 teaspoon black pepper, 1 teaspoon paprika, and ½ teaspoon garlic powder. Keep the seasoning in the flour relatively mild — the big flavor punch comes from the hot paste, not the breading itself.
Now, take about ¼ cup of your buttermilk brine and drizzle it into the flour. Use a fork or your fingers to toss and pinch the flour until you get small, irregular clumps throughout. These clumps are what create that extra-crunchy texture when they hit the hot oil.
Pull each chicken strip out of the buttermilk, let the excess drip off for a second, and press it firmly into the flour mixture. Don’t just dust it — really push the flour into the surface. Flip it, press again, then gently shake off the loose bits. Set the breaded tenders on a wire rack and let them rest for 10 to 15 minutes before frying. This rest period lets the coating hydrate and bond with the chicken so it doesn’t fall off in the fryer.
If you’ve been working on your frying technique with other dishes like homemade chicken tenders, this process will feel familiar. The difference here is really in that shaggy texture — Nashville hot chicken depends on those extra crispy bits.
Frying: Temperature, Oil, and Timing
Frying Nashville hot chicken tenders isn’t complicated, but it is precise. Get the temperature wrong and you’ll end up with either raw chicken inside a burnt shell or a pale, greasy mess that never crisps up.
The target temperature is 325°F to 350°F. Most people fry too hot. Chicken tenders are relatively thin, so they don’t need the high heat you’d use for bone-in pieces. At 325°F, the breading develops a deep golden color while the inside cooks through gently. If you go above 375°F, the outside will darken too fast and the interior won’t be done.
Use a neutral oil with a high smoke point. Peanut oil is the traditional choice in Nashville and gives the best flavor. Canola and vegetable oil work fine too. Avoid olive oil — the smoke point is too low and the flavor competes with the spice paste. If you’re curious about choosing the right oil for frying, the same principles apply as when you’re making homemade french fries and picking your oil.
Fill your pot or Dutch oven with at least 3 inches of oil. Use a clip-on thermometer or an instant-read thermometer to monitor temperature. The oil will drop 15 to 25 degrees when you add the chicken, so let it come back up before adding the next batch.
Fry in small batches — 3 to 4 tenders at a time, depending on the size of your pot. Crowding the pot drops the temperature too much and creates steam instead of crispy frying.
Cook the tenders for 4 to 6 minutes, flipping once halfway through. They’re done when the internal temperature hits 165°F and the coating is a rich, deep golden brown. Pull them out with tongs or a spider strainer and set them on a wire rack — never on paper towels, which trap steam and make the bottom soggy.
Quick Fact: That frying oil you’re about to drain? Don’t dump it yet. You need some of it for the most important step.
The Nashville Hot Paste: This Is Where the Magic Happens
Everything up to this point has been building toward this moment. The hot paste is what transforms good fried chicken tenders into Nashville hot chicken tenders. Without it, you just have regular fried chicken.
Here’s the base recipe for the paste:
- 3 tablespoons cayenne pepper
- 1 tablespoon dark brown sugar
- 1 teaspoon smoked paprika
- 1 teaspoon garlic powder
- ½ teaspoon black pepper
- ¼ teaspoon salt
- ½ cup hot frying oil (from the pot you just used)
Mix all the dry ingredients together in a heat-safe bowl. Then ladle in the hot frying oil — carefully, because it’ll sizzle slightly — and stir until you have a smooth, loose paste. It should look like a thin, deep red sauce, not a thick paste. If it’s too thick, add another tablespoon or two of oil.
The brown sugar is critical. It doesn’t make the tenders sweet — it balances the heat and creates a slight caramelized flavor that’s a signature of authentic Nashville hot chicken. Skip it and you get flat, one-dimensional heat. Include it and you get that complex, addictive flavor that keeps you reaching for the next tender even when your mouth is on fire.
Brush the paste generously over each tender while they’re still hot. Some people dip the entire tender into the paste, which gives you maximum heat coverage. Others prefer brushing just the top for a slightly less intense experience. Either way works — it’s your mouth, your rules.
Did you know? The original Prince’s Hot Chicken Shack reportedly uses even more cayenne than most copycat recipes — some estimates put their hottest level at 5+ tablespoons per batch. The recipe above lands in the “medium-hot” range. If you want to go nuclear, increase the cayenne to 5 tablespoons and add ½ teaspoon of ghost pepper powder.
Controlling the Heat Level
Not everyone wants to feel like they’re breathing fire after dinner. One of the best things about making Nashville hot chicken tenders at home is that you control exactly how hot they are.
Here’s a rough guide to help you calibrate:
Mild: Use 1 tablespoon cayenne, increase the paprika to 2 tablespoons for color. You’ll get the look and the warmth without any real burn. Great for kids or anyone who’s spice-sensitive.
Medium: Use 2 tablespoons cayenne with the standard recipe. You’ll feel it, but it won’t overwhelm the other flavors. This is where most people are happiest.
Hot: The full 3-tablespoon recipe listed above. Your lips will tingle, your nose might run slightly, and you’ll definitely want a cold drink nearby.
Extra Hot/Shut the Cluck Up: 5+ tablespoons cayenne, plus a ½ teaspoon of habanero powder or ghost pepper powder. This is pain-as-pleasure territory. Don’t say I didn’t warn you.
A smart move if you’re cooking for a group is to make a mild batch of paste and a hot batch separately. Brush some tenders with mild and some with hot. Label them clearly — or don’t, if you enjoy watching your friends discover what they’ve gotten into.
What to Serve with Nashville Hot Chicken Tenders
Traditionally, Nashville hot chicken is served on white bread with dill pickle chips on top. That’s it. The white bread isn’t just a plate — it soaks up the spicy oil drippings and becomes almost like a savory, heat-infused treat by itself. The pickles cut through the richness with acid and crunch.
For tenders specifically, you’ve got more flexibility. Here’s what pairs well:
Classic white bread and pickles — don’t mess with tradition if you don’t need to. A few slices of cheap white sandwich bread and some thick-cut dill pickles are all you need.
Coleslaw — a creamy, cool coleslaw is probably the best sidekick for Nashville hot tenders. The creaminess from the mayo and the crunch from the cabbage offer a counterpoint to all that heat and richness.
French fries — specifically crispy ones. If you can manage golden, crisp french fries alongside your tenders, you’ve got a meal that competes with any restaurant plate. Or go all out with game day chili cheese fries if you’re feeling indulgent.
Ranch or blue cheese dip — yes, purists might cringe, but a cool, creamy dip genuinely helps when the heat builds up. It’s practical, not blasphemous.
Mac and cheese — the richness of cheese and pasta absorbs spice and rounds out the meal. It’s a Southern comfort food pairing that just works.
If you’re serving these at a party or game day gathering, Nashville hot chicken tenders are honestly one of the best finger foods for a football party. They’re easy to grab, they don’t need a fork and knife, and they always get people talking.
Common Mistakes That Ruin Nashville Hot Chicken Tenders
Let me save you some frustration. These are the errors I see people make most often, and they’re all easy to avoid.
Using hot sauce instead of the cayenne paste. I mentioned this earlier, but it bears repeating. Pouring Frank’s Red Hot or Tabasco over fried chicken doesn’t make it Nashville hot. Those sauces have vinegar as a base, which softens the breading and changes the entire flavor profile. The dry cayenne mixed with hot frying oil is non-negotiable.
Not letting the breaded tenders rest before frying. When you skip that 10-to-15-minute rest, the flour hasn’t had time to hydrate and bond with the buttermilk layer underneath. The breading will slide right off in the oil, and you’ll be left with naked chicken in a pot of floating breading crumbs. Patience pays off here.
Frying at too high a temperature. Cranking the heat to 400°F thinking you’ll get crispier results is a trap. The outside burns while the inside stays raw. Keep it between 325°F and 350°F. Trust the thermometer.
Applying the paste to cold or room-temperature tenders. The hot paste needs to go on hot chicken. When both elements are warm, the oil in the paste melts slightly into the crust’s surface, creating that stained, glistening look and infusing the flavor into the breading. If the chicken has cooled down, the paste just sits on top like a greasy layer.
Overcrowding the frying pot. We talked about this already, but it really is one of the most common problems. Fry in batches. It takes longer but the results are worth it. The same principle applies whether you’re frying tenders, chicken wings, or anything else — give each piece room to breathe.
Can You Bake Nashville Hot Chicken Tenders Instead of Frying?
Honestly? You can, but the result won’t be the same. Baking gives you a decent tender with good flavor, but you lose the deep, craggy crunch that makes Nashville hot chicken what it is. The Maillard reaction that happens in 350°F oil creates a texture that an oven at the same temperature simply can’t replicate.
That said, if frying isn’t an option for you, here’s how to get the best baked version:
Preheat your oven to 425°F. Place breaded tenders on a wire rack set over a baking sheet — the rack lets hot air circulate under the tenders so the bottom crisps up instead of getting soggy. Lightly spray the tenders with cooking spray. Bake for 20 to 25 minutes, flipping once halfway through, until they reach an internal temperature of 165°F and the coating is golden.
For the hot paste on baked tenders, you obviously won’t have frying oil to use. Substitute melted butter or melted lard for the oil component. The flavor won’t be identical, but the butter actually adds a richness that works well with the cayenne and brown sugar.
Another option worth considering is frying at home without a deep fryer — shallow frying in a cast iron skillet with about an inch of oil can give you most of the benefits of deep frying without the full commitment.
Making Nashville Hot Chicken Tenders for a Crowd
If you’re cooking for more than four people, you need a strategy. Making Nashville hot chicken tenders one batch at a time while your guests wait isn’t a great hosting move.
Here’s what works: fry all your tenders in advance and keep them warm in a 200°F oven on a wire rack. They’ll hold for up to 30 minutes without losing too much crunch. Make your hot paste and keep it warm on the stovetop over the lowest setting. When you’re ready to serve, brush the paste on and plate them up.
If you’re feeding a real crowd — think tailgate or big party — consider doing the frying outside with a turkey fryer setup. The larger pot and powerful burner let you fry bigger batches, and you keep all that oil spatter and smell outside where it belongs. Just make sure you follow proper safety protocols, similar to what you’d do when deep frying a turkey.
Plan on about 4 to 5 tenders per person as a main course, or 2 to 3 per person if you’re serving them alongside other Southern comfort foods for a watch party.
Turning Nashville Hot Chicken Tenders into a Sandwich
This deserves its own section because a Nashville hot chicken tender sandwich might be the single best use of these tenders.
Take a soft, buttered and toasted brioche bun. Lay down a few dill pickle chips on the bottom bun. Stack 2 to 3 hot-paste-coated tenders on top. Add a generous scoop of creamy coleslaw. Close the bun. That’s it. Don’t over-complicate it.
Some people add mayo or a creamy dill sauce to the top bun, which isn’t traditional but tastes great. Others add a slice of American cheese under the tenders so it melts slightly from the heat. Both are solid moves.
If you’re a fan of the spicy chicken sandwich trend that’s been dominating fast food menus, this homemade version will genuinely make you question why you ever waited in a drive-through line for one.
FAQ
What’s the difference between Nashville hot chicken and Nashville hot chicken tenders?
The flavor profile and preparation method are essentially the same. The difference is the cut of chicken. Traditional Nashville hot chicken uses bone-in pieces — typically breast quarters and leg quarters. Tenders use boneless breast meat or chicken tenderloins, which cook faster and are easier to eat. The buttermilk brine, breading technique, and cayenne hot paste remain the same for both.
How do you store leftover Nashville hot chicken tenders?
Store them in an airtight container in the fridge for up to 3 days. Reheat them in a 375°F oven on a wire rack for 10 to 12 minutes to restore crispiness. Don’t microwave them — the breading turns rubbery and sad. You can apply a fresh coat of hot paste after reheating if the original coating has absorbed into the crust too much.
Can you make Nashville hot chicken tenders in an air fryer?
Yes, and they turn out better than oven-baked versions. Preheat the air fryer to 375°F, spray the basket with cooking oil, and cook the breaded tenders in a single layer for 10 to 12 minutes, flipping once. The circulating hot air mimics some of the effects of deep frying. The crust won’t be quite as craggy as the deep-fried version, but it’s a solid alternative. Use melted butter mixed with the cayenne spice blend for your hot paste.
What dipping sauces go best with Nashville hot chicken tenders?
Ranch dressing is the most popular choice because the cool, creamy flavor offsets the heat. Blue cheese works the same way. Honey is another classic — the sweetness against the cayenne creates a sweet-heat combination that’s really addictive. Some people dip in bread-and-butter pickle juice, which sounds unusual but actually works beautifully as an acid-forward contrast.
Is Nashville hot chicken supposed to make you sweat?
At the higher heat levels, yes. The capsaicin in cayenne triggers your body’s heat response — sweating, flushed skin, runny nose. That’s completely normal and actually part of the experience. If you don’t want that reaction, dial back the cayenne. There’s no shame in choosing a mild or medium heat level. You still get the flavor and the technique — just without the physical workout.
Your Next Move
You’ve got everything you need now — the technique, the ratios, the timing, and the mistakes to avoid. Nashville hot chicken tenders are one of those dishes that seem intimidating from the outside but are surprisingly straightforward once you break them down into steps.
Start with the buttermilk brine tonight. Tomorrow, you fry. The whole process from fridge to plate takes about 30 minutes once the chicken is brined, and the payoff is a plate of tenders that taste like you drove to Nashville and back.
And here’s the thing nobody tells you about making Nashville hot chicken at home: once you figure out the paste and the technique, you can put it on almost anything. Fried shrimp. Cauliflower florets. Even things you wouldn’t normally think to chicken fry. The hot paste is a flavor system, not just a recipe. Use it however you want.
Now go fire up that oil.