
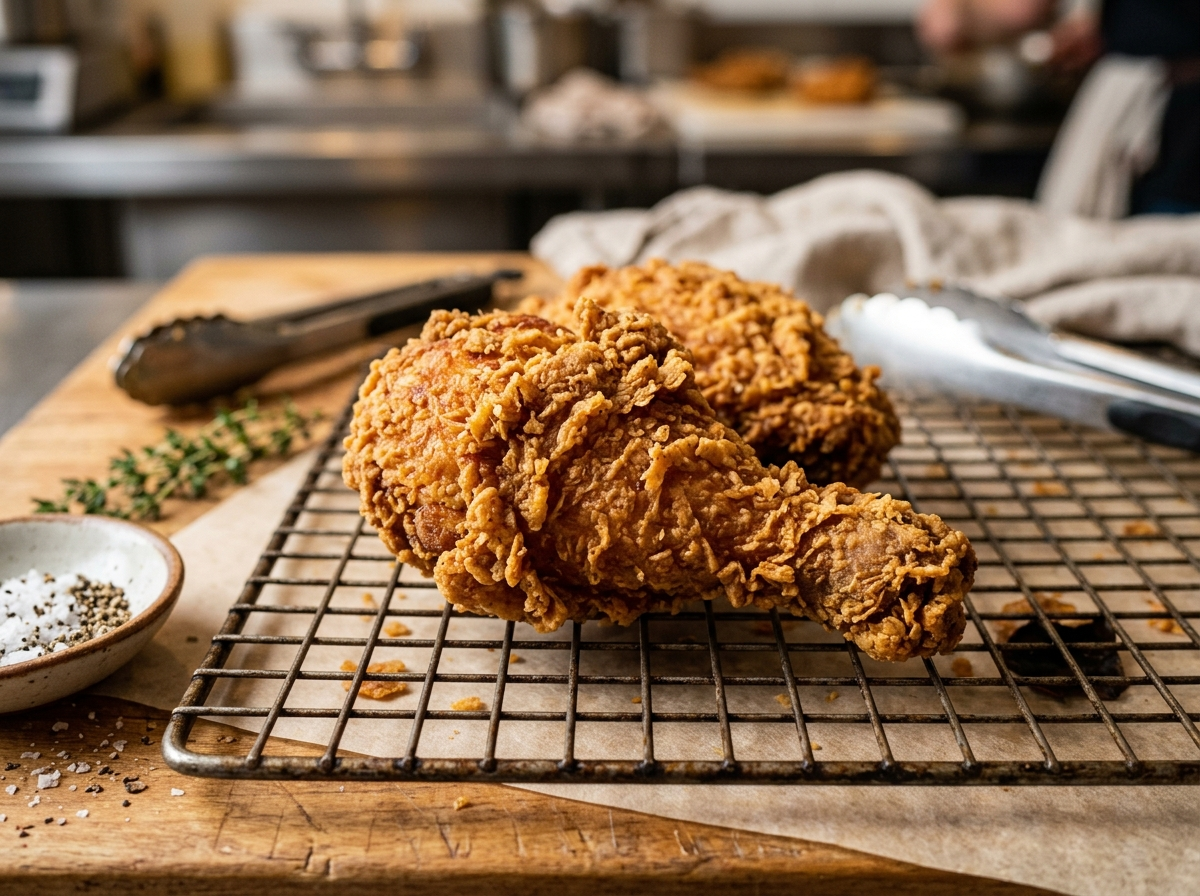
Greasy fried chicken usually isn’t caused by “too much oil.” It’s usually caused by oil that’s too cool, chicken that’s too wet, or coating that never gets time to set. If you want golden non-greasy fried chicken at home, you don’t need a restaurant fryer. You need a few smart habits that work together. Once you get those right, your chicken comes out crisp, light, and deeply golden instead of heavy and slick.
Why Fried Chicken Turns Greasy Instead of Golden
Here’s the simple version: non-greasy fried chicken happens when the crust sets fast.
As soon as chicken hits hot oil, moisture inside starts turning into steam. That steam pushes outward. If your oil is hot enough, the coating firms up quickly and creates a crisp shell. That shell helps keep extra oil from soaking in.
If the oil is too cool, the opposite happens. The crust stays soft for too long. It absorbs oil before it gets crisp. You still get color later, but the bite feels oily and heavy.
Think of the crust like a raincoat. If it goes on dry and snug, the rain stays outside. If it’s loose and soggy, water gets in. Fried chicken works the same way.
Quick fact: Greasy fried chicken is often a temperature problem, not an oil problem.
A lot of people assume more bubbling means better frying. Not always. Wet chicken bubbles like crazy, even if the oil is too cool. That’s why guessing by sound or bubbles can fool you.
Three things usually cause greasy chicken at home:
- the oil drops too low after you add the chicken
- the surface of the chicken is too wet
- the pan is crowded, so steam gets trapped
There’s also a smaller issue people miss: old oil. Oil that’s been used too many times breaks down, darkens faster, and can leave food tasting heavy. Fresh or properly strained oil fries cleaner.
So what’s the real secret? It’s not one magic ingredient. It’s a chain of little choices. Dry the chicken properly. Build a coating that isn’t too thick. Hold the oil in the right range. Let the fried pieces rest on a rack, not a paper towel pile.
Miss one step and the result slips. Get the chain right and your chicken feels almost dry on the outside, in the best way.
Start With the Right Chicken and Prep
Best cuts for home fried chicken
If you’re frying at home, bone-in thighs and drumsticks are the easiest place to start.
They stay juicy, they handle a longer fry well, and they forgive small timing mistakes. Breasts can still be great, but they dry out faster. Wings are delicious too, though they cook quickly and can go from perfect to too dark in a hurry.
Skin-on pieces help a lot. The skin adds texture and protects the meat. If you want that classic fried chicken look and crunch, keep it on.
Try to fry similar-sized pieces together. A giant breast and a small drumstick in the same batch rarely finish at the same moment. One gets overcooked while the other still needs time.
Buttermilk, brine, or both?
You don’t need a complicated marinade, but you do need seasoning before the fry.
A simple buttermilk soak works well because it adds tang, helps tenderize the surface a bit, and gives the flour something to cling to. For about 3 pounds of chicken, mix 2 cups of buttermilk with 1 to 1 1/2 tablespoons of kosher salt and some black pepper. Let the chicken sit in that for 4 to 12 hours in the fridge.
If you don’t have buttermilk, don’t panic. A dry brine also works. Salt the chicken well and refrigerate it uncovered for a few hours or overnight. Then dip it in buttermilk or milk before dredging.
You can even use plain yogurt thinned with a splash of milk. The goal isn’t fancy. The goal is a lightly seasoned, slightly tacky surface.
Don’t rinse the chicken
A common kitchen habit still hangs around: washing raw chicken in the sink.
Skip it.
The USDA advises against rinsing poultry because water droplets can spread bacteria around your sink, faucet, and counter. Pat the chicken dry with paper towels instead. That makes it safer and helps the coating stick better.
Remove excess moisture before dredging
Even if you marinated the chicken, you don’t want it dripping wet.
Lift each piece from the buttermilk and let the extra drip off. You want the surface tacky, not sloppy. If the chicken is swimming in liquid, the flour turns pasty. That pasty layer often slides off in the oil.
Food safety note: Keep raw chicken cold until prep time, and cook it to at least 165°F in the thickest part.
There’s one more prep move that helps more than people expect: organize your station before heating the oil. Set out the chicken, dredge, tongs, thermometer, and wire rack first. Fried chicken goes smoother when you’re not scrambling for tools with oily hands.
Build a Coating That Fries Crisp, Not Heavy
A simple flour mix works better than a thick batter
For classic home fried chicken, a seasoned flour dredge usually beats a heavy wet batter.
A reliable mix for about 3 pounds of chicken is 2 cups all-purpose flour plus 1/2 cup cornstarch, with 2 teaspoons kosher salt, 2 teaspoons paprika, 1 teaspoon black pepper, and 1 teaspoon each of garlic powder and onion powder. Add a little cayenne if you like heat.
Why add cornstarch? It lightens the crust and helps it crisp. Flour alone can work, but a little starch makes the coating less dense.
If you want a rough, craggy crust, press the flour onto the chicken instead of just dusting it. Some cooks drizzle a spoonful of buttermilk into the flour and rub it around with their fingers to create little clumps. Those clumps fry into crisp ridges.
Still, don’t build the coating too thick. A thick crust may look dramatic, but it can brown before the chicken cooks through.
Common misconception: More flour doesn’t mean more crunch. It often means a heavier, greasier shell.
If crust texture has been a struggle for you, the same breading issues show up in other fried foods too. This piece on why your chicken fried steak isn’t crispy explains a few of those crust mistakes in a very practical way.
Season every layer
The outside shouldn’t carry the whole flavor.
Salt the chicken or marinade. Season the dredge. Then add a light sprinkle of fine salt right after frying if needed. That layered seasoning gives you flavor all the way through instead of only on the crust.
Paprika helps with color. Black pepper gives warmth. Garlic and onion powder fill in the background. Keep sugar out of the flour mix, though. Sugar burns fast and can make the crust go too dark before the meat is done.
Rest the coated chicken before frying
This is one of the biggest “secret” steps.
After dredging, place the coated chicken on a rack or tray and let it rest for about 15 to 20 minutes while the oil heats. During that time, the flour hydrates and grabs onto the chicken.
If you fry right away, loose dry flour can fall off into the oil. If you rest the pieces, the coating sticks better and fries more evenly.
You’ll notice the surface changes a bit. It looks less powdery and more settled. That’s exactly what you want.
Oil and Heat: The Real Secret to Non-Greasy Fried Chicken
Best oil for frying chicken at home
Use a neutral oil with a high smoke point.
Peanut oil is excellent if allergies aren’t a concern. Canola, vegetable, sunflower, and corn oil also work well. They fry cleanly and don’t fight the flavor of the chicken.
Olive oil has a stronger taste and, in many versions, a lower smoke point than you want for this job. Save it for roasting or sautéing.
If you want a deeper look at frying oils, this guide to the best oil for homemade french fries helps with the same choice. The oil rules don’t suddenly change just because you’re frying chicken instead of potatoes.
What oil temperature keeps fried chicken crispy?
Start around 350°F.
Once you add the chicken, the temperature will drop. That’s normal. Your job is to keep it from dropping too far. For most home fried chicken, the sweet spot is about 325°F to 340°F during the cook.
Below that range, the crust can absorb oil before it crisps. Too far above it, the outside browns too fast while the inside still needs time.
A thermometer matters more than guesswork. A cheap clip-on fry thermometer can save a whole batch. An instant-read thermometer finishes the job by checking the meat.
The same idea shows up in smaller cuts too. If you want another good example, this article on chicken wing fry temperature shows how tiny temperature shifts change the final texture.
Did you know? Bubbling doesn’t tell you the oil temperature. Wet food will bubble hard even in oil that’s too cool.
Use the right pan and don’t crowd it
You don’t need a deep fryer.
A cast-iron skillet or Dutch oven works beautifully because heavy metal holds heat better than a thin pan. A 12-inch skillet with about 1 1/2 to 2 inches of oil is enough for many home cooks.
If you’re new to stovetop frying, this guide on how to fry at home without deep frying gives a good setup for safe, simple frying.
Crowding the pan is where a lot of batches go wrong. Add too many pieces at once and the oil temperature crashes. Steam also gets trapped around the chicken, which softens the crust.
Give each piece space. Fry in batches. It takes a little longer, but the chicken comes out better and cleaner.
Skim out stray burnt flour bits between batches too. Those little bits keep cooking, darken the oil, and can leave bitter specks on the next pieces.
How to Get Golden Non-Greasy Fried Chicken at Home, Step by Step
You’ve got the “why.” Now here’s the easy working method.
A reliable small-batch method
- Season and soak the chicken.
Marinate the pieces in salted buttermilk for 4 to 12 hours, or dry brine them ahead of time. - Lift and dredge.
Let excess buttermilk drip off, then coat each piece in your seasoned flour-cornstarch mix. Press the coating on so it adheres well. - Rest the coated pieces.
Set them on a rack for 15 to 20 minutes while your oil heats to 350°F. Don’t skip this. It helps the coating lock in. - Fry in small batches.
Lower the chicken into the oil away from you. Add only a few pieces at a time so the temperature stays steady. - Cook until golden and safe inside.
Turn the pieces as needed for even color. Most wings take about 8 to 10 minutes, drumsticks about 12 to 14, thighs around 14 to 16, and split breasts roughly 12 to 15. Use those times as a guide, not a rule. Check the thickest part with a thermometer. Chicken is safe at 165°F, and dark meat often feels best a bit higher, around 175°F. - Drain on a wire rack, not paper towels.
Set the fried chicken on a rack over a sheet pan. Add a tiny pinch of salt while it’s hot if you want. Let it rest a few minutes before serving.
That’s the base method. It’s simple, repeatable, and it works.
Why the wire rack matters so much
Paper towels soak up visible oil, but they also trap steam under the crust. That trapped steam softens the bottom fast.
A wire rack fixes that. Air can move under the chicken, so the crust stays crisp all around.
It sounds like a tiny detail. It isn’t. A good batch can lose half its crunch in five minutes if you park it flat on paper towels.
Pro tip: If you’re making several batches, hold the finished chicken on a rack in a 200°F oven. Don’t cover it.
If you’re feeding a party and need batch timing help, this guide to fast and crispy fried chicken for a crowd is worth a look.
Small Mistakes That Quietly Ruin the Crust
Dark outside, undercooked inside
That usually means the heat is too high, the pieces are too large, or the coating is too thick.
Bring the oil down closer to 325°F and check the meat with a thermometer. If a piece gets golden before it’s cooked through, you can finish it in a 300°F to 325°F oven for a few minutes.
Crisp at first, soggy ten minutes later
Steam is the likely culprit.
Maybe the chicken went onto paper towels. Maybe the pieces got stacked. Maybe someone covered the platter with foil. All three trap moisture.
Spread the pieces out on a rack and keep air moving around them.
Coating falls off in the oil
That usually starts earlier than you think.
The chicken may have been too wet. The coating may not have had time to rest. Or the piece got moved too soon after going into the oil.
Once chicken hits the oil, give the crust a moment to set before turning or nudging it. If you fuss with it too early, it tears.
Using one hand for wet ingredients and one for dry also helps. It keeps your dredge from turning into sticky lumps before you even start frying.
The oil got dirty fast
That often means loose flour fell off in the pot.
Shake off extra dredge before frying. Rest the coated chicken. Skim out dark bits between batches. Cleaner oil gives you cleaner color.
You used fresh chicken but it still tasted heavy
Check the seasoning mix and oil age.
Too much paprika can darken the crust faster than expected. Sugar in the flour burns fast. Old oil tastes stale even if the chicken is cooked properly.
Sometimes the “greasy” taste isn’t extra grease at all. It’s burnt crumbs and tired oil.
FAQ Section
Frequently Asked Questions
Why is my fried chicken greasy even though the oil started hot?
Because the oil may not have stayed hot. Once chicken goes in, the temperature drops. If you add too much at once, it can fall below the crisping range. Greasy chicken also happens when the surface is too wet or the coating didn’t rest before frying.
What oil is best for non-greasy fried chicken?
Peanut oil, canola oil, vegetable oil, sunflower oil, and corn oil are all good choices. They have neutral flavor and a high enough smoke point for frying. Fresh oil also matters. Old oil can make fried chicken taste heavy and dark.
Do I need buttermilk for fried chicken at home?
No, but it helps. Buttermilk adds flavor and gives flour something to stick to. If you don’t have it, use a dry brine, or thin plain yogurt with a little milk. The key is a seasoned, tacky surface, not a soaking-wet one.
Should I drain fried chicken on paper towels or a rack?
A rack is better. Paper towels catch drips, but they trap steam under the chicken and soften the crust. A wire rack keeps the coating crisp on all sides.
What internal temperature should fried chicken reach?
The safe minimum is 165°F in the thickest part, based on USDA guidance. Dark meat like thighs and drumsticks often tastes more tender a little higher, around 175°F, because the connective tissue breaks down more fully.
Should I double fry fried chicken?
Not usually for classic bone-in fried chicken. One good fry at the right temperature is enough. A second quick fry can help with reheating or with smaller pieces like wings, but it can dry out breast meat if you’re not careful.
Conclusion
If you remember only one thing, remember this: golden non-greasy fried chicken at home starts before the oil heats up.
Dry the chicken properly. Use a light, well-seasoned coating. Rest the dredged pieces. Keep the oil steady around 325°F to 340°F during the fry. Then let the chicken drain on a rack so the crust stays crisp.
That’s the whole secret. Not fancy gear. Not luck. Just a few smart choices done in the right order.
Start with thighs or drumsticks on your next batch, keep a thermometer nearby, and trust the process. Once you feel that first crisp, dry crunch, you’ll know you’ve got it.