
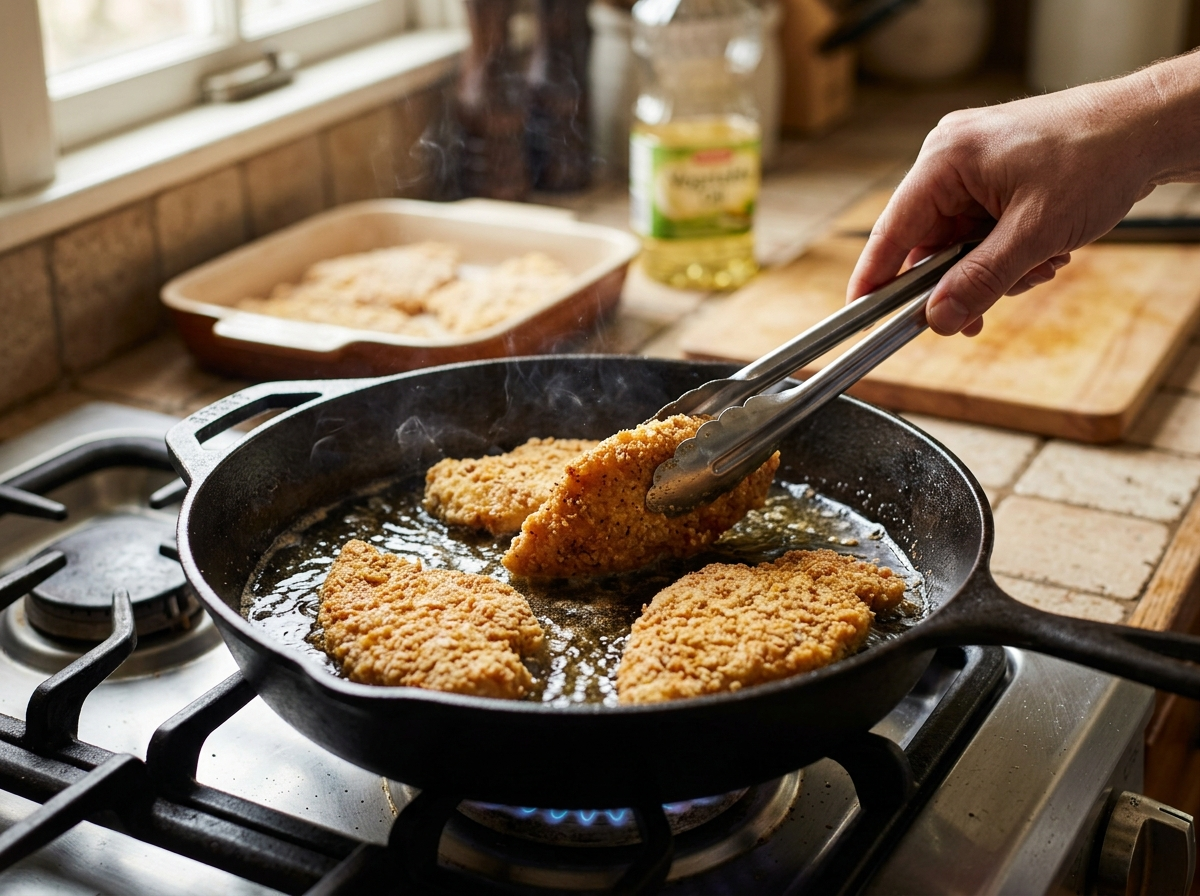
You don’t need a countertop fryer or a pot full of oil to make crisp, golden food at home. The shallow fry method gives you that fried texture with less oil, less mess, and a lot more control. If deep frying feels wasteful, risky, or just too much cleanup for a Tuesday night, you can still fry at home without deep frying and get really solid results.
What Shallow Frying Actually Means
Shallow frying is a cooking method where food cooks in a small amount of hot oil, usually enough to come one-third to halfway up the sides of the food. You fry one side, flip it, and finish the other side.
That’s the big difference from deep frying. In deep frying, the food sits fully under the oil. In shallow frying, only part of it touches the oil at a time.
It’s also not the same as sautéing. Sautéing uses a thin film of fat and fast movement. Shallow frying uses more oil, steadier heat, and much less moving around. You’re building a crust, not just browning a surface.
Quick fact: A lot of classic fried foods are shallow fried, not deep fried. Think chicken cutlets, schnitzel, fish fillets, crab cakes, potato cakes, latkes, and breaded eggplant.
Why do people search for this method so often? Usually for the same reasons. They want crispy food without buying a fryer. They want less oil. They want fewer splatters. They want something that feels safer in a small kitchen. And honestly, they want fried food that doesn’t leave the whole house smelling like a fast-food place.
Shallow frying answers all of that pretty well.
Why the Shallow Fry Method Works So Well at Home
You get more control and less mess
A heavy skillet with half an inch of oil is easier to manage than a deep pot full of hot fat. The oil heats faster. It cools down faster if needed. You can see the food clearly. You can flip it without guessing.
That control matters more than people think. Good fried food comes from steady heat, dry food, and patience. A deep fryer can help, sure. But it isn’t the only path to a crisp crust.
You also use far less oil. That saves money, especially if you like peanut oil, sunflower oil, or refined avocado oil, which can cost more than standard vegetable oil.
Cleanup gets easier too. You’re dealing with a skillet, not a heavy Dutch oven filled with used oil.
Crisp food doesn’t always need a deep pot
If you’ve been assuming that “real fried food” always needs full submersion, that’s a common misconception.
For many foods, direct contact with the hot pan plus hot oil is enough to create a beautiful crust. The surface dries out, the coating browns, and the food cooks through. That brown flavor comes from the Maillard reaction, the same kind of browning you get on toast, roasted potatoes, and seared meat.
The shallow fry method works best with foods that are thin, flat, or medium-thick. Chicken cutlets, fish, fritters, and potato cakes are perfect examples. They don’t need deep oil because they cook fairly quickly.
Where shallow frying struggles is with food that’s very thick, heavily battered, or shaped in a way that needs full oil contact. We’ll get to that in a bit.
How to Fry at Home Without Deep Frying: Set Up the Right Way
A lot of frying problems start before the food even hits the pan. The setup matters more than people expect.
Use a heavy pan
Pick a skillet that holds heat well. Cast iron, carbon steel, and heavy stainless steel all work nicely.
A thin, lightweight pan heats unevenly. You get hot spots, pale patches, and coating that burns in one place while staying soggy in another. That’s frustrating, and it’s avoidable.
A 10- or 12-inch skillet is a good size for most home cooks. It gives you enough room to fry a few pieces at once without crowding the pan.
Nonstick pans can work for light pan-frying, but they’re usually not my first choice for breaded shallow-fried food. You want strong heat retention and a crisp crust, and heavy pans do that better.
Pick an oil with a clean taste and high smoke point
You want an oil that can handle frying heat without smoking too fast.
Good choices include:
- canola oil
- vegetable oil
- peanut oil
- sunflower oil
- refined avocado oil
These oils have a fairly neutral taste, so your food tastes like chicken, fish, or potatoes, not like burnt oil.
Extra virgin olive oil isn’t the best pick for most shallow frying jobs. It has a lower smoke point than the oils above, and its flavor can feel a bit heavy in breaded foods. Butter alone also burns too quickly. If you want buttery flavor, use a little ghee or mix a small amount of butter in at the end, not at the start.
If you want a deeper breakdown of smoke point and flavor, this post on choosing the best oil for homemade french fries is worth a read.
How much oil do you really need?
Here’s the easy rule: add enough oil so it comes about one-third to halfway up the food.
For thin chicken cutlets or fish fillets in a 10- or 12-inch skillet, that’s often 1/4 inch to 1/2 inch of oil. You don’t need to measure with ruler-level precision. You just don’t want the pan barely coated, and you don’t want the food swimming like it’s in a fryer basket.
Too little oil can make the coating scorch where it touches the pan. Too much oil makes flipping awkward and raises the splatter risk.
What temperature should shallow frying be?
For most breaded foods, 350°F is the sweet spot.
A useful range looks like this:
- 325°F to 350°F for delicate foods like fish
- 350°F to 375°F for cutlets, fritters, and breaded chicken strips
If the oil is too cool, the coating absorbs oil and turns greasy. If the oil is too hot, the outside burns before the inside cooks.
An instant-read thermometer or a small clip-on frying thermometer helps a lot. If you don’t have one, drop in a tiny breadcrumb. It should sizzle right away and turn golden gradually, not sit there quietly and not turn dark in five seconds.
You’re listening for a steady sizzle. Think soft applause, not angry fireworks.
Pro tip: Preheat the pan first, then add oil, then heat the oil. That small step helps the pan warm more evenly.
A simple tool setup makes the job easier
You don’t need much. A few basics help a lot:
- a heavy skillet
- tongs or a fish spatula
- a thermometer
- a wire rack over a sheet pan
- paper towels for quick wipe-ups
That wire rack matters. It keeps steam from getting trapped under the food after frying.
Did you know? Food stays crisper on a wire rack than on a plate lined only with paper towels. Paper towels soak up oil, but they can also trap steam under the crust.
The Shallow Fry Method, Step by Step
Now for the part most people actually want: what to do in real life, in the right order.
1) Dry, season, and coat the food
Moisture is the enemy of crispness.
Pat the food dry with paper towels first. That goes for chicken, fish, zucchini, eggplant, and anything else with surface moisture. If the surface is wet, the oil splatters more, and the coating won’t stick as well.
Then season the food. Salt, black pepper, garlic powder, paprika, cayenne, and onion powder all work well depending on what you’re making.
For a simple breading, use the basic three-part setup:
- flour
- beaten egg
- breadcrumbs or cracker crumbs
You can stop at seasoned flour if you want a lighter crust. That works well for fish and thin cutlets. If you want more crunch, use panko breadcrumbs.
After coating, let the food rest for 10 to 15 minutes on a rack or plate. That little pause helps the breading cling better in the pan.
2) Heat the oil before the food goes in
Add the oil to your skillet and heat it over medium or medium-high heat, depending on your stove.
Don’t rush this part. If the food goes in too early, the coating acts like a sponge. It takes in oil before the crust has time to set.
Once the oil reaches about 350°F, you’re ready.
If the oil starts smoking, pull the pan off the heat for a minute. Smoking oil is a sign that things are getting too hot, and burnt oil gives food a bitter taste fast.
3) Fry in batches and give each piece space
Lower the food into the pan gently and away from your body. That helps reduce splatter toward your hands.
Don’t crowd the skillet. Leave a little room around each piece so steam can escape and oil temperature can stay steady. If you pack the pan too tightly, you trap moisture and drop the temperature all at once.
That’s one of the biggest reasons home-fried food turns pale and oily.
For many foods, two to four pieces at a time is plenty, depending on the pan size.
4) Flip once the crust sets
A lot of people try to flip too soon.
Let the first side brown and firm up. Once the crust sets, the food releases from the pan more easily. If it sticks hard, give it another 30 seconds and try again.
You’re looking for visual cues:
- the edges turn golden
- the sizzle steadies instead of sounding wet
- the coating looks set, not pasty
A thin chicken cutlet may need 3 to 4 minutes per side. Fish fillets often take 2 to 3 minutes per side. Potato cakes might take 3 to 5 minutes per side. Time changes with thickness, so color and feel matter more than the clock.
Don’t keep turning the food over and over. This isn’t stir-frying. One good flip is usually enough.
5) Finish safely and drain the right way
Once the second side is golden and the food is cooked through, move it to a wire rack.
If you’re frying chicken, use a thermometer for peace of mind. The USDA says chicken is safe at 165°F in the thickest part. For thicker pieces, you can brown them in the skillet and finish them in a 375°F oven. That gives you a crisp outside without burning the crust.
Salt the food lightly while it’s still hot. That helps the seasoning stick.
If you’re working with strips instead of cutlets, this method for homemade chicken tenders shows how thickness changes cook time. And if your crust often comes out oily, these tips for golden, non-greasy fried chicken will help you tighten up the process.
Best Foods to Shallow Fry at Home
Not every food needs deep oil. Some foods are almost made for the skillet.
Foods that usually turn out great
Shallow frying is a strong fit for:
- chicken cutlets and tenders
- fish fillets like cod, tilapia, or catfish
- pork cutlets
- crab cakes or salmon patties
- potato cakes, hash browns, and latkes
- breaded eggplant or zucchini slices
- small fritters like corn or vegetable fritters
These foods cook fairly fast, hold their shape, and brown nicely with one flip.
A thin chicken breast pounded even is one of the easiest places to start. So is a simple flour-dredged fish fillet. If you’ve never fried at home before, those two give you a quick win.
Foods that need a different plan
Some foods can be shallow fried, but they’re trickier. Others really do better with deep frying or another method.
You may struggle more with:
- thick bone-in chicken pieces
- very wet batters, like beer batter
- thick-cut raw fries
- corn dogs
- donuts
- stuffed items that leak cheese fast
Why? Because these foods either need longer cook time, more even oil contact, or a crust that sets very quickly on all sides.
That doesn’t mean they’re impossible. It just means the margin for error gets smaller. If you’re trying coated snacks with batter, steady heat matters a lot. These corn dog frying temps and tips show exactly why temperature control makes such a big difference.
Why Fried Food Turns Greasy, Pale, or Soggy
If your last frying attempt felt disappointing, there’s usually a clear reason.
The oil wasn’t hot enough
This is the most common issue.
Common misconception: More oil makes food greasy. In real kitchens, low oil temperature is often the bigger problem.
When the oil is too cool, the coating soaks it up before the crust sets. You end up with heavy, oily breading instead of a light, crisp shell.
If your food looks blond and feels limp after a few minutes, check the temperature.
You crowded the pan
Every piece of food lowers the oil temperature a little. Add too much at once, and the drop gets sharp.
That’s why a full pan often gives you weak browning and soggy texture. The food starts steaming each other. Steam is great for dumplings. It’s terrible for fried crust.
Smaller batches feel slower, but they almost always taste better.
The coating was too wet or too loose
A coating falls off for a few common reasons:
- the food was wet
- the flour layer was too thin
- the breading didn’t get time to rest
- the food was moved too early
Try this simple sequence next time: dry the food, dredge well, press the coating on, then rest it for 10 minutes before frying.
If you’ve run into patchy crust on steak-style fried dishes, this breakdown of why chicken fried steak isn’t crispy explains the little mistakes that usually cause it.
The outside browned before the inside cooked
That usually means one of two things. Either the oil was too hot, or the food was too thick.
Thin cutlets solve this fast. Pound chicken breasts to even thickness. Use smaller fish fillets. Flatten potato cakes so the heat can reach the center before the crust gets too dark.
For thicker chicken, sear in the skillet and finish in the oven. That’s a smart move, not cheating.
Steam killed the crunch
A perfect crust can go soft in minutes if you trap steam.
Stacking hot fried food on a plate does that. Covering it too early does that too.
Give the food space on a wire rack. If you need to hold multiple batches, place the rack over a sheet pan in a low oven, around 200°F, until serving time.
A lid is rarely your friend while shallow frying. It traps moisture and softens the coating. The only time it helps is when you’re gently finishing a thicker item and don’t care as much about a super-crisp crust.
Safety, Cleanup, and Used Oil
Frying at home doesn’t need to feel scary, but hot oil does deserve respect.
Keep splatter under control
Start with dry food. That one move cuts splatter more than almost anything else.
Lower food into the pan away from you. Use tongs or a spatula with a little reach. Keep kids and pets out of the immediate area. Don’t leave hot oil alone on the stove, even for a quick phone check.
Warning: Water and hot oil do not mix. Never pour water on an oil fire. If oil catches fire, turn off the heat and cover the pan with a metal lid or baking sheet if it’s safe to do so.
Loose sleeves are a bad idea here too. Same with reaching across the pan.
Reuse or throw out oil the right way
If the oil stayed fairly clean, you can often reuse it one to three times.
Let it cool fully. Then strain it through a fine mesh strainer or coffee filter into a clean jar or container. Store it in a cool, dark place.
Toss it if:
- it smells rancid
- it looks very dark
- it smokes much earlier than it should
- it has lots of burnt crumbs in it
- it tastes off
Don’t pour used oil down the sink. It can clog pipes and create a mess later. Pour cooled oil into a sealed container and throw it away if your local area doesn’t offer cooking-oil recycling.
A quick wipe with paper towels before washing the pan also saves you from an oily sink.
- FAQ Section
FAQ
What is the shallow fry method?
The shallow fry method cooks food in a small amount of hot oil, usually enough to come one-third to halfway up the food. You brown one side, flip it, and cook the other side. It gives you fried texture without using a deep pot of oil.
How much oil do I need to fry at home without deep frying?
For most foods, you need about 1/4 inch to 1/2 inch of oil in the pan. The goal is to let the oil reach partway up the food, not fully cover it. Thin cutlets and fish need less than thicker patties or fritters.
Can you shallow fry chicken and still get it crispy?
Yes, especially with chicken cutlets, tenders, boneless thighs, or pounded chicken breast. Pat the chicken dry, coat it well, keep the oil around 350°F, and don’t crowd the pan. For thicker pieces, brown them first and finish in the oven until they reach 165°F.
Is shallow frying healthier than deep frying?
It can use less oil than deep frying, but “healthier” depends on the food, the coating, the oil temperature, and your portion size. A well-fried cutlet in hot oil often absorbs less oil than people expect. Still, it’s fried food, so think of it as a texture and flavor choice, not a magic health upgrade.
Can I shallow fry frozen food?
You can, but it’s not always the easiest place to start. Frozen food often throws off more moisture, which leads to splatter and uneven browning. Small frozen items with clear package directions can work. Delicate or thick frozen foods usually turn out better if thawed first or cooked using the method recommended on the package.
Should I cover the pan while shallow frying?
Usually, no. A lid traps steam and softens the crust. Leave the pan uncovered if your goal is crispness. The only exception is a thicker piece of food that needs help cooking through after the crust already formed.
- Conclusion
If deep frying has kept you from making crispy food at home, shallow frying is the easy middle path. You use less oil, you keep better control, and you still get that golden crust people actually want. Start with something simple like a chicken cutlet or fish fillet, use a heavy pan, and pay attention to oil temperature. After one or two batches, the whole process starts to feel much less like a project and much more like dinner.