
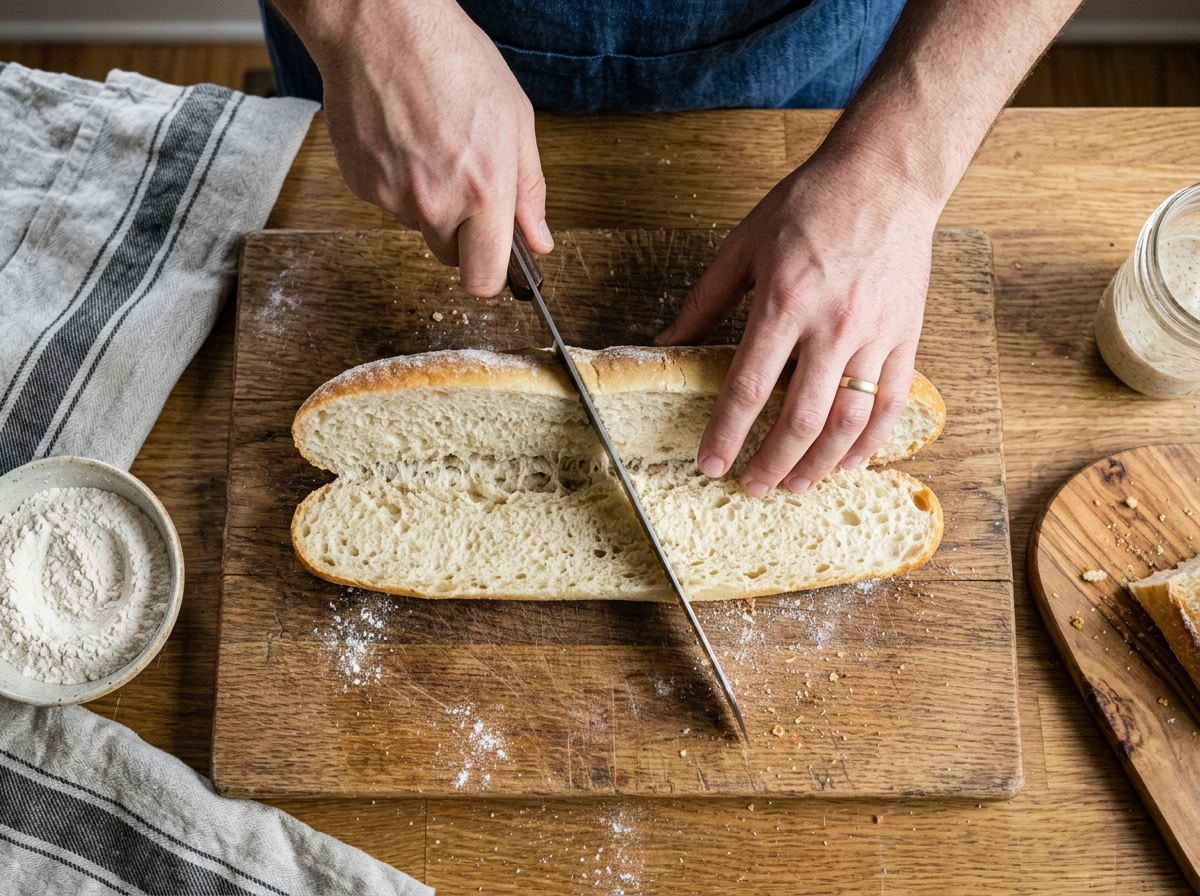
You grab a beautiful hoagie roll, press a knife into it, and the whole thing squishes flat or rips apart in your hands. Sound familiar? Cutting hoagie rolls is one of those small kitchen tasks that causes way more frustration than it should. The good news is that a clean slice comes down to two things: the right knife and the right motion. Once you nail both, you’ll never mangle a roll again.
Why Hoagie Rolls Tear So Easily
Hoagie rolls are tricky because of their structure. They have a thin, slightly crusty exterior and a very soft, airy interior. That contrast is exactly what makes them great for sandwiches — and exactly what makes them a nightmare to cut.
When you press a knife straight down into a hoagie roll, the crust resists for a split second and then gives way all at once. That sudden release crushes the soft crumb inside. Instead of a clean opening, you get a flattened, mangled mess that can barely hold your ingredients.
The problem gets worse with very fresh rolls. A roll that came out of the oven an hour ago has a more elastic crumb and a thinner crust. It wants to compress rather than cut. On the flip side, a roll that’s a day or two old has a firmer structure that holds its shape better under a blade. Neither extreme is “wrong,” but each one demands a slightly different approach.
There’s also the shape factor. Hoagie rolls are long and narrow, which means you’re making a cut that’s six to eight inches long through an uneven surface. The longer the cut, the more chances something can go sideways — literally. If your knife drifts even slightly off-center halfway through, you’ll end up with one thick wall and one paper-thin wall that tears the moment you try to open it.
Understanding what a hoagie actually is and how its bread differs from a standard sandwich loaf helps you see why the usual “just cut it” approach falls short.
The Right Knife for Cutting Hoagie Rolls
This is where most people go wrong before they even make the first cut. The knife you choose matters more than almost anything else in this process.
Serrated vs. Straight Edge
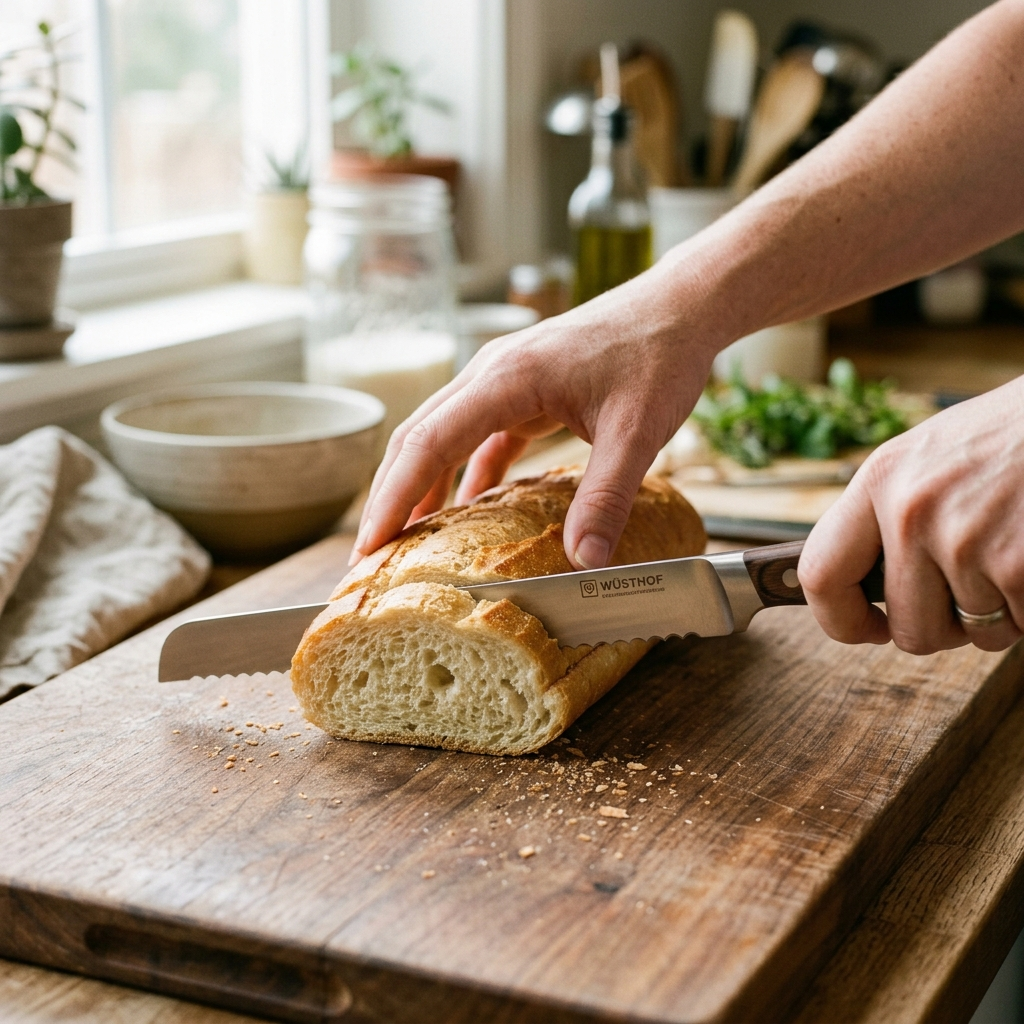
A serrated knife — often called a bread knife — is the tool you want. The small teeth along the blade grip the crust of the roll and saw through it without requiring downward pressure. That’s the key. You’re not pushing the knife into the bread. You’re letting the teeth do the work as you slide the blade back and forth.
A straight-edge knife, like a chef’s knife or a paring knife, relies on downward force to cut. That force compresses the soft interior of the hoagie roll before the blade ever breaks through the crust. By the time you’ve cut through, you’ve already squished the crumb flat.
If you’ve ever watched a deli worker slice a roll in about three seconds with zero squishing, they’re using a long serrated blade. That’s not a coincidence. Culinary experts at sources like America’s Test Kitchen consistently recommend serrated blades for any bread with a crust-to-crumb contrast, which describes a hoagie roll perfectly.
Knife Length and Shape
Go for a blade that’s at least 8 to 10 inches long. A short serrated knife (like a small tomato knife) won’t cover the full length of the roll in a single pass, which means you’ll have to reposition and start a second cut. Every time you reposition, you increase the chance of the blade catching and tearing the crumb.
A longer blade lets you make one smooth, continuous sawing motion from end to end. The offset handle style — where the handle sits higher than the blade — can also help because it keeps your knuckles from dragging against the roll as you cut.
How to Slice a Hoagie Roll Step by Step
Here’s the actual hoagie roll slicing technique, broken down into three simple steps. Once you do this a few times, it becomes second nature.
Step 1: Position the Roll
Place the hoagie roll on a stable cutting board with the seam side down. Most hoagie rolls have a visible seam or slightly flatter bottom where they sat on the baking sheet. That flat side gives you a stable base so the roll doesn’t wobble while you cut.
Now, decide where you want the opening. The most common approach is to cut along the top of the roll, slightly off-center. Cutting dead center on top gives you two equal halves that tend to flop open too wide. Cutting slightly to one side creates a natural “lid” that stays attached and holds your fillings in place.
If you prefer a side cut (which some people do for hoagies vs. subs vs. grinders depending on the style), position the roll on its side and plan to cut along the upper third. The principle is the same — you want more bread on the bottom to act as a sturdy base for your ingredients.
Step 2: The Sawing Motion
This is the part that separates a clean cut from a torn one.
Place the serrated knife on the roll at your starting point. Apply almost zero downward pressure. I mean it — barely touch the crust. Now, start moving the blade back and forth in long, smooth strokes. Let the teeth of the knife catch the crust and pull themselves through.
Think of it like cutting a ripe tomato. If you push down, you crush it. If you saw gently, the blade glides through with the skin perfectly intact. Same idea here.
Work your way along the full length of the roll in one continuous motion if you can. Don’t rush. A slow, steady saw takes about five to eight seconds and produces a dramatically cleaner cut than a quick, forceful chop.
Pro tip: If you feel the knife starting to drag or catch, stop and reposition. Forcing it through a snag is the number-one cause of tears mid-cut.
Step 3: Creating the Perfect Hinge
A great hoagie roll slice leaves a hinge — a strip of uncut bread along one side that keeps the top and bottom connected. This hinge is what turns two separate pieces of bread into a functional sandwich pocket.
To create it, simply stop your cut about half an inch to one inch from the bottom of the roll. Don’t saw all the way through. When you open the roll, the hinge will flex and hold everything together.
If you accidentally cut all the way through, don’t panic. You can still make a perfectly good sandwich — you’ll just need to be more careful when you load it. But for the cleanest result, that hinge is your best friend. It’s one of the small details that makes a big difference when you build the perfect deli sandwich.
Hoagie Roll Slicing Technique for Different Roll Types
Not all hoagie rolls are created equal. The roll you grab from a local bakery behaves differently than the bag of rolls you pick up at the supermarket. Here’s how to adjust your approach.
Fresh Bakery Rolls
Fresh bakery hoagie rolls are the most delicious and the most fragile. The crust is thin and crisp, and the interior is pillowy soft. These rolls compress at the slightest provocation.
For fresh bakery rolls, use your lightest possible touch with the serrated knife. You might even want to let the roll sit uncovered for 15 to 20 minutes before slicing. This allows a tiny bit of moisture to escape from the crust, firming it up just enough to give the knife teeth something to grip.
Some bakers recommend scoring the top of a very fresh roll with the tip of the knife before starting the full cut. A shallow score line gives the serrated blade a track to follow and reduces the chance of it skidding across the smooth crust.
Supermarket Hoagie Rolls
Supermarket rolls tend to be softer overall, with less crust development than bakery rolls. They’re often packaged in plastic, which traps moisture and keeps the exterior soft.
The trick with these rolls is to remove them from the bag and let them air out for at least 10 minutes before cutting. The plastic packaging makes the crust too soft for the serrated knife to grip properly. A little air exposure firms up the surface just enough.
You can also try a very light toast before slicing. Pop the uncut roll in a 350°F oven for about three to four minutes. You’re not trying to brown it — just dry the surface slightly. This makes a huge difference in how cleanly the knife passes through. A clean cut also helps prevent a soggy sandwich later, since torn crumb absorbs moisture much faster than a smooth-cut surface.
Day-Old or Slightly Stale Rolls
Day-old rolls are actually the easiest to slice. The crumb has firmed up and the crust has set, so the roll holds its shape well under the knife.
You can use a slightly more confident sawing motion here without worrying about compression. The one thing to watch for is a crust that’s gone from crisp to hard. If the exterior feels tough rather than crunchy, the knife teeth might skip across the surface instead of biting in. In that case, start your cut at the very end of the roll where the crust is usually thinner, and work your way inward.
Pro Tips to Prevent Tearing Every Time
Beyond the basic technique, a few small adjustments can make your cuts even cleaner.
Chill the roll briefly. If you’re working with very soft, fresh rolls and nothing else is working, pop them in the fridge for 15 to 20 minutes. Cold bread is firmer and cuts more cleanly. This is the same reason bakers recommend chilling cookie dough before slicing — temperature changes the texture of the structure you’re cutting through.
Use a sharp serrated knife. Serrated knives don’t need sharpening as often as straight-edge blades, but they do go dull eventually. If your bread knife is more than a few years old and you notice it crushing rather than cutting, it might be time for a replacement. A dull serrated blade requires more pressure, which leads right back to the squishing problem.
Don’t squeeze the roll while cutting. This sounds obvious, but it’s a very common habit. When you hold the roll with your non-cutting hand, use a gentle, open-palm grip. Don’t wrap your fingers around it and squeeze. You want to stabilize the roll, not compress it. Place your hand on top with your fingers spread wide, applying just enough pressure to keep it from sliding.
Cut on a hard surface. A wooden or plastic cutting board gives you a firm base. Cutting on a plate, a countertop, or (worst of all) in mid-air gives the roll room to shift and buckle under the knife.
Consider the roll quality. If you’re consistently struggling with tearing, the roll itself might be the issue. Rolls with a higher protein flour and proper proofing develop a stronger gluten structure that holds up better to slicing. If you’re curious about how bread quality affects the final sandwich, choosing the best cheesesteak bread covers some of the same principles that apply to hoagie rolls.
Common Mistakes When Slicing Hoagie Rolls
Even with the right knife and technique, a few habits can sabotage your cut.
Pressing down instead of sawing. This is the most common mistake and the one that causes the most damage. The moment you apply real downward force, you’re compressing the crumb. Trust the serrated edge and let the back-and-forth motion do the work.
Using a dull or wrong knife. A butter knife, a paring knife, or a dull chef’s knife will tear the roll every time. If you don’t own a serrated bread knife, it’s one of the most useful tools you can add to your kitchen. They’re inexpensive and last for years.
Cutting too fast. Speed creates friction, and friction creates tearing. A slow, deliberate saw produces a cleaner edge than a rapid back-and-forth. Give yourself five to ten seconds for the full cut.
Ignoring the roll’s orientation. Cutting a round-topped roll from the side without stabilizing it first is a recipe for a wobbly, uneven slice. Always start with the flat side down on the board.
Sawing all the way through. If you want a hinged roll (and you almost always do), remember to stop your cut before you reach the bottom. Going all the way through gives you two separate pieces that slide apart the moment you add fillings.
Frequently Asked Questions
What is the best knife to slice a hoagie roll?
A serrated bread knife with an 8- to 10-inch blade is the best choice. The teeth grip the crust without compressing the soft interior, giving you a clean cut with minimal pressure. Avoid straight-edge knives, paring knives, or butter knives, which all require downward force that squishes the roll.
Should I cut a hoagie roll from the top or the side?
Most deli workers and home cooks cut from the top, slightly off-center. This creates a natural lid that stays attached via the hinge and keeps fillings from falling out. A side cut works too, especially for loaded Italian hoagies where you want a deeper pocket, but the top cut is easier to control for beginners.
How do I keep a hoagie roll from squishing when I cut it?
Use a gentle sawing motion with a sharp serrated knife and apply almost no downward pressure. Hold the roll with a light, open-palm grip rather than squeezing it. If the roll is very fresh and soft, let it air out for 15 to 20 minutes or chill it briefly in the fridge to firm up the crumb before slicing.
Slicing a hoagie roll cleanly isn’t about brute force or fancy equipment. It comes down to a sharp serrated knife, a light touch, and a patient sawing motion. Once you get the feel of letting the teeth do the work instead of pressing down, you’ll wonder why you ever struggled with it in the first place.
Grab a roll, grab your bread knife, and give the technique a try tonight. Your next hoagie deserves a clean pocket — and now you know exactly how to give it one. If you’re planning to load that freshly sliced roll with an Italian hoagie, you’re already one step closer to sandwich perfection.