

Your homemade sandwich falls apart, gets soggy by noon, or tastes flat — while the deli down the street nails it with the exact same cold cuts and bread. The difference isn’t expensive ingredients. It’s technique. Learning how to build a deli sandwich properly comes down to layering order, moisture control, and a few small moves most home cooks skip entirely. Here’s your homemade deli sandwich guide to fixing all of that.
Start With the Right Bread (It’s Not Just About Taste)
Bread is the foundation of your sandwich, and picking the wrong one will sabotage everything else you do. You want a roll with a crusty exterior and a soft, slightly chewy interior. That contrast gives you structure on the outside and tenderness where it meets the filling.
A classic hoagie roll or Italian sub roll works beautifully because the crumb — that’s the soft, airy part inside — is tight enough to hold condiments without turning to mush. If you’ve ever bitten into a sandwich and felt the bread dissolve into a wet paste, you probably used a roll with too open of a crumb structure. Big, irregular air pockets let moisture travel straight through to the crust, and then you’re holding a leak.
Ciabatta is a great option if you want something heartier, and a good sourdough boule sliced thick works for open-faced builds. Stay away from standard sliced sandwich bread for a deli-style build. It’s too thin and too soft to carry the weight of properly stacked cold cuts and toppings.
If you’re curious about the differences between roll types, this breakdown of hoagie vs. sub vs. grinder covers what each one brings to the table.
Pro tip: Slice your roll with a serrated knife using a gentle sawing motion. Don’t press down. You want to cut through the crust without crushing the soft interior, which keeps the bread’s structure intact for layering.
The Moisture Barrier: Stop Soggy Sandwiches Before They Start
This is the single biggest reason your homemade sandwich doesn’t taste like the deli version. Deli workers build a moisture barrier between the wet ingredients and the bread, and most people at home skip this step completely.
Here’s what actually happens when you slap a tomato slice directly onto bread: the tomato’s water content starts migrating into the crumb within minutes. By the time you sit down to eat, the bread around that tomato is waterlogged and falling apart.
The fix is simple. Coat both inner faces of your bread with a fat-based spread before anything else touches it. Mayonnaise, butter, cream cheese, or even a good olive oil all work because fat repels water. That thin layer acts like a raincoat for your bread, keeping moisture from the tomatoes, pickles, and dressings from soaking in.
Once your fat barrier is down, you can layer wet ingredients in the center of the sandwich, sandwiched between drier components like meat and cheese. The cheese, in particular, acts as a second shield. This double-protection approach is the real secret behind sandwiches that stay firm even a few hours after you build them.
For a deeper look at why sandwiches go soggy and how to stop it, check out this guide on how to prevent a soggy sandwich.
How to Layer Deli Meat Like a Pro
The way you place your deli meat on the bread matters almost as much as the meat itself. And this is where most home builds go wrong — they lay cold cuts flat in neat, overlapping sheets like they’re shingling a roof.
Don’t do that. Flat layers compress under the weight of toppings and turn dense. You lose all the airy, tender texture that makes a deli sandwich satisfying to bite into.
The Ribbon Fold Technique
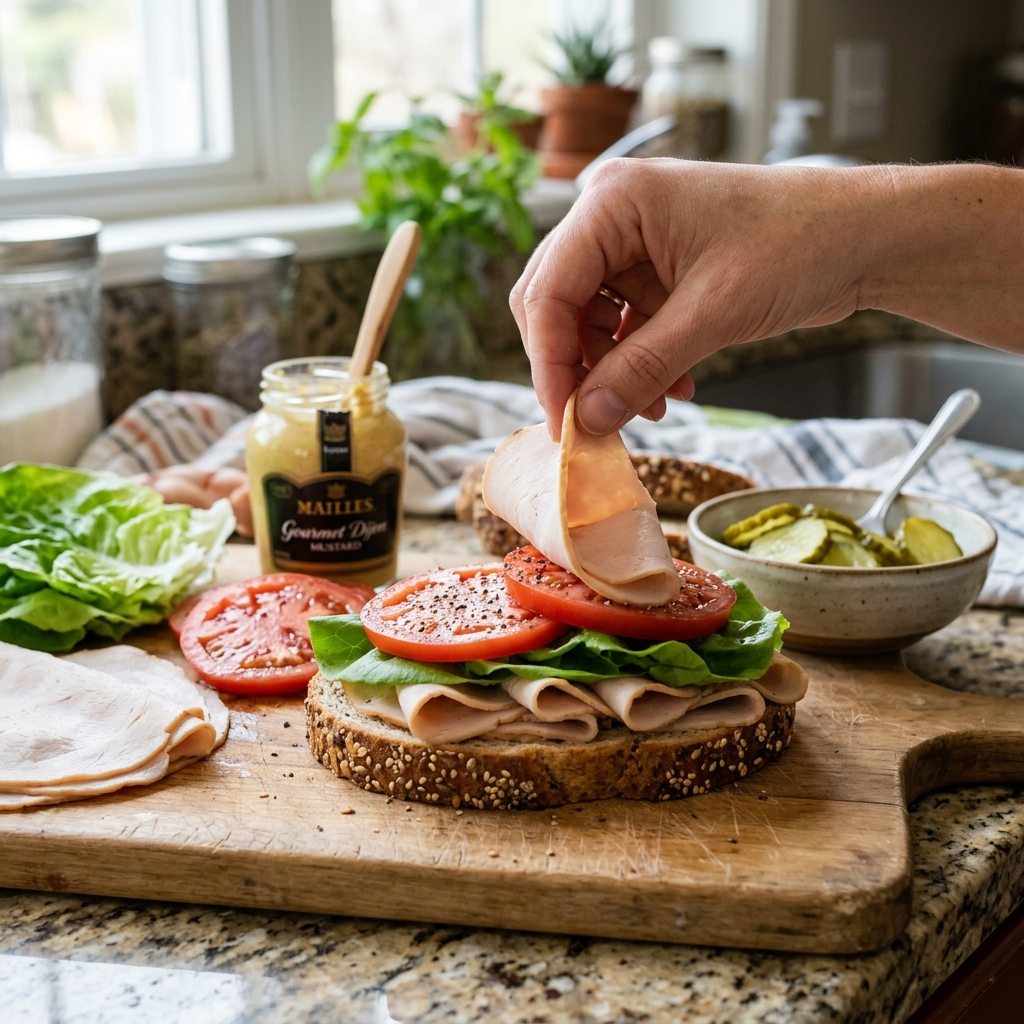
Instead of laying meat flat, fold each slice loosely into ribbons or waves. Grab a slice of turkey or ham, bunch it gently between your fingers so it ruffles, and drop it onto the bread in a fluffy pile. This creates tiny air pockets between the folds, which gives the sandwich volume and a lighter mouthfeel. It also distributes the meat more evenly across the roll so you get some in every bite instead of one thick slab in the middle and bare bread at the ends.
Aim for 3 to 5 ounces of meat per sandwich if you’re building a standard 6-to-8-inch sub. That sounds like more than you’d think, and it is. Most home cooks use about half of what a real deli piles on. If you’re using a kitchen scale, weigh it out once or twice until you develop an eye for it.
Combining Meats
Mixing two or three meats adds complexity. A classic Italian combo uses capicola, salami, and ham. A turkey club stacks turkey with bacon. When you combine meats, put the stronger-flavored ones (salami, pepperoni) on the inside of the stack and the milder ones (turkey, chicken) on the outside so the bold flavors don’t overwhelm everything else.
Make sure your cold cuts are fresh, too. If you’re not sure how long that package has been hanging around, this rundown on deli meat fridge life will help you figure out what’s still good.
Cheese, Toppings, and the Full Layering Order That Actually Works
Now that you’ve got the bread prepped and the meat folded, it’s time to put the whole thing together. The order of your layers isn’t arbitrary — each position serves a purpose.
The Ideal Deli Sandwich Layering Order
Here’s the sequence that gives you the best structural integrity and flavor distribution, working from the bottom slice of bread up:
Bottom bread → fat-based spread (mayo, butter, oil) → cheese → folded deli meat → leafy greens (lettuce, spinach, arugula) → tomato slices → onion, peppers, pickles → oil and vinegar or dressing → salt and pepper → top bread with spread
Why this order? The cheese sits directly on the bottom bread, adding a second moisture barrier on top of the mayo. The meat goes on the cheese, where its weight helps anchor everything. The greens go on top of the meat because they’re relatively dry and act as a buffer between the meat and the wetter vegetables above. Tomatoes, onions, and pickles go near the top because they’re the wettest ingredients, and placing them high keeps their moisture from pooling down into the bread.
The dressing and seasoning go on last, right before the top lid, so they coat the vegetables without soaking the bread below.
If you want ideas for what to pile on, this list of popular sandwich toppings covers the classics and some less obvious picks.
A Quick Word on Cheese Choice
Provolone is the deli standard for a reason — it’s mild, melts well if you’re toasting, and doesn’t compete with the meat. Swiss works beautifully with ham and turkey. Sharp cheddar stands up to bold meats like salami or roast beef. Fresh mozzarella is fantastic for an Italian-style build but adds more moisture, so be extra careful with your barrier layers if you use it.
Slice your cheese thin. Thick slabs don’t distribute evenly and create hard, chewy spots in the sandwich. If you’re buying pre-sliced deli cheese, you’re already in good shape.
Perfect Deli Sandwich Tips Most People Skip
These are the small moves that separate a decent homemade sandwich from one that genuinely rivals the deli counter.
Season your tomatoes. This takes five seconds and makes a huge difference. A pinch of salt and a crack of black pepper on your tomato slices before they go into the sandwich pulls out their natural sweetness and prevents them from tasting watery. Most deli workers do this automatically.
Use oil and vinegar. A light drizzle of good olive oil and red wine vinegar over the vegetables adds brightness and acidity that cuts through the richness of the meat and cheese. This is the signature move of East Coast Italian hoagies, and it’s the reason they taste so sharp and alive compared to a dry turkey-and-cheese build. If you want to nail the ratio, this oil and vinegar hoagie dressing guide walks you through it.
Let the sandwich rest. Once you’ve built it, wrap the sandwich tightly in parchment paper or deli paper and let it sit for 3 to 5 minutes before cutting. This short rest lets the flavors meld and the bread absorb just enough moisture from the fillings to soften slightly without going soggy. It also makes the sandwich much easier to cut cleanly.
Press it gently. After wrapping, press down on the sandwich with the flat of your hand — not hard, just enough to compress the layers together. This helps everything hold in place when you bite into it and prevents ingredients from sliding out the back.
Toast the bread if you want crunch. A quick pass under the broiler or in a toaster oven for 60 to 90 seconds gives the roll a warm, crackly crust that contrasts beautifully with the cold fillings. Just toast the bread before you add anything else, or you’ll wilt your lettuce and melt your cheese unintentionally.
Slice on a diagonal. This is purely about presentation and bite geometry, but a diagonal cut exposes more of the cross-section and makes the sandwich easier to bite into from the corner. It’s the reason deli sandwiches look so appealing when they hand them to you cut and wrapped.
Food Safety: Keep Your Deli Meats Safe at Home
Since you’re working with ready-to-eat cold cuts, food safety is worth a quick mention. Deli meats are susceptible to Listeria monocytogenes, a bacteria that can grow even at refrigerator temperatures. The USDA recommends keeping opened packages of deli meat at 40°F or below and using them within 3 to 5 days of opening.
If the meat looks slimy, smells sour, or has an off color, throw it out. Don’t taste-test it to check.
Disclaimer: This is general food safety information, not a substitute for professional guidance. If you’re serving sandwiches to pregnant individuals, young children, elderly family members, or anyone with a compromised immune system, consult the USDA’s full guidelines or a healthcare professional about safe handling of deli meats.
Frequently Asked Questions
What is the correct order to layer a deli sandwich?
Start with a fat-based spread on both slices of bread, then add cheese on the bottom, followed by folded deli meat, leafy greens, tomatoes and other wet vegetables, dressing, and seasoning. Finish with the top bread. This order creates moisture barriers that keep the bread from getting soggy while distributing flavor evenly through every bite.
How much deli meat should I put on a sandwich?
For a standard 6-to-8-inch deli sandwich, use 3 to 5 ounces of meat. This is more than most home cooks typically use, but it matches what a real deli counter piles on. Fold the slices into ribbons rather than laying them flat to create volume and a better texture.
How do I keep my deli sandwich from getting soggy?
Apply a fat-based condiment like mayonnaise, butter, or olive oil to both inner faces of the bread before adding any fillings. This creates a moisture barrier that repels water from tomatoes, pickles, and dressings. Place the wettest ingredients near the top of the sandwich, insulated by layers of meat, cheese, and greens. Wrapping the finished sandwich in parchment paper and letting it rest for a few minutes also helps the structure set.
Building a great deli sandwich at home doesn’t require special equipment or hard-to-find ingredients. It comes down to choosing sturdy bread, creating a moisture barrier, folding your meat instead of stacking it flat, and layering everything in an order that keeps the wet stuff away from the bread. Once you start building sandwiches this way, you’ll notice the difference on the very first bite — and you probably won’t go back to the old method.
Grab a good hoagie roll, fold some cold cuts into ribbons, and build one tonight. Your lunch game is about to get a lot better.