
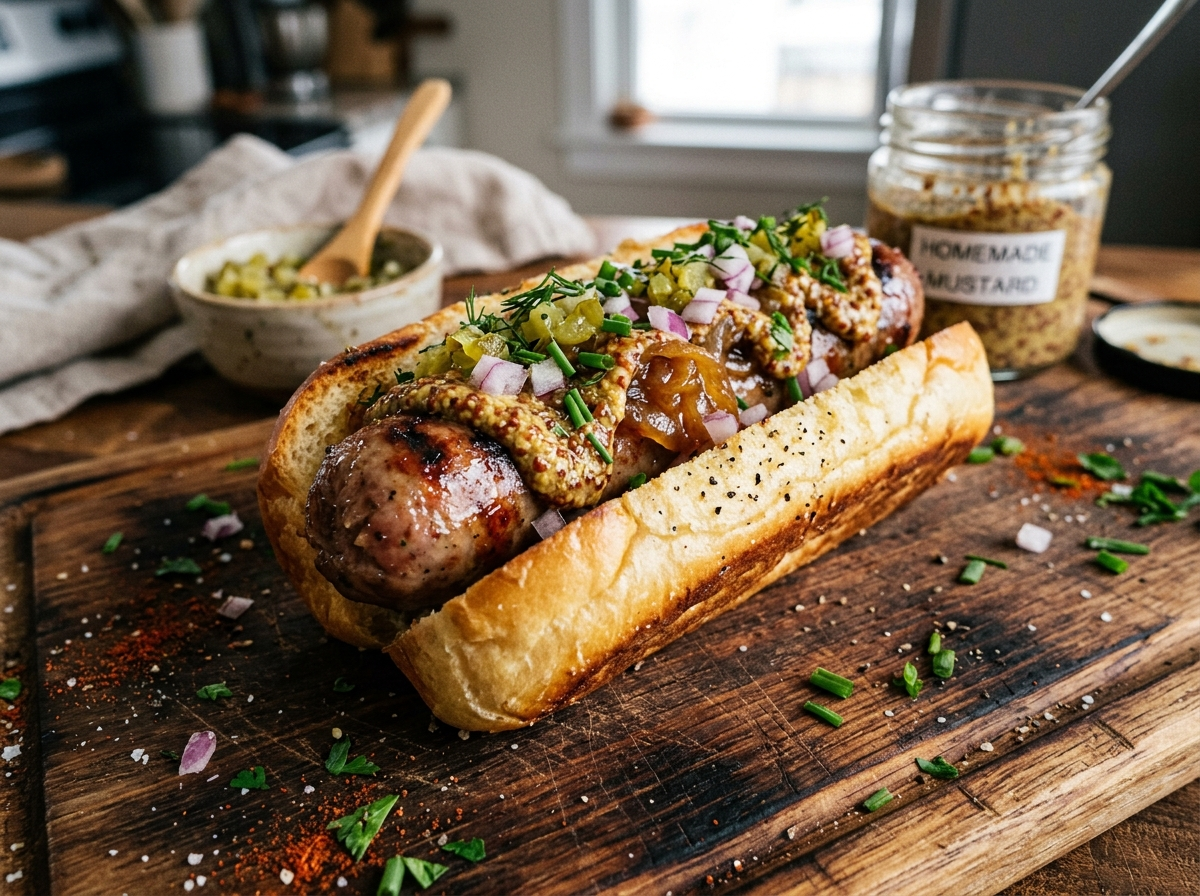
Most store-bought hotdogs contain around 20 to 30 ingredients — and if you actually read the label, you’ll recognize maybe five of them. Sodium phosphate, potassium lactate, sodium diacetate… it reads more like a chemistry experiment than a food product. That’s exactly why so many people are starting to make their own hotdogs at home.
And here’s the thing that surprises most folks: it’s genuinely not that hard. If you’ve ever made meatloaf or mixed together a meatball recipe, you already have most of the skills you need. The process takes a little patience, sure, and there’s a small learning curve with casings. But the payoff? A hotdog that actually tastes like real meat, seasoned exactly the way you want, with zero mystery fillers.
This guide walks you through the whole process. We’ll cover what meat to use, how to get that classic smooth texture, which spices give you that authentic hotdog flavor, how to work with casings, and how to cook them perfectly. Whether you’re a total beginner or someone who’s been wanting to try this for a while, you’ll have everything you need right here.
Why Bother Making Hotdogs at Home?
Let’s get the obvious question out of the way. Store-bought hotdogs cost a couple bucks for an eight-pack. So why go through all this effort?
The short answer: taste and control.
A homemade hotdog tastes completely different from what you pull out of a plastic package. The flavor is cleaner, meatier, and actually satisfying. You know that “processed” taste that most commercial hotdogs have? That disappears when you make your own. What you get instead is something that tastes like real food — because it is.
You also get to control what goes into them. Got a kid with food allergies? You choose every single ingredient. Watching your sodium intake? You control the salt. Want something spicier, smokier, or with a specific herb blend? That’s entirely up to you. There’s something deeply satisfying about handing someone a hotdog at a cookout and saying, “Yeah, I made those from scratch.” The look on their face is worth the effort alone.
And if you’re someone who already grinds your own hamburgers, this is a natural next step. You’re already comfortable working with fresh meat. Hotdogs just add a few extra steps to that process.
Choosing the Right Meat
The meat you pick is the foundation of everything. Get this right, and everything else falls into place much easier.
Traditional hotdogs use a combination of beef and pork. The classic ratio most home sausage makers start with is about 70% beef to 30% pork. The beef gives you that hearty, savory flavor people associate with a good hotdog, and the pork adds juiciness and a subtle sweetness that rounds everything out.
Now, can you go all-beef? Absolutely. An all-beef hotdog has a bolder, more robust flavor. It’s what you find at most ballparks and delis in New York. If you go this route, you’ll want to make sure you’re using cuts with enough fat — otherwise your dogs will end up dry and crumbly.
Speaking of fat, this is critical. You need a fat content of about 25% to 30% in your meat blend. Fat is what gives a hotdog its juiciness, snap, and mouthfeel. Lean meat alone will produce something tough and disappointing. Think of it like burgers — there’s a reason the best fat ratio for burgers matters so much. The same principle applies here.
Best cuts to use:
For beef, go with chuck or brisket trimmings. Both have solid flavor and the right amount of fat. For pork, shoulder (also called pork butt) is your best bet. It’s well-marbled and affordable.
Pro Tip: Keep your meat ice-cold throughout the entire process. This isn’t just a suggestion — it’s essential. Warm meat doesn’t emulsify properly, and you’ll end up with a grainy, crumbly hotdog instead of that smooth, snappy texture you’re after. Cut your meat into small cubes and throw it in the freezer for about 30 minutes before grinding. Some people even chill their grinder parts.
The Spice Blend That Makes It Taste Like a Real Hotdog
Here’s where a lot of first-timers overthink things. You don’t need 15 different spices. The classic hotdog flavor comes from a surprisingly simple combination.
The essential spices are paprika, garlic powder, onion powder, ground mustard, white pepper, and curing salt. That’s your core. Paprika gives it that familiar reddish color and mild smokiness. Garlic and onion provide depth. Ground mustard adds a subtle tang that your tongue recognizes even if you can’t quite name it. White pepper brings gentle heat without any visible black specks.
For a batch using about 5 pounds of meat, a good starting point is roughly 1 tablespoon of paprika, 1 teaspoon each of garlic powder and onion powder, 1 teaspoon of ground mustard seed, half a teaspoon of white pepper, and about 1 teaspoon of curing salt (Prague Powder #1). You’ll also want around 2 teaspoons of regular salt and a teaspoon of sugar. The sugar isn’t there to make the hotdog sweet — it balances the salt and helps with browning.
About curing salt: Prague Powder #1 (also called pink curing salt) is what gives hotdogs their characteristic pink color and that specific “cured” flavor. Without it, your hotdogs will look grey and taste more like a plain sausage. It also prevents bacterial growth during the cooking process. You only need a small amount — follow the recommended ratio on the package carefully, because too much isn’t safe.
If you want to experiment, a tiny pinch of coriander or mace can add interesting depth. Some traditional frankfurter recipes use marjoram. But start simple with your first batch. You can always adjust on your second try.
Getting That Classic Smooth Texture
This is the step that separates a homemade hotdog from a regular sausage. A good hotdog has a smooth, almost emulsified texture — not chunky or coarse like a bratwurst. Getting there takes a bit of technique, but it’s totally doable at home.
Step one: grind the meat twice. Run your chilled meat through the grinder using a fine plate (the smallest holes your grinder has). Then run it through a second time. This breaks down the meat fibers much more than a single grind.
Step two: emulsify in a food processor. After the second grind, transfer the meat to a food processor. Add about 3/4 cup of ice-cold water (for a 5-pound batch) and your spice blend. Process the mixture until it becomes a smooth, sticky paste — almost like a thick batter. This usually takes 2 to 3 minutes of continuous processing. You might need to scrape down the sides a couple times.
The ice water serves two purposes. It keeps the temperature down (remember, cold is everything here), and it helps create that smooth emulsion. Some recipes call for non-fat dry milk powder too — about 3 tablespoons per 5 pounds. The milk powder acts as a binder and helps the emulsion hold together. It’s optional, but it does make a noticeable difference in texture.
Quick test: Take a small pinch of your finished meat paste and press it between your fingers. It should feel smooth and sticky, almost like it’s glued to your skin. If it feels grainy or falls apart easily, it needs more processing. If it feels warm, stop and refrigerate everything for 15 minutes before continuing.
This emulsification step is what most people worry about, but honestly, a decent food processor handles it just fine. You don’t need professional equipment. A KitchenAid-style food processor that holds 10 to 14 cups will get the job done for a standard batch.
Working with Casings: Natural vs. Collagen
Alright, let’s talk casings. This is the part that intimidates most beginners, but once you do it once, you’ll wonder why you were nervous.
You’ve got two main options: natural casings and collagen casings.
Natural casings are made from sheep or hog intestines. Before you make a face — this is how hotdogs, sausages, and bratwursts have been made for literally thousands of years. For hotdogs, you want sheep casings, which are smaller in diameter (about 22mm to 24mm). They give you that satisfying snap when you bite into the dog. That “snap” is something you really can’t replicate with other methods, and it’s one of the best parts of a homemade hotdog.
Natural casings come packed in salt. Before you use them, soak them in warm water for about 30 minutes, then run cold water through them to flush out the salt. They’re a little slippery to work with at first, but you get the hang of it fast.
Collagen casings are manufactured and come ready to use — no soaking required. They’re easier for beginners and more consistent in size. The downside is they don’t give you quite the same snap as natural casings. They work fine, though, and plenty of commercial hotdog brands use them.
Which should you pick? If this is your first time, collagen casings take away one variable and let you focus on the meat and seasoning. If you’re comfortable and want the best texture and snap, go natural. Either way, you’ll end up with something far better than store-bought.
You’ll need a sausage stuffer attachment for your grinder, or a standalone sausage stuffer. The attachment works, but if you find yourself making sausages regularly, a dedicated stuffer (even a basic 5-pound vertical stuffer for around $30 to $50) makes the process much smoother and less frustrating.
Stuffing, Linking, and Shaping Your Hotdogs
Once your meat paste is ready and your casings are prepped, it’s time to stuff.
Slide the casing onto the stuffer tube, leaving about 2 inches hanging off the end. Don’t tie a knot yet — you want air to escape as the first bit of meat pushes through. Once meat starts coming out, tie off the end.
The key here is consistent pressure. You want the casing filled firmly enough that there aren’t air pockets, but not so tight that the casing bursts. Think of it like filling a balloon to about 80% capacity. If you see air bubbles, you can prick them with a clean pin or needle — it won’t damage the casing.
For linking, most hotdogs run about 6 to 7 inches long. Once you’ve filled a length of casing, pinch it at your desired interval and twist. Here’s a trick that prevents untwisting: alternate your twist direction. Twist the first link clockwise, the second counterclockwise, and keep alternating. This locks each link in place.
Don’t stress about making every single link identical on your first try. They’re homemade — they’re supposed to look a little rustic. That’s part of the charm.
Did you know? The average American eats about 70 hotdogs per year, according to the National Hot Dog and Sausage Council. That’s roughly 20 billion hotdogs consumed in the U.S. annually. Making even a fraction of those at home dramatically changes what you’re actually putting in your body.
Cooking Your Homemade Hotdogs
You’ve stuffed and linked your dogs. Now comes the fun part.
Homemade hotdogs need to be fully cooked before they’re ready to eat — unlike store-bought dogs, which are pre-cooked at the factory. You’ve got a few cooking methods to choose from, and each one gives a slightly different result.
Poaching First, Then Finishing
This is the most reliable method and the one most sausage makers recommend for beginners. Bring a pot of water to about 160°F to 170°F — not a rolling boil. You want a gentle simmer. Drop your hotdogs in and let them poach for about 20 to 25 minutes, or until the internal temperature reaches 160°F.
Use an instant-read thermometer. Seriously. Don’t guess on this. You’re working with a raw meat product, and hitting the right internal temperature matters for food safety.
After poaching, you can eat them as-is, or give them a quick finish on the grill or in a skillet. A couple minutes over high heat gives you those beautiful grill marks and a little char on the outside. That contrast between the slightly crispy exterior and the juicy interior? That’s the sweet spot.
Smoking
If you have a smoker, you can smoke your hotdogs at 225°F for about 1 to 2 hours until they hit 160°F internally. Smoking adds another layer of flavor that’s hard to beat. Use a mild wood like apple, cherry, or maple — something that won’t overpower the spice blend you worked so hard on.
This is where homemade hotdogs really start to outclass anything from a store. The combination of your custom spice blend and real wood smoke creates a flavor profile that’s honestly in a completely different league.
Grilling Directly
You can grill raw homemade hotdogs, but you need to be more careful. Use medium heat and turn them frequently. Since they’re raw, they need more time on the grill than a pre-cooked store-bought dog. Aim for about 15 to 20 minutes of total grill time, turning every few minutes, and verify the internal temp hits 160°F.
If you’re already comfortable managing heat on a grill — say you’ve dialed in your burger temperatures — you’ll handle this just fine. The same principles of heat management apply.
Warning: Don’t boil your hotdogs at a full, aggressive boil. High heat causes the casing to split and the fat to render out, leaving you with a dry, sad-looking dog. Low and gentle is the way.
Storage and Batch Planning
One of the best things about making homemade hotdogs is that you can make a big batch and store them for weeks.
Refrigerator: Cooked hotdogs keep well in the fridge for 5 to 7 days in an airtight container or vacuum-sealed bag.
Freezer: For longer storage, vacuum-seal your cooked (or uncooked) hotdogs and freeze them. They’ll keep their quality for 2 to 3 months easily. When you’re ready to eat, thaw them in the fridge overnight and then reheat by poaching, grilling, or pan-frying.
A 5-pound batch typically yields about 25 to 30 hotdogs, depending on the size you make them. That’s enough for a solid cookout or a few weeks of lunches. If you’re planning a football watch party or tailgate, doubling the batch is worth the effort — the extra time is minimal since the prep work is the same.
Toppings and Serving Ideas That Pair Perfectly
A homemade hotdog deserves better than a squirt of plain yellow mustard from a squeeze bottle. I mean, you can absolutely go that route — nothing wrong with it. But you’ve put real effort into this dog. Why not dress it up a little?
Classic combos that always work: Yellow mustard, chopped onion, and sweet relish is the timeless trio. Sauerkraut with spicy brown mustard is another winner, especially if your hotdog leans pork-heavy. A Chicago-style setup with mustard, relish, chopped onion, tomato, pickle spear, sport peppers, and celery salt on a poppy seed bun is fantastic if you want to go all out.
For something a little different, try topping your hotdog with game day chili cheese fries style toppings — chili, shredded cheese, and diced onions. A chili cheese dog made with homemade hotdogs is genuinely one of the best things you’ll ever eat at home.
On the bun: Don’t overlook this detail. A soft, steamed potato roll makes a noticeable difference compared to those dry, crumbly buns from the bargain shelf. Toast the inside of the bun lightly on the grill or in a skillet with a bit of butter. Takes 30 seconds and elevates the whole experience.
Troubleshooting Common Issues
Even experienced home sausage makers hit bumps. Here are the problems you’re most likely to run into and how to fix them.
Grainy or crumbly texture: Your meat got too warm during processing. Next time, keep everything colder. Partially freeze the meat before grinding, use ice water in the food processor, and chill the equipment itself.
Casings bursting during stuffing: You’re overfilling. Ease up on the pressure and leave a little slack in the casing. Also make sure you’re pricking out any trapped air pockets.
Bland flavor: Don’t be shy with the spice blend. Raw meat paste always tastes more seasoned than the finished product. Some flavor dissipates during cooking. To test before committing, fry a small patty of the seasoned meat paste in a skillet, taste it, and adjust the batch accordingly.
Hotdogs splitting during cooking: Your water temperature is too high. Keep it at a gentle 160°F to 170°F for poaching. Also, if you’re grilling raw dogs over too-high heat, they’ll split. Medium heat and patience solve this.
Grey color: You either skipped the curing salt or didn’t use enough. Prague Powder #1 is what creates that pink color. Without it, cooked ground meat just turns grey — safe to eat, but visually unappealing.
Is the Equipment Investment Worth It?
Let’s be real about what you need.
If you already own a meat grinder (even a KitchenAid attachment), a food processor, and a sausage stuffer, you’re set. You don’t need to buy anything else.
If you’re starting from zero, a basic grinder attachment runs about $40 to $60, and a manual sausage stuffer costs $30 to $50. Casings are cheap — a pack of natural sheep casings costs around $10 to $15 and gives you enough for several batches.
The real question is whether you’ll make hotdogs more than once. If you think this is a one-time experiment, borrow equipment from a friend. But if you’re someone who already enjoys making things from scratch — maybe you’ve experimented with homemade corn dogs or you make your own chicken tenders — you’ll use this equipment over and over. It pays for itself quickly.
FAQ
How long does it take to make homemade hotdogs from start to finish?
Plan for about 2 to 3 hours for your first batch. That includes prep, grinding, processing, stuffing, linking, and cooking. Once you’ve done it a couple times, you can get through the whole process in about 90 minutes. Making a big batch and freezing extras saves time in the long run.
Can I make hotdogs without casings?
Yes. You can shape the meat paste into logs using plastic wrap, roll them tightly, twist the ends shut, and poach them in the plastic wrap at 160°F to 170°F. Once cooked, remove the wrap and give them a quick sear on the grill or in a pan. You won’t get the same snap as a cased hotdog, but the flavor will still be excellent.
Are homemade hotdogs healthier than store-bought?
They can be, because you control exactly what goes in. No preservatives beyond the curing salt, no fillers, no mystery ingredients. You choose the quality of the meat and how much salt to add. That said, a hotdog is still a processed meat product — even homemade. It’s a treat, not a health food, and that’s perfectly fine.
What’s the best meat-to-fat ratio for homemade hotdogs?
Aim for about 70% to 75% lean meat and 25% to 30% fat. This gives you a juicy, flavorful hotdog with good texture. Going leaner than 80/20 usually results in dry, tough dogs that don’t hold together well. If you understand why fat ratio matters for burgers, the same logic applies here.
Do I have to use curing salt?
You don’t have to, but you’ll miss out on the classic hotdog flavor and pink color. Without curing salt, your hotdog will taste more like a plain cooked sausage and look grey. If you choose to skip it, make sure to cook and consume the hotdogs promptly — curing salt also plays a role in food safety during the cooking process.
Your Backyard Deserves Better Hotdogs
Making hotdogs at home sounds like one of those projects that’s way more complicated than it actually is. The truth? Once you’ve done one batch, the whole process feels surprisingly natural. You grind, you season, you stuff, you cook. That’s really it.
The first bite of a homemade hotdog — especially one right off the grill with a little char on the outside — is a genuine “why didn’t I do this sooner” moment. The flavor is cleaner and more real than anything wrapped in plastic at the supermarket. And the fact that you can rattle off every ingredient because you put it there yourself? That’s a pretty good feeling.
Grab some fresh meat this weekend, clear a couple hours, and give it a shot. Your next cookout will never be the same.