
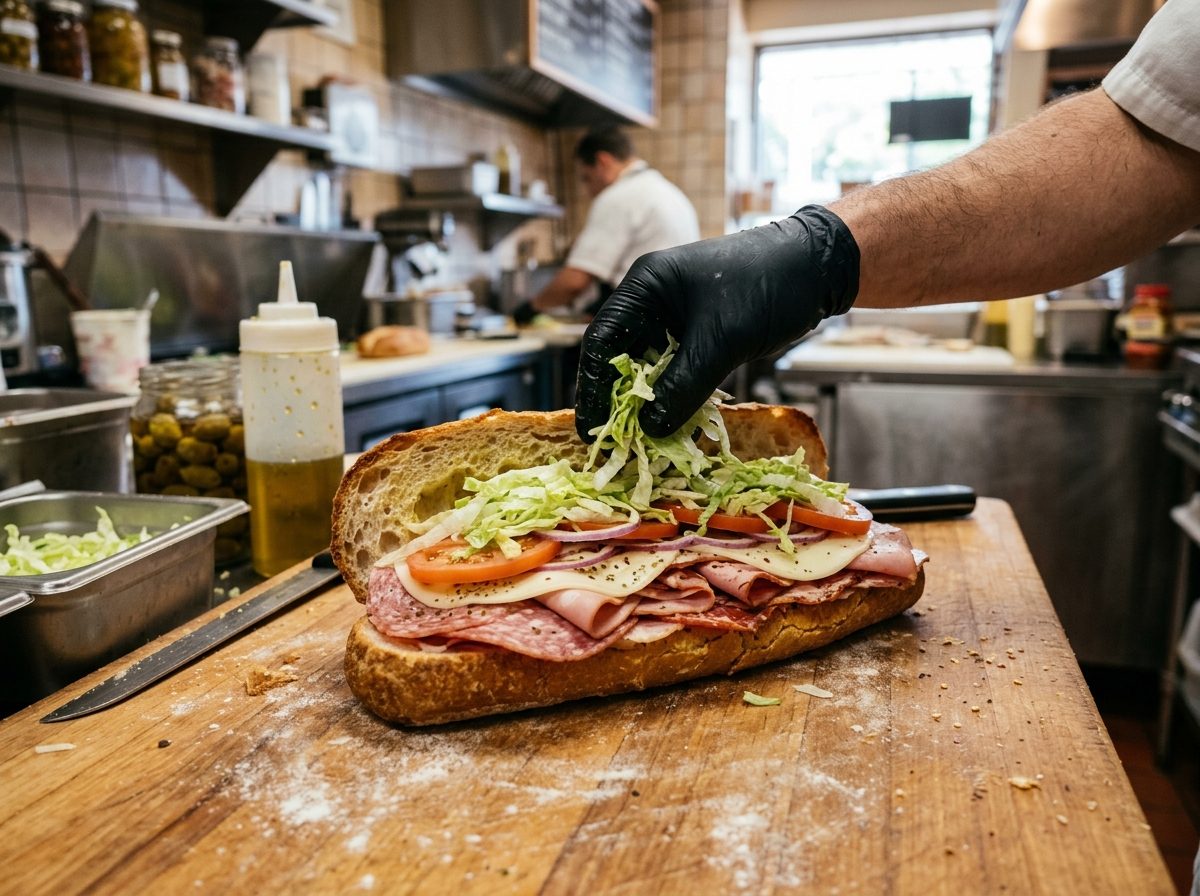
Most homemade Italian subs fall flat because people pile ingredients randomly onto whatever bread they have. The fix is simpler than you think. A great Italian sub comes down to four things: the right roll, quality deli meats layered properly, sharp provolone, and a good splash of oil and vinegar. Get those right and you won’t miss the deli counter. Here’s exactly how to make a classic Italian sub that holds together and tastes like the real deal.
What Makes an Italian Sub “Classic”?
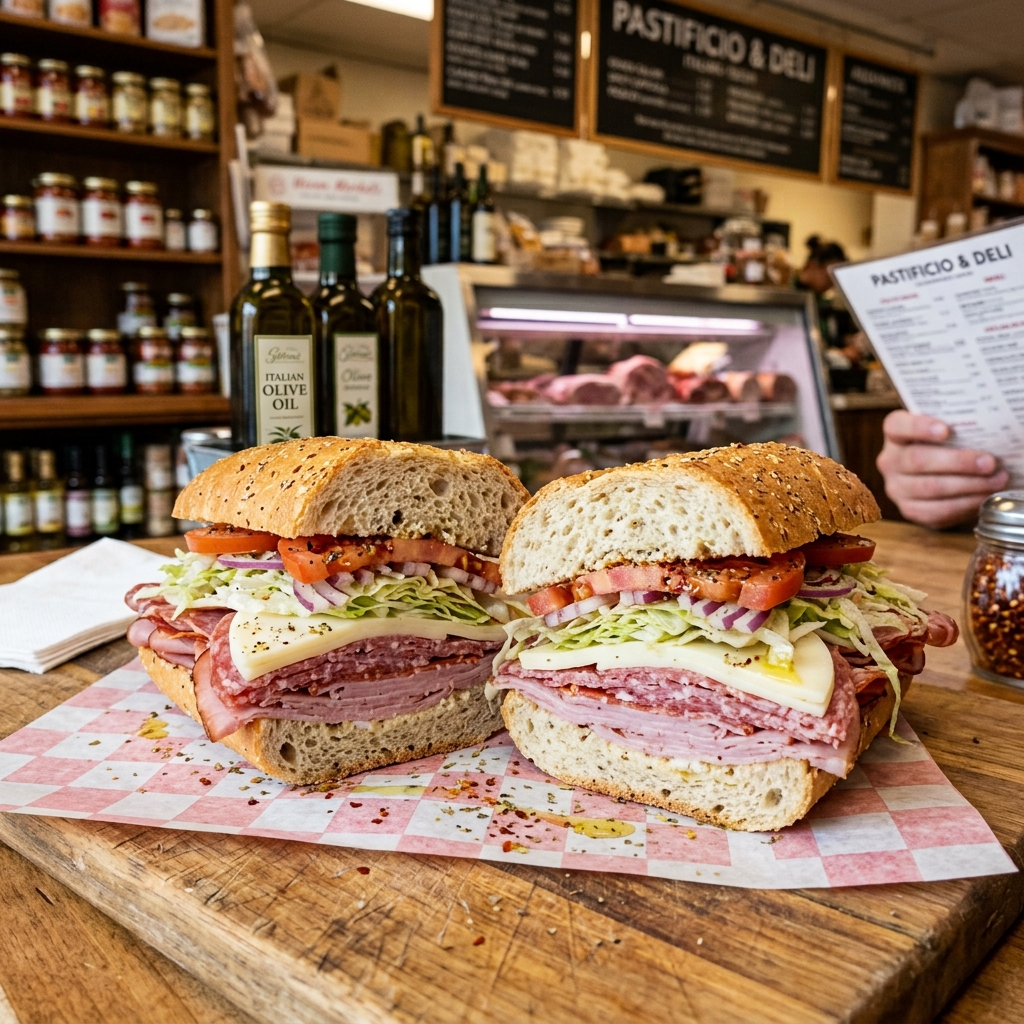
A classic Italian sub is a cold sandwich built on a long, crusty roll and stacked with Italian cured meats — typically salami, ham, and capicola — plus provolone cheese, shredded lettuce, tomato, onion, and a simple oil-and-vinegar dressing. That’s the blueprint. You’ll see variations from city to city, but those core ingredients are what separate an Italian sub from any other deli sandwich.
The name itself can get confusing. Depending on where you grew up, you might call this same sandwich a hoagie, a grinder, or a hero. If you’ve ever argued about what to call this type of sandwich, you’re not alone — the debate is basically a regional loyalty test. But no matter what you call it, the build stays pretty consistent.
The Italian sub traces its roots to Italian-American communities in the Northeast, particularly Philadelphia and New York, where immigrant families adapted Old World cured meats into a portable, affordable lunch. Food historians at institutions like the Smithsonian have documented how these sandwiches evolved from the Italian tradition of stuffed breads like panini and schiacciata into the overstuffed deli format we know now. It’s one of those sandwiches that sounds simple on paper but rewards you when you pay attention to the details.
Italian Sub Sandwich Ingredients You Actually Need
You don’t need a massive shopping list, but you do need the right ingredients. Subbing in whatever’s in the fridge is how you end up with a sad, forgettable sandwich. Here’s what to grab.
The Meats
The holy trinity of a classic Italian sub is salami, ham, and capicola (sometimes spelled capocollo). Some versions swap in or add pepperoni, mortadella, or prosciutto, but those three are the non-negotiables for a traditional build.
Salami brings the fat and the spice. Go with a hard Genoa salami — it has that slightly tangy, garlicky flavor that stands up to everything else on the sandwich. The ham should be a simple, thinly sliced deli ham. Nothing honey-glazed or smoked. You want it mild so it doesn’t overpower the other meats.
Capicola is the one most people skip at home, and it’s the one that makes the biggest difference. It’s a dry-cured pork shoulder with a rich, slightly spicy kick. Ask for it hot or sweet depending on your heat tolerance. Thin slices are key here — thick cuts make the sandwich gummy.
Food safety note: The USDA recommends keeping cold cuts refrigerated at 40°F or below and using opened packages within three to five days. If your deli meats smell off or feel slimy, toss them. The USDA Food Safety and Inspection Service has detailed guidelines on storing and handling deli meats if you want to double-check. This is general information and not a substitute for professional food safety advice, so use your best judgment and err on the side of caution.
The Cheese
Provolone. That’s the answer. Specifically, sharp provolone if you can find it. Mild provolone works in a pinch, but it tends to disappear behind all those bold meats. Sharp provolone has enough bite to hold its own.
Slice it thin and lay it directly on top of the meat layer. You want about two to three slices per sandwich. Some people reach for mozzarella, and while fresh mozzarella is delicious, it releases a lot of moisture and can make your bread soggy fast. Save the mozzarella for a caprese.
The Bread
This is where most homemade Italian subs go wrong. You need a long, crusty roll with a soft interior — think an Italian hoagie roll, about 8 to 12 inches depending on how hungry you are. The crust should have some resistance when you bite into it, but the inside should be pillowy enough to absorb the dressing without disintegrating.
Avoid soft hamburger buns, sliced sandwich bread, or anything pre-sliced and bagged from the bread aisle. Those will turn to mush the second the oil and vinegar hit them. If your local bakery sells hoagie rolls, grab those. If not, look for “Italian rolls” or “sub rolls” in the bakery section of your grocery store. The right roll for an Italian hoagie makes or breaks the whole experience.
The Toppings and Condiments
Here’s your standard lineup:
- Shredded iceberg lettuce — it adds crunch and a cool contrast to the salty meats. Shred it thin.
- Sliced tomato — use a ripe but firm tomato. Watery, overripe tomatoes are a sogginess risk.
- Thinly sliced red onion — a little goes a long way. If raw onion is too sharp for you, soak the slices in cold water for 10 minutes before building.
- Banana peppers or hot cherry peppers — for a tangy, slightly spicy kick. This is optional but highly recommended.
- Dried oregano — just a pinch. This is the secret weapon that makes the sandwich taste like it came from a real Italian deli.
For the dressing, keep it simple: extra-virgin olive oil and red wine vinegar, plus salt and black pepper. A good ratio is about two parts oil to one part vinegar. If you want a more detailed breakdown of how to nail the oil and vinegar dressing for a hoagie, there’s a bit more to it than just splashing both on and hoping for the best.
How to Make an Italian Sub Step by Step
Now for the fun part. Building an Italian sub is all about order and technique. Throw everything on in a random pile and you’ll get a mess that falls apart by the third bite. Follow this sequence and your sandwich will hold together beautifully.
Step 1: Prep Your Bread
Slice your roll lengthwise, but don’t cut all the way through. Leave a “hinge” on one side so the sandwich stays connected. This keeps everything contained and makes it way easier to eat.
If you like a little warmth and crunch, toast the cut sides under a broiler for about 60 to 90 seconds. Watch it closely — the difference between perfectly toasted and burnt is roughly 15 seconds. Toasting also creates a slight barrier that helps the bread resist sogginess from the dressing.
Step 2: Layer the Meats Right
Here’s a trick most home cooks miss: don’t lay your deli meats flat. Instead, fold or drape each slice so it creates little ripples and air pockets. This is what deli workers do behind the counter, and it’s the reason a deli sub tastes lighter and more flavorful than a flat-packed homemade one. The folds trap the dressing and give every bite more texture.
Start with the ham on the bottom — it’s the mildest meat and creates a stable base. Layer the salami next, folding each slice loosely. Finish with the capicola on top of the salami. The capicola’s bold flavor should be closest to the cheese and toppings so it hits your palate first when you bite in.
If you want a deeper look at how to build a deli sandwich that actually holds together, the layering order matters more than most people realize.
Step 3: Add Cheese and Toppings
Drape your provolone slices over the meat layer. The cheese acts as a kind of lid that keeps the meats in place when you add the vegetables.
Now add your shredded lettuce, tomato slices, and onion. Put the lettuce on first — it creates a buffer between the moist tomato and the cheese below. Tomato goes on top of the lettuce, followed by onion and your banana peppers.
Step 4: Dress It and Close It Up
Drizzle your oil and vinegar over the vegetables. Go easy at first — you can always add more, but you can’t take it back once the bread is soaked. Sprinkle on a pinch of dried oregano, salt, and cracked black pepper.
Close the sandwich, press down gently with your palm, and cut it in half on a diagonal. The diagonal cut isn’t just for looks. It gives you a pointed end that’s easier to bite into and makes the sandwich feel like it came from an actual deli counter.
Classic Italian Sub Recipe Variations Worth Trying
Once you’ve nailed the classic build, you can start playing around. Here are a few variations that stay true to the spirit of the sandwich without going off the rails.
The Spicy Italian: Swap the regular salami for a hot soppressata and add sliced Calabrian chilis or giardiniera (an Italian pickled vegetable relish). This one has serious heat and a tangy crunch that cuts through all the fat.
The Prosciutto Upgrade: Replace the ham with thin-sliced prosciutto. It’s saltier and more delicate, so you’ll want to go lighter on the added salt in your dressing. This version feels a little more upscale and works great for a dinner party spread.
The Melted Version: Some people prefer their Italian sub hot. If that’s you, build the sandwich with just the meats and cheese, wrap it in foil, and bake it at 375°F for about 10 minutes until the provolone melts. Add your cold toppings — lettuce, tomato, onion, dressing — after it comes out of the oven. This gives you the best of both worlds: melty cheese and crisp vegetables.
The Party Sub: Building one giant sub on a 24-inch roll and slicing it into portions is a great move for game day or a cookout. Just make sure you dress it right before serving so the bread doesn’t get soggy while it sits out. Per foodsafety.gov, perishable foods like deli meats shouldn’t sit at room temperature for more than two hours, so keep that clock in mind if you’re feeding a crowd.
Tips to Keep Your Sub From Getting Soggy
Nothing ruins an Italian sub faster than a bottom layer of mushy bread. Here’s how to avoid that.
Create moisture barriers. The lettuce layer between the tomato and the cheese isn’t just for texture — it stops tomato juice from soaking straight into the meat and bread. Think of it as insulation.
Don’t overdress. This is the most common mistake. A light drizzle of oil and vinegar is all you need. The meats are already salty and fatty, so the dressing is there to brighten things up, not drown them.
Build it close to serving time. If you’re making subs for a party, prep all your ingredients ahead of time but don’t assemble until about 15 to 20 minutes before eating. The longer the dressing sits on the bread, the soggier it gets. If you need more strategies for keeping your sandwich from turning into a wet mess, a few small tweaks make a big difference.
Toast the bread. As mentioned earlier, a quick toast creates a slightly firmer surface that resists moisture better than a completely soft roll.
Pat your tomatoes dry. After slicing your tomato, lay the slices on a paper towel for a minute or two. This pulls off excess surface moisture that would otherwise seep into the bread.
Frequently Asked Questions
What meats go on a classic Italian sub?
A traditional Italian sub uses three main meats: Genoa salami, deli ham, and capicola. Some versions also include pepperoni, mortadella, or prosciutto, but the salami-ham-capicola trio is the standard you’ll find at most Italian-American delis.
What’s the best bread for an Italian sub?
A crusty Italian hoagie roll, about 8 to 12 inches long, works best. You want a roll with a firm exterior and a soft, airy interior. Avoid soft sandwich bread or anything that can’t hold up to oil and vinegar without falling apart.
Can I make an Italian sub ahead of time?
You can, but it’s not ideal. If you need to prep ahead, build the sandwich without the dressing and tomatoes, wrap it tightly in parchment paper, and refrigerate. Add the dressing and tomato right before serving. An assembled, dressed sub will start getting soggy within about 30 minutes.
What’s the difference between an Italian sub and a hoagie?
Honestly, not much. The terms overlap a lot and vary by region. In Philadelphia, a hoagie is basically the same thing as what New Yorkers might call a hero or what other parts of the country call a sub. The ingredients and build are nearly identical.
The best Italian sub you’ll ever eat is the one you build yourself with ingredients you actually chose. Once you get the layering technique down and find a roll you love, you’ll stop paying deli prices for something you can make better at home. Grab some good salami, a sharp provolone, and a crusty roll, and make one this weekend. Your lunch game will thank you.