
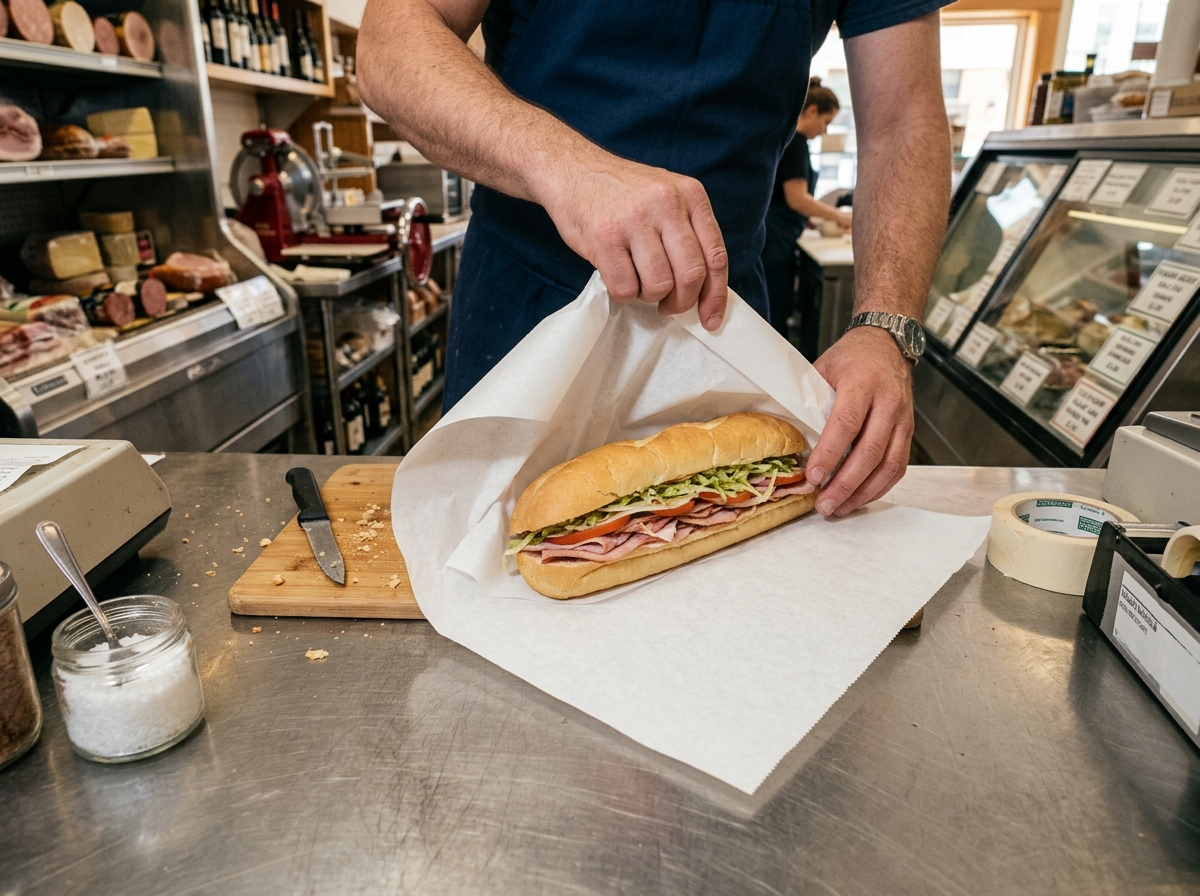
You built a great sandwich. The layers are right, the bread is fresh, and the toppings are stacked just how you like them. Then you try to wrap it, and everything shifts. The paper bunches up, the filling spills out the sides, and by lunchtime it looks like it lost a fight inside your bag.
Deli workers wrap hundreds of sandwiches a shift, and they do it in about ten seconds flat. The good news? Their technique isn’t complicated. You just need the right paper, the right fold, and a couple of small details most people skip.
Here’s exactly how to do it.
Why Deli Wrapping Actually Matters
Most people think wrapping a sandwich is just about keeping it together until lunch. That’s part of it, sure. But a proper deli-style wrap does three things at once.
First, it holds the structure. A tight wrap acts like a second layer of bread. It keeps your meat, cheese, and toppings from sliding around, which means your first bite tastes the same as your last.
Second, it manages moisture. Sandwiches produce condensation, especially if you’re using warm ingredients or juicy tomatoes. The right paper absorbs just enough moisture to prevent a soggy sandwich without drying out the bread.
Third, it protects flavor. A snug wrap traps the aromas inside instead of letting them bleed into whatever else is in your lunch bag. Nobody wants their apple tasting like Italian dressing.
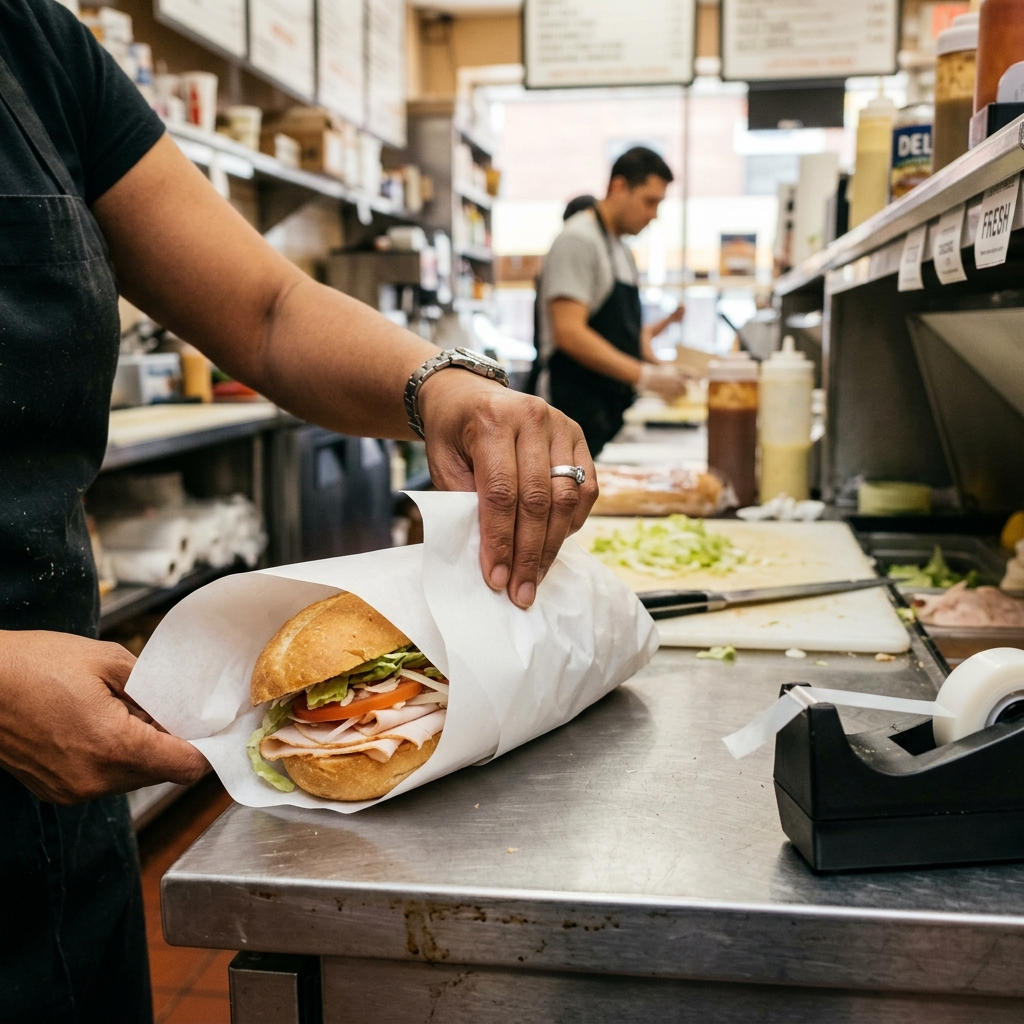
When you build a perfect deli sandwich, the wrap is the final step that locks in all that work. Skip it or rush it, and you undo half the effort.
Choosing the Right Paper for Wrapping Sandwiches in Paper
The paper you pick matters more than the fold itself. Grab the wrong sheet and no amount of technique will save you from a greasy, unraveling mess.
Deli Paper vs Wax Paper vs Parchment Paper
Deli paper (also called sandwich wrap paper) is what most deli counters actually use. It’s thin, slightly porous, and often has a light wax or poly coating on one side. That coated side faces the sandwich and creates a mild moisture barrier, while the uncoated side lets the paper breathe just enough to stop condensation from pooling.
Wax paper works in a pinch. It’s more moisture-resistant than deli paper, which sounds like a good thing until your sandwich steams inside the wrap and the bread turns gummy. Wax paper is better for very wet sandwiches — think heavy tomato, pickle, or coleslaw situations — but it’s not the best all-rounder.
Parchment paper is the most versatile option for home use. It handles heat well, resists grease, and doesn’t stick to melted cheese. If you’re wrapping a hot sandwich like a cheesesteak or a panini, parchment is your best bet because it won’t melt or transfer any coating onto the food.
The FDA regulates all paper products intended for direct food contact under its food contact substance guidelines, so any paper sold as “food-safe” or “deli paper” in the U.S. has met those standards. You don’t need to overthink the safety side — just make sure the packaging says food-grade.
When to Use Foil
Aluminum foil is the right call for sandwiches you want to keep warm for more than 30 minutes. It traps heat aggressively, which is great for a roast beef sub you’re driving across town. The downside is that foil doesn’t breathe at all, so any moisture inside turns to steam and softens the crust.
A good compromise: wrap the sandwich in a sheet of deli paper first, then loosely tent it with foil. The paper absorbs excess moisture while the foil holds the heat.
Quick tip: Never wrap acidic sandwiches (tomato-heavy, vinegar-based dressings) directly in foil. The acid reacts with the aluminum and gives the food a metallic taste.
How to Wrap a Sandwich Like a Deli (Step-by-Step)
Now for the part you came here for. The deli style sandwich wrapping technique changes slightly depending on the shape of your sandwich, so I’ll walk you through the three most common styles.
Before you start, here’s the one detail that separates a clean wrap from a messy one: lay your paper out in a diamond shape, with a corner pointing toward you. This gives you more paper to fold over the top and bottom of the sandwich, which is where most wraps fail.
The Classic Square Fold (for Regular Sandwiches)
This is the standard deli fold for square or round sandwiches on sliced bread.
Step 1: Place your sandwich in the center of the diamond-shaped paper. If the sandwich is tall, position it slightly below the center so you have extra paper at the top.
Step 2: Fold the bottom corner up and over the sandwich, tucking it snugly against the front edge of the bread. Don’t just lay it on top — tuck it under the sandwich’s bottom edge slightly. This creates a pocket that holds the filling in.
Step 3: Fold the left corner over the sandwich, pulling it tight. Then fold the right corner over, overlapping the left. You want these two folds to be firm but not so tight that you crush the bread.
Step 4: Roll the sandwich forward into the remaining top flap of paper. The roll should be snug, like you’re wrapping a burrito. Tuck the final edge underneath the sandwich.
The result is a neat, rectangular package that holds its shape in a bag or container. If you did it right, you can pick it up from one end and nothing falls out.
The Sub Roll Wrap (for Hoagies and Long Sandwiches)
Long sandwiches need a different approach because the filling tends to push out the ends. If you’re not sure what counts as a hoagie versus a sub, this breakdown of hoagies, subs, and grinders clears up the naming confusion — but the wrapping technique works the same regardless of what you call it.
Step 1: Lay out a sheet of paper roughly twice the length of your sub. Diamond orientation still works, but for very long hoagies, a rectangular sheet laid horizontally is easier.
Step 2: Place the sub diagonally across the paper, with one end near the bottom corner and the other near the top.
Step 3: Fold the bottom corner up over the sandwich and tuck it under. Then fold the two long sides over the sub, overlapping them on top. Pull them tight enough to hold the fillings in place.
Step 4: Roll the sandwich from the bottom up, keeping the side folds tucked as you go. The final result looks like a tight cylinder with one open end — the end you’ll eat from.
This is the fold you see at most sub shops. The open top lets you peel the paper down as you eat, and the tight sides keep everything from spilling out the bottom.
The Half-Moon Fold (for Triangular Cuts)
If you cut your sandwich into triangles, the standard square fold wastes paper and leaves gaps at the pointed ends.
Step 1: Place the triangle on the paper with the long edge (the cut side) facing you.
Step 2: Fold the bottom edge of the paper up over the cut side, tucking it under the sandwich.
Step 3: Fold the two side corners inward, overlapping them over the pointed end of the triangle.
Step 4: Roll the whole thing forward into the remaining paper. The pointed end gets fully enclosed, which stops filling from leaking out the sharp corner.
Pro Tips That Make the Wrap Hold All Day
Here are the small things deli workers do automatically that most home wrappers miss. I spent a while watching a local deli counter during a lunch rush, and the thing that stood out wasn’t speed — it was how consistently they pulled the side folds tight while keeping the bottom tuck gentle. That specific tension balance is what keeps the wrap from tearing or loosening.
Pull the paper tight on the second fold, not the first. The first fold (the bottom tuck) should be snug but gentle. The real structural tension comes from the side folds. If you crank the bottom fold too tight, the paper tears before you get to the sides.
Use two sheets for overstuffed sandwiches. If your sandwich is taller than about two inches, a single sheet won’t cover it properly. Lay a second sheet perpendicular to the first and wrap them together. This is what delis do for their loaded specials.
Let hot sandwiches cool for two minutes before wrapping. I know you want to eat it right away, but wrapping a steaming sandwich immediately traps all that moisture against the bread. Give it a brief rest so the steam dissipates, then wrap. Your bread will stay firmer for much longer.
Tape or sticker the final fold if the sandwich is traveling. A small piece of masking tape or a deli sticker on the final tuck keeps the wrap from loosening in a bag. This is especially useful if you’re keeping sandwiches fresh for a party and they’ll be sitting out for a while.
Wrap cold cuts tighter than hot fillings. Cold meat and cheese don’t produce steam, so you can pull the paper much tighter without worrying about condensation. A tighter wrap on a cold sandwich actually improves the texture because it compresses the layers slightly, making each bite more cohesive.
Common Wrapping Mistakes (and How to Fix Them)
Mistake: Using a sheet that’s too small. This is the number one reason wraps fall apart. The paper should extend at least four inches beyond the sandwich on every side. If you’re constantly running out of paper mid-fold, go bigger.
Mistake: Wrapping on a wet surface. If your cutting board or counter has water or dressing on it, the bottom of the paper absorbs that moisture and weakens. Wipe the surface dry before you lay the paper down.
Mistake: Folding too loosely. A loose wrap looks fine for about five minutes, then gravity takes over and the whole thing sags. You want the paper to feel like it’s hugging the sandwich, not draping over it.
Mistake: Ignoring the filling placement. If all your wet ingredients (tomatoes, pickles, dressing) are on the outer edges of the sandwich, they’ll soak through the paper at the fold lines. Keep wet ingredients centered and buffered by lettuce or cheese. The sandwich wrap technique only works when the sandwich itself is built with wrapping in mind.
Mistake: Storing wrapped sandwiches in a sealed plastic bag. The plastic traps moisture that the paper is trying to wick away, defeating the purpose of the wrap. If you need an outer layer, use a paper bag or a loosely closed container instead.
Food Safety Note for Wrapped Sandwiches
This is worth mentioning because a well-wrapped sandwich can give you a false sense of security about how long it stays safe to eat.
According to the USDA’s food safety guidelines, perishable sandwiches (anything with meat, cheese, eggs, or mayo) should not sit at room temperature for more than two hours — or one hour if the temperature is above 90°F. Wrapping the sandwich tightly does not extend this window. The wrap keeps the sandwich intact and fresh-tasting, but it doesn’t slow bacterial growth.
If you’re packing a lunch that won’t be eaten for several hours, include an ice pack in the bag. The wrap will do its job of holding the sandwich together, and the ice pack will handle the temperature side of things. Properly storing your deli meat before you even build the sandwich also plays a big role in how long the finished product stays safe.
This is general food safety information and not a substitute for professional guidance. When in doubt, follow USDA and FDA recommendations for your specific situation.
Frequently Asked Questions
What is the best paper for wrapping sandwiches?
Parchment paper is the most versatile choice for home use because it handles both hot and cold sandwiches well, resists grease, and doesn’t transfer any coating to the food. For cold deli sandwiches specifically, wax-coated deli paper gives you the closest result to what you’d get at a shop counter.
How do you keep a wrapped sandwich from getting soggy?
Start with a moisture barrier — spread butter, mayo, or cream cheese on both slices of bread before adding fillings. Keep wet ingredients like tomatoes and pickles in the center of the sandwich, buffered by drier layers. Use parchment or deli paper instead of plastic wrap, which traps condensation. And if the sandwich is warm, let it cool for a couple of minutes before wrapping so steam doesn’t build up inside the paper.
Can I wrap a sandwich the night before?
Yes, but with a few adjustments. Wrap the sandwich tightly in parchment paper, then place it in an airtight container or resealable bag in the fridge. The paper will absorb some moisture overnight, so use slightly less dressing or sauce than you normally would. Sandwiches with hearty breads like ciabatta or sourdough hold up much better overnight than soft white bread.
Do delis use wax paper or parchment paper?
Most traditional delis use wax-coated deli paper, which is a specific product designed for sandwich wrapping. It’s thinner than standard wax paper and has a lighter coating, so it breathes better while still resisting grease. Some modern shops have switched to unbleached parchment for its heat resistance and eco-friendlier profile.
How do you wrap a sandwich without it falling apart?
The key is the bottom tuck. When you fold the first corner of paper up and over the sandwich, tuck it under the bottom edge of the bread to create a pocket. This pocket catches any filling that tries to slide out. After that, pull the side folds tight and roll the sandwich into the remaining paper. A snug roll holds everything in place far better than loose folds.
Now you know the exact folds, the right paper choices, and the small details that make a deli wrap hold up from morning to lunch. The next time you build a sandwich, take an extra thirty seconds to wrap it properly. You’ll notice the difference the moment you pull it out of your bag — no spills, no soggy bread, no sad-looking lunch.
Start with parchment paper and the classic square fold. Once that feels natural, try the sub roll technique for your longer sandwiches. Your lunch game will never look the same.